
Keycloak
This page provides an example of how to configure Cloud CMS Single Sign On (SSO) for JBoss KeyCloak.
Keycloak is an open-source Identity and Access Management product provided by JBoss/RedHat.
Keycloak plays the role of an Identity Provider that speaks SAML 2.0 and/or JWT. Cloud CMS integrates via either of these mechanism and can therefore integrate to Keycloak straight away as an identity provider.
Cloud CMS provides Single Sign On (SSO) Enterprise support for a variety of Identity Providers using SAML 2.0 and/or JWT. For more information, see Cloud CMS Single Sign On (SSO).
You can learn more about Keycloak here:
http://www.keycloak.org/about.html
Set up Keycloak
In this section, we'll set up Keycloak with some sample data that we can use to demonstrate SSO.
Here we assume that you've downloaded and installed Keycloak. For the purposes of this documentation, we've tested using Keycloak 8.0.2.
The Keycloak download is available here: https://www.keycloak.org/downloads.html
The Keycloak Getting Started guide is available here: https://www.keycloak.org/docs/latest/getting_started/index.html
Once you have Keycloak up and running, you should proceed to learn how to set it up as an SSO provider for Cloud CMS.
Log into the Keycloak Administration Console
Keycloak offers an Administration Console that is generally available at:
http://localhost:8080/auth/admin
It may be on a different port depending on the exact version of Keycloak that you're using.
Enter your administrative username and password to log in. If you're using a standard configuration, then this may simply be admin / admin.
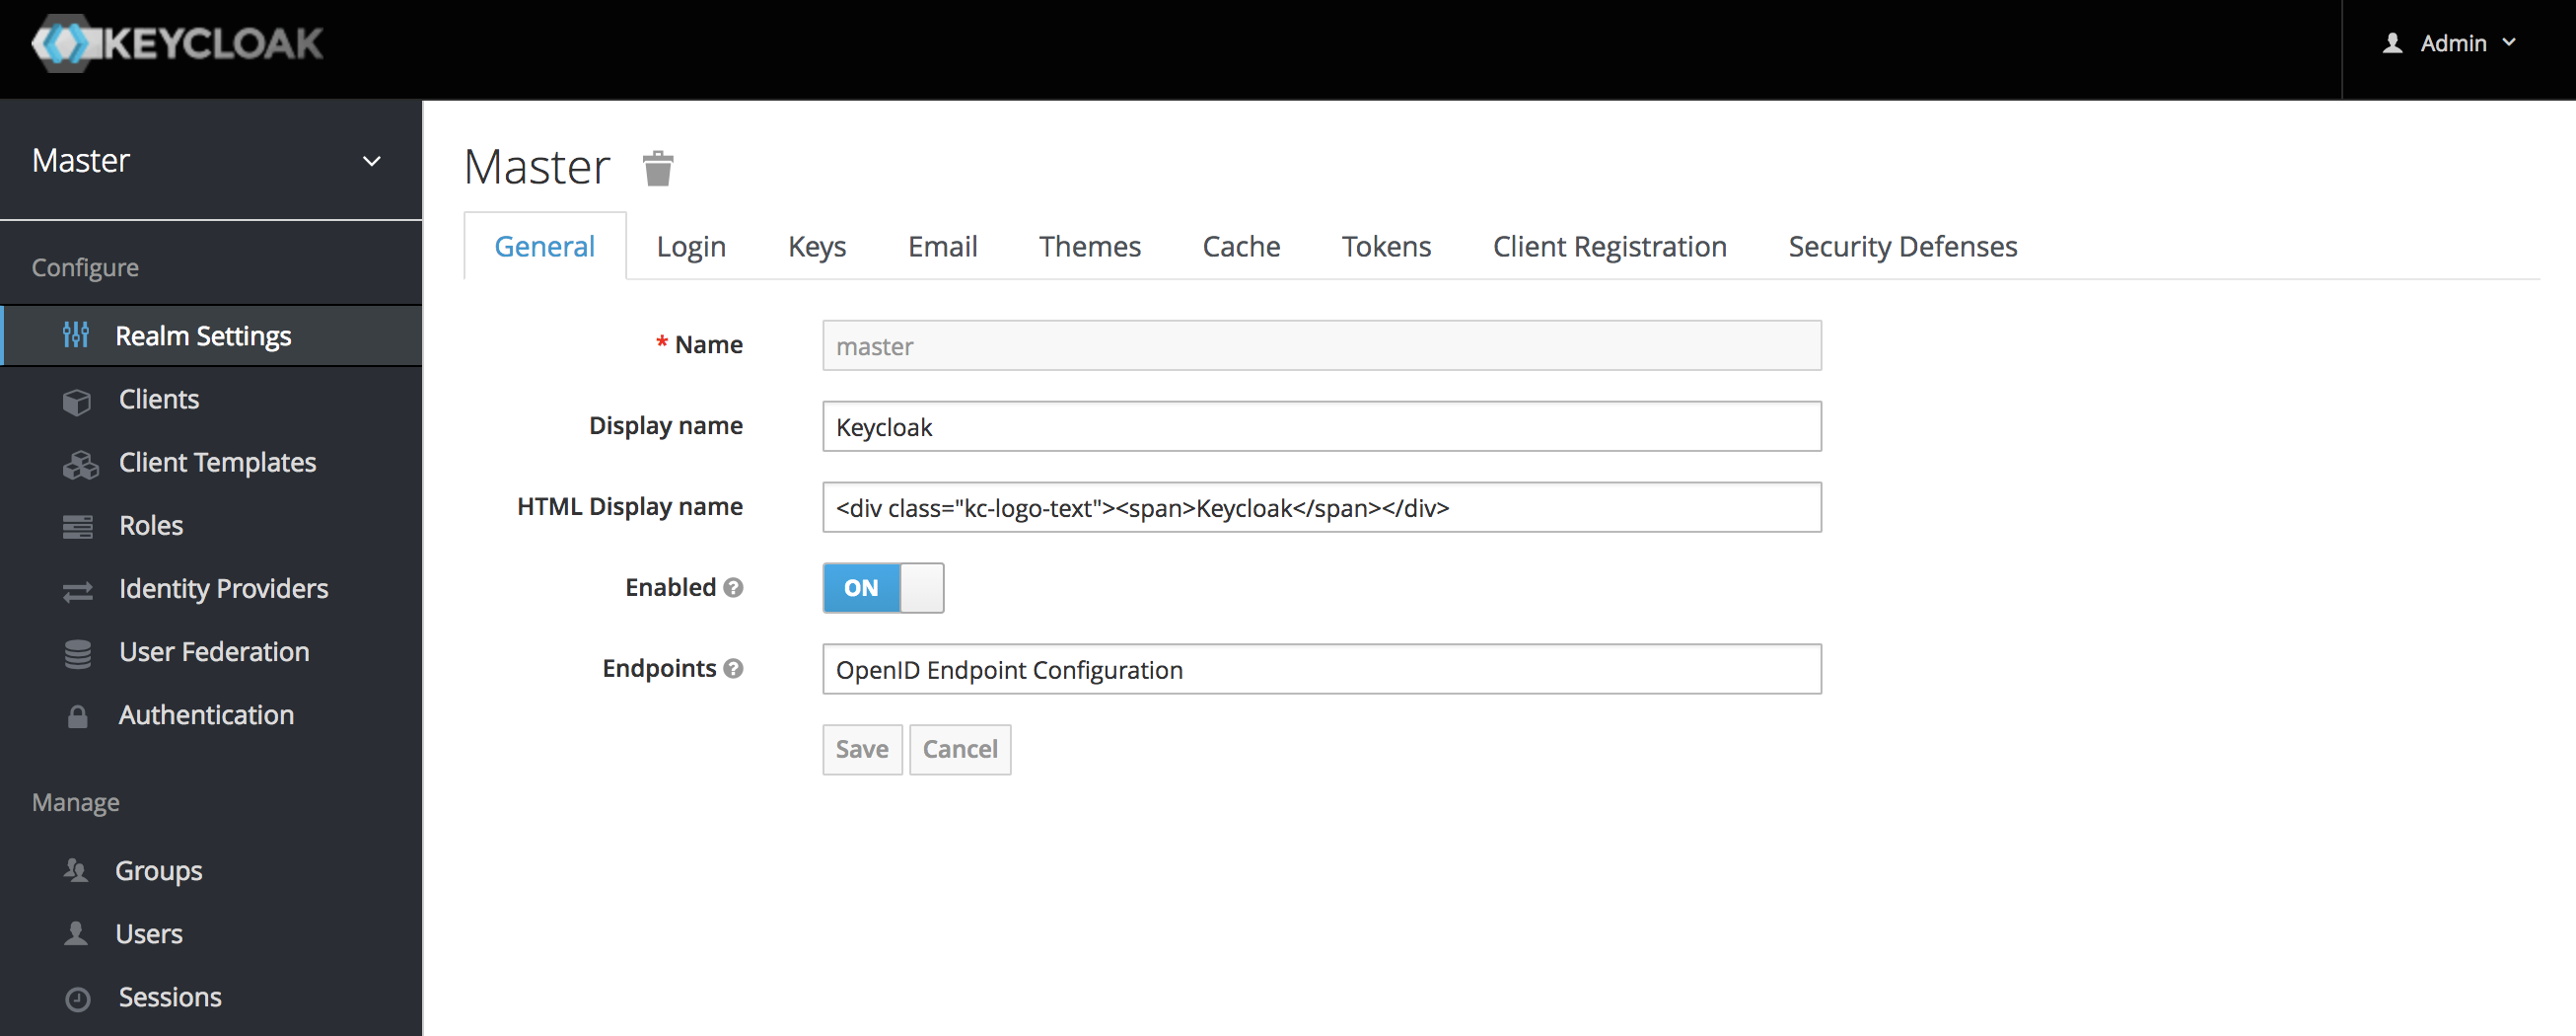
Once you have logged in, you can see the Admin Console with a Master realm already present.
Create a SAML 2.0 Client
Go to Clients in the left menu bar. Click on the Create button the right hand side of the page.
You will see a form like this:

Enter in the Client ID of the client. This can be any name but we recommend myapp.
Select saml in the Client Protocol drop down box.
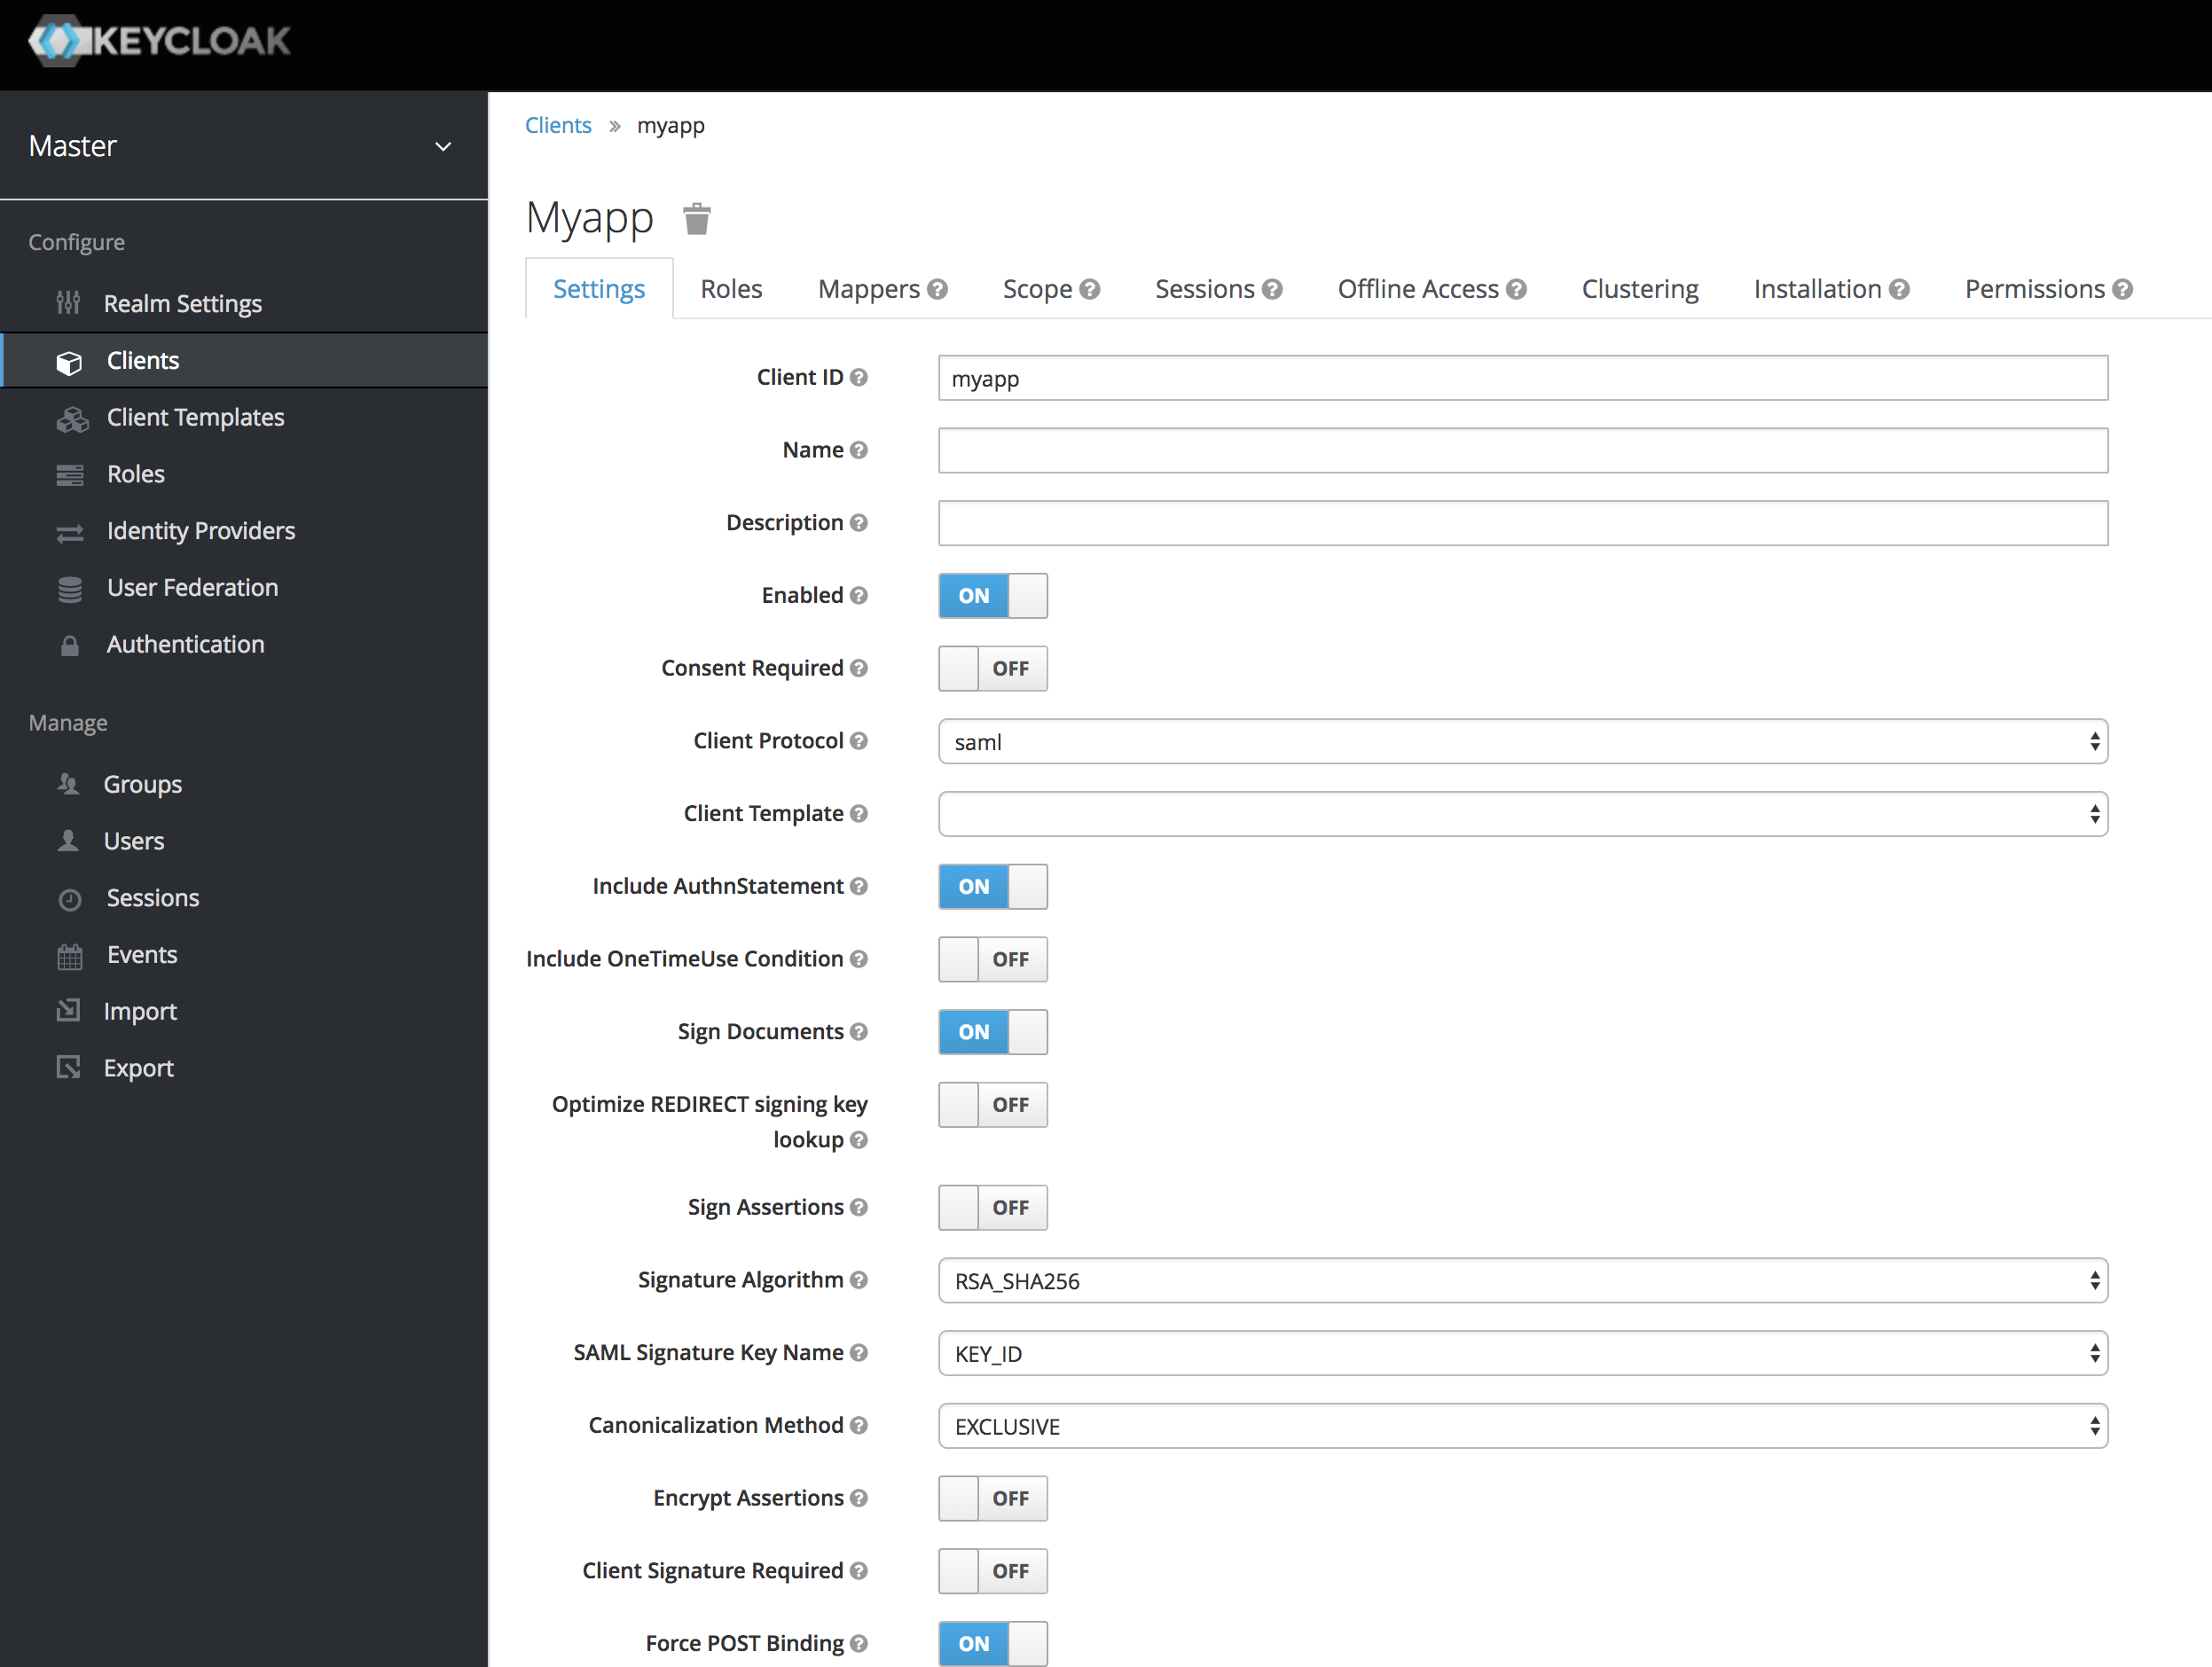
Click Save. This will create the client and bring you to the client Settings tab as below:
Customize the Client
By default, Keycloak sets up your client to work with default settings. We need to make a few adjustments to have it work correctly with Cloud CMS.
Include AuthnStatementshould be set toOn.Sign Documentsshould be set toOn.Signature Algorithmshould be set toRSA_SHA1Force Signature Requiredshould be set toOff.Force POST Bindingshould be set toOn.Valid Redirect URIsshould have an entry for*.
Make sure to save your changes.
Create a User
Let us now create a user named Joe Smith.
Go to Users in the left menu bar. Then, on the right side of the empty user list, you should see an Add User button.

Click the Add User button to create a new user.

The only required field is Username. Click Save.
Once the User is created, go to the Credentials tab and add a Password for the User which will be used to login.

Set Temporary to off. Then click on Set Password to apply your changes.
Finally, click on the Attributes tab and add three attributes.
first_name=Joelast_name=Smithname=joesmith
Cloud CMS supports mapping user attributes from SAML Assertions back into the Cloud CMS user object. It also supports group mappings to auto-sync project and team memberships, but we'll leave that for another time.
Add Mappers
We now want to tell Keycloak to hand back these three attributes (firstname, lastname and name) as part of the SAML 2.0 assertion response. That way, Cloud CMS will learn about these properties when a user successfully logs in and can use them to automatically keep the Cloud CMS user account in sync.
Go to your myapp Client by clicking on Clients on the left-hand menu bar. Then click on myapp.
Click on the Mappers tab:
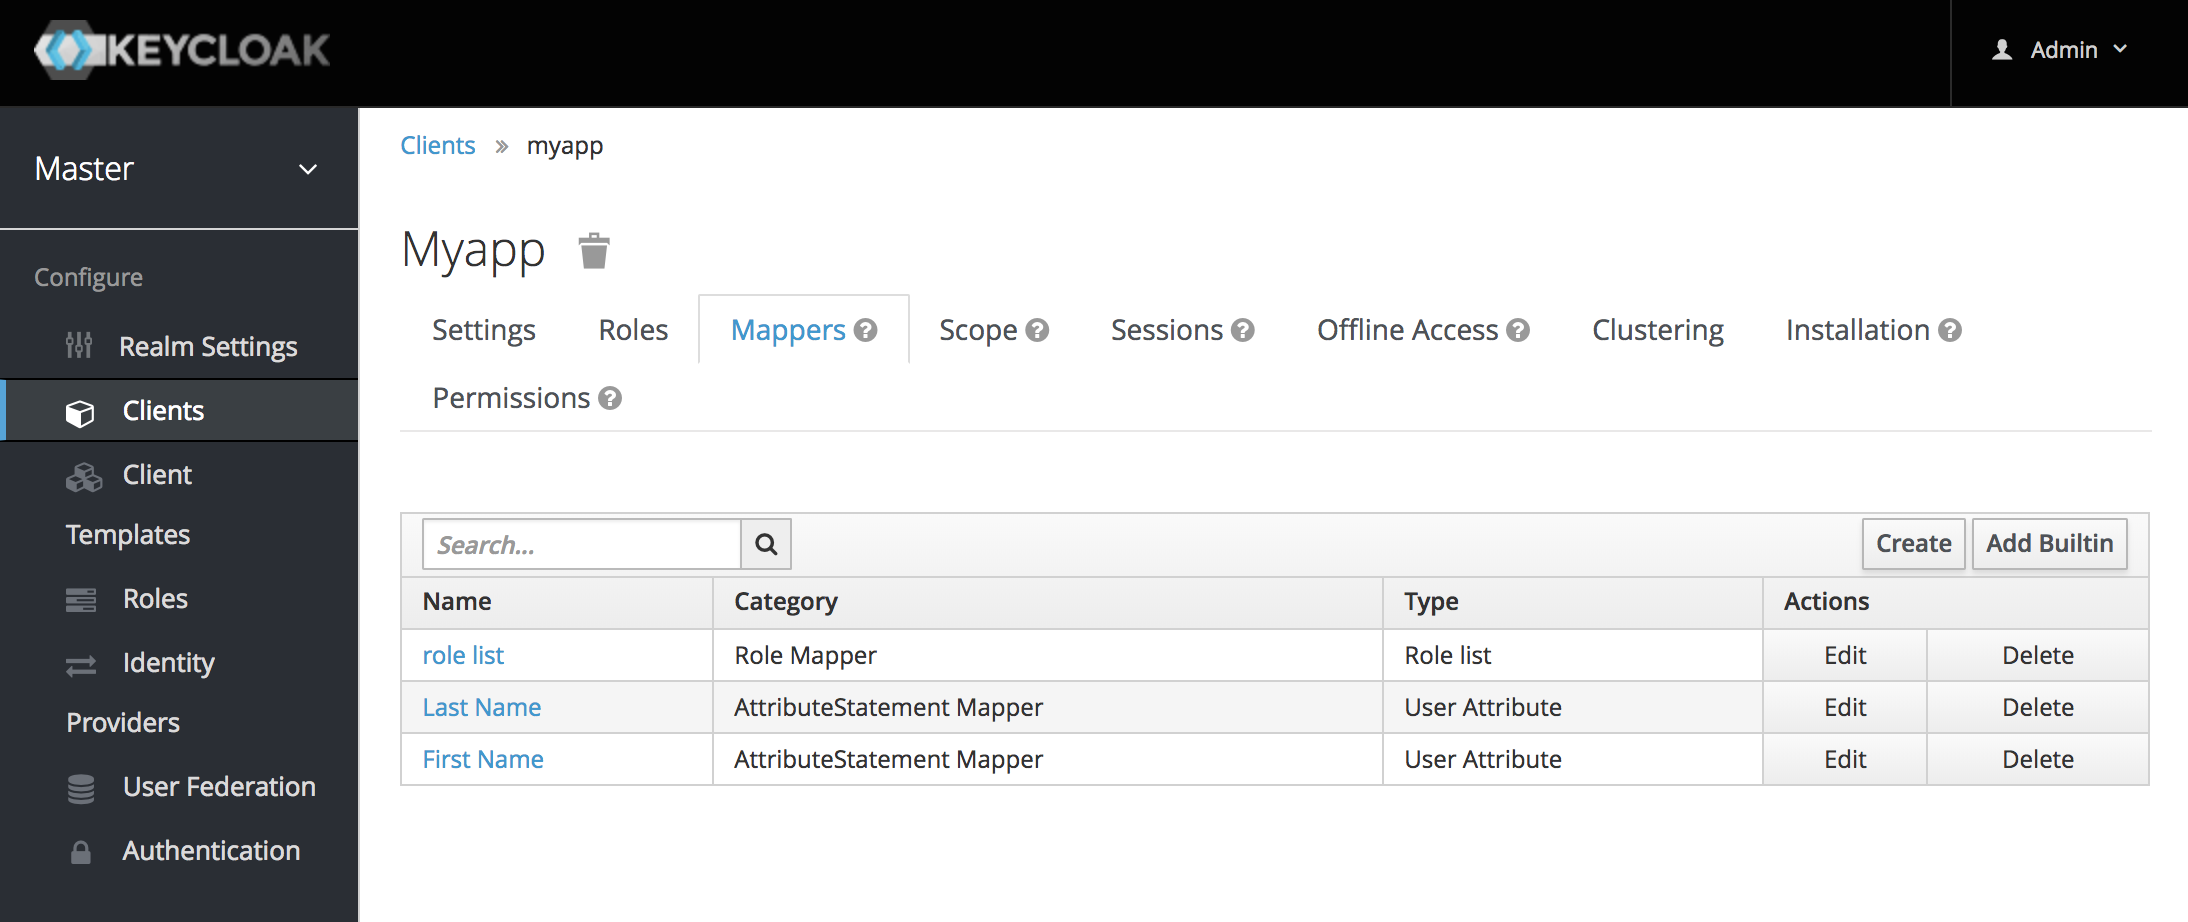
Click on Create button present on the right side of the Mappers tab and start creating a mapper.
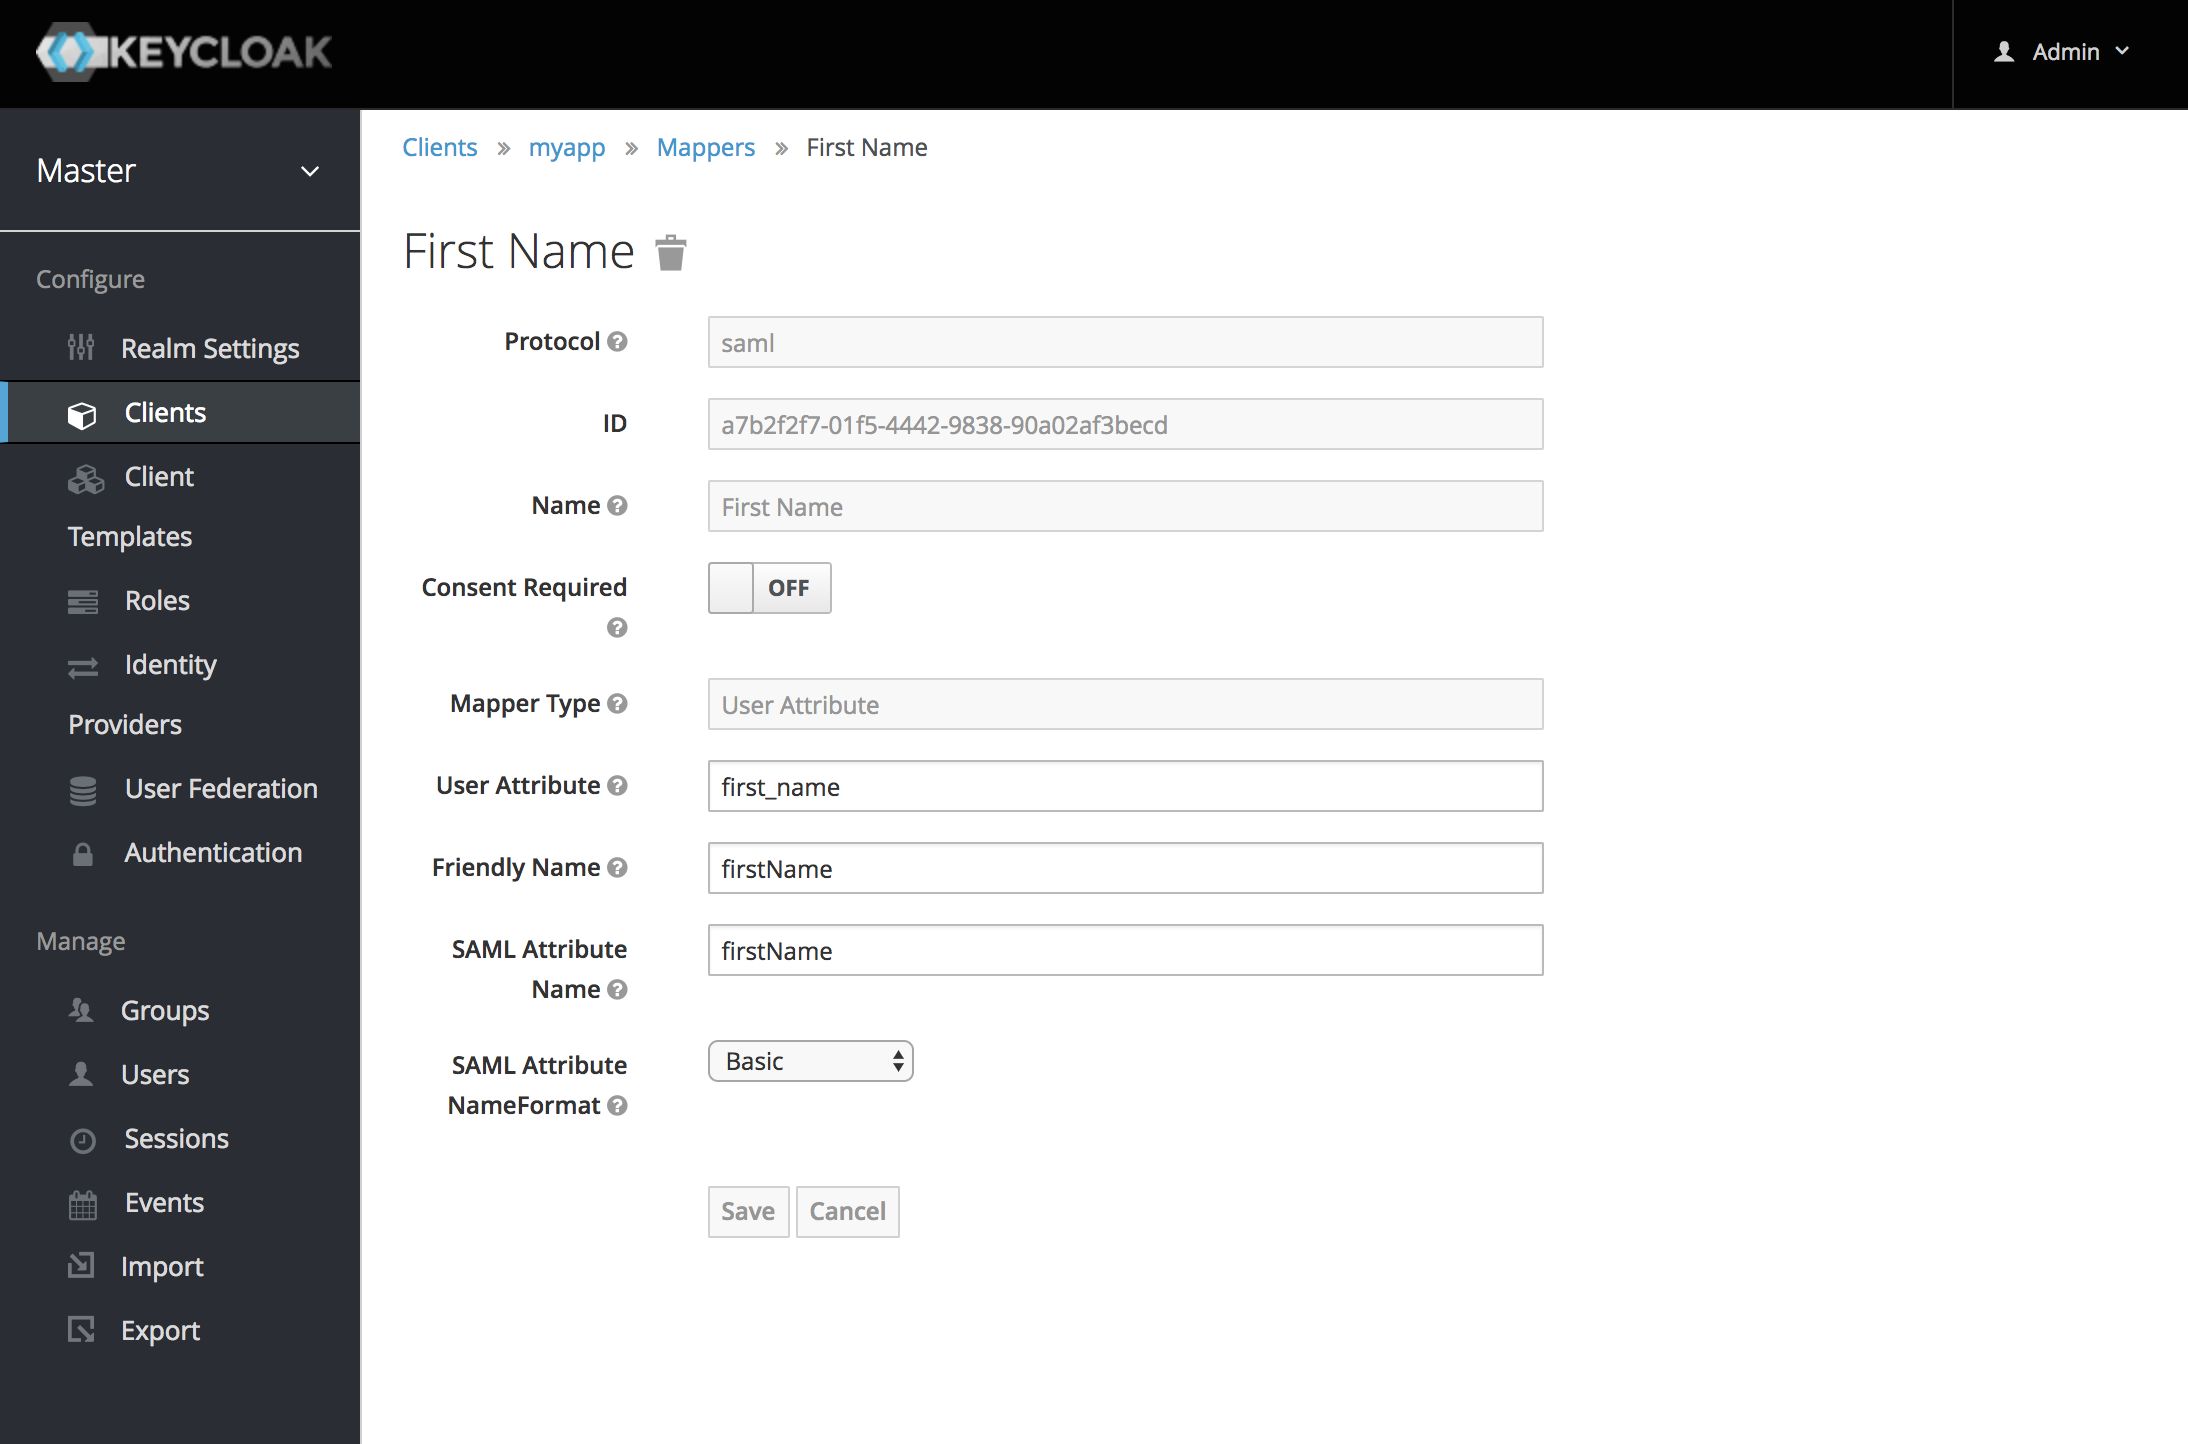
Add this mapping for First Name:
Name=first_nameMapper Type=User AttributeProperty=first_nameFriendly Name=firstNameSAML Attribute Name=firstName
Add this mapping for Last Name:
Name=last_nameMapper Type=User AttributeProperty=last_nameFriendly Name=lastNameSAML Attribute Name=lastName
Add this mapping for Name:
Name=nameMapper Type=User AttributeProperty=nameFriendly Name=nameSAML Attribute Name=name
An example of creating a Mapper "First Name" might look something like this:
Set up Cloud CMS
In a new browser window, log in to the Cloud CMS user interface.
Click on Manage Platform and then pick SSO on the left-hand menu.
Select SAML 2.0 from the radio button list.
And then fill out the form.
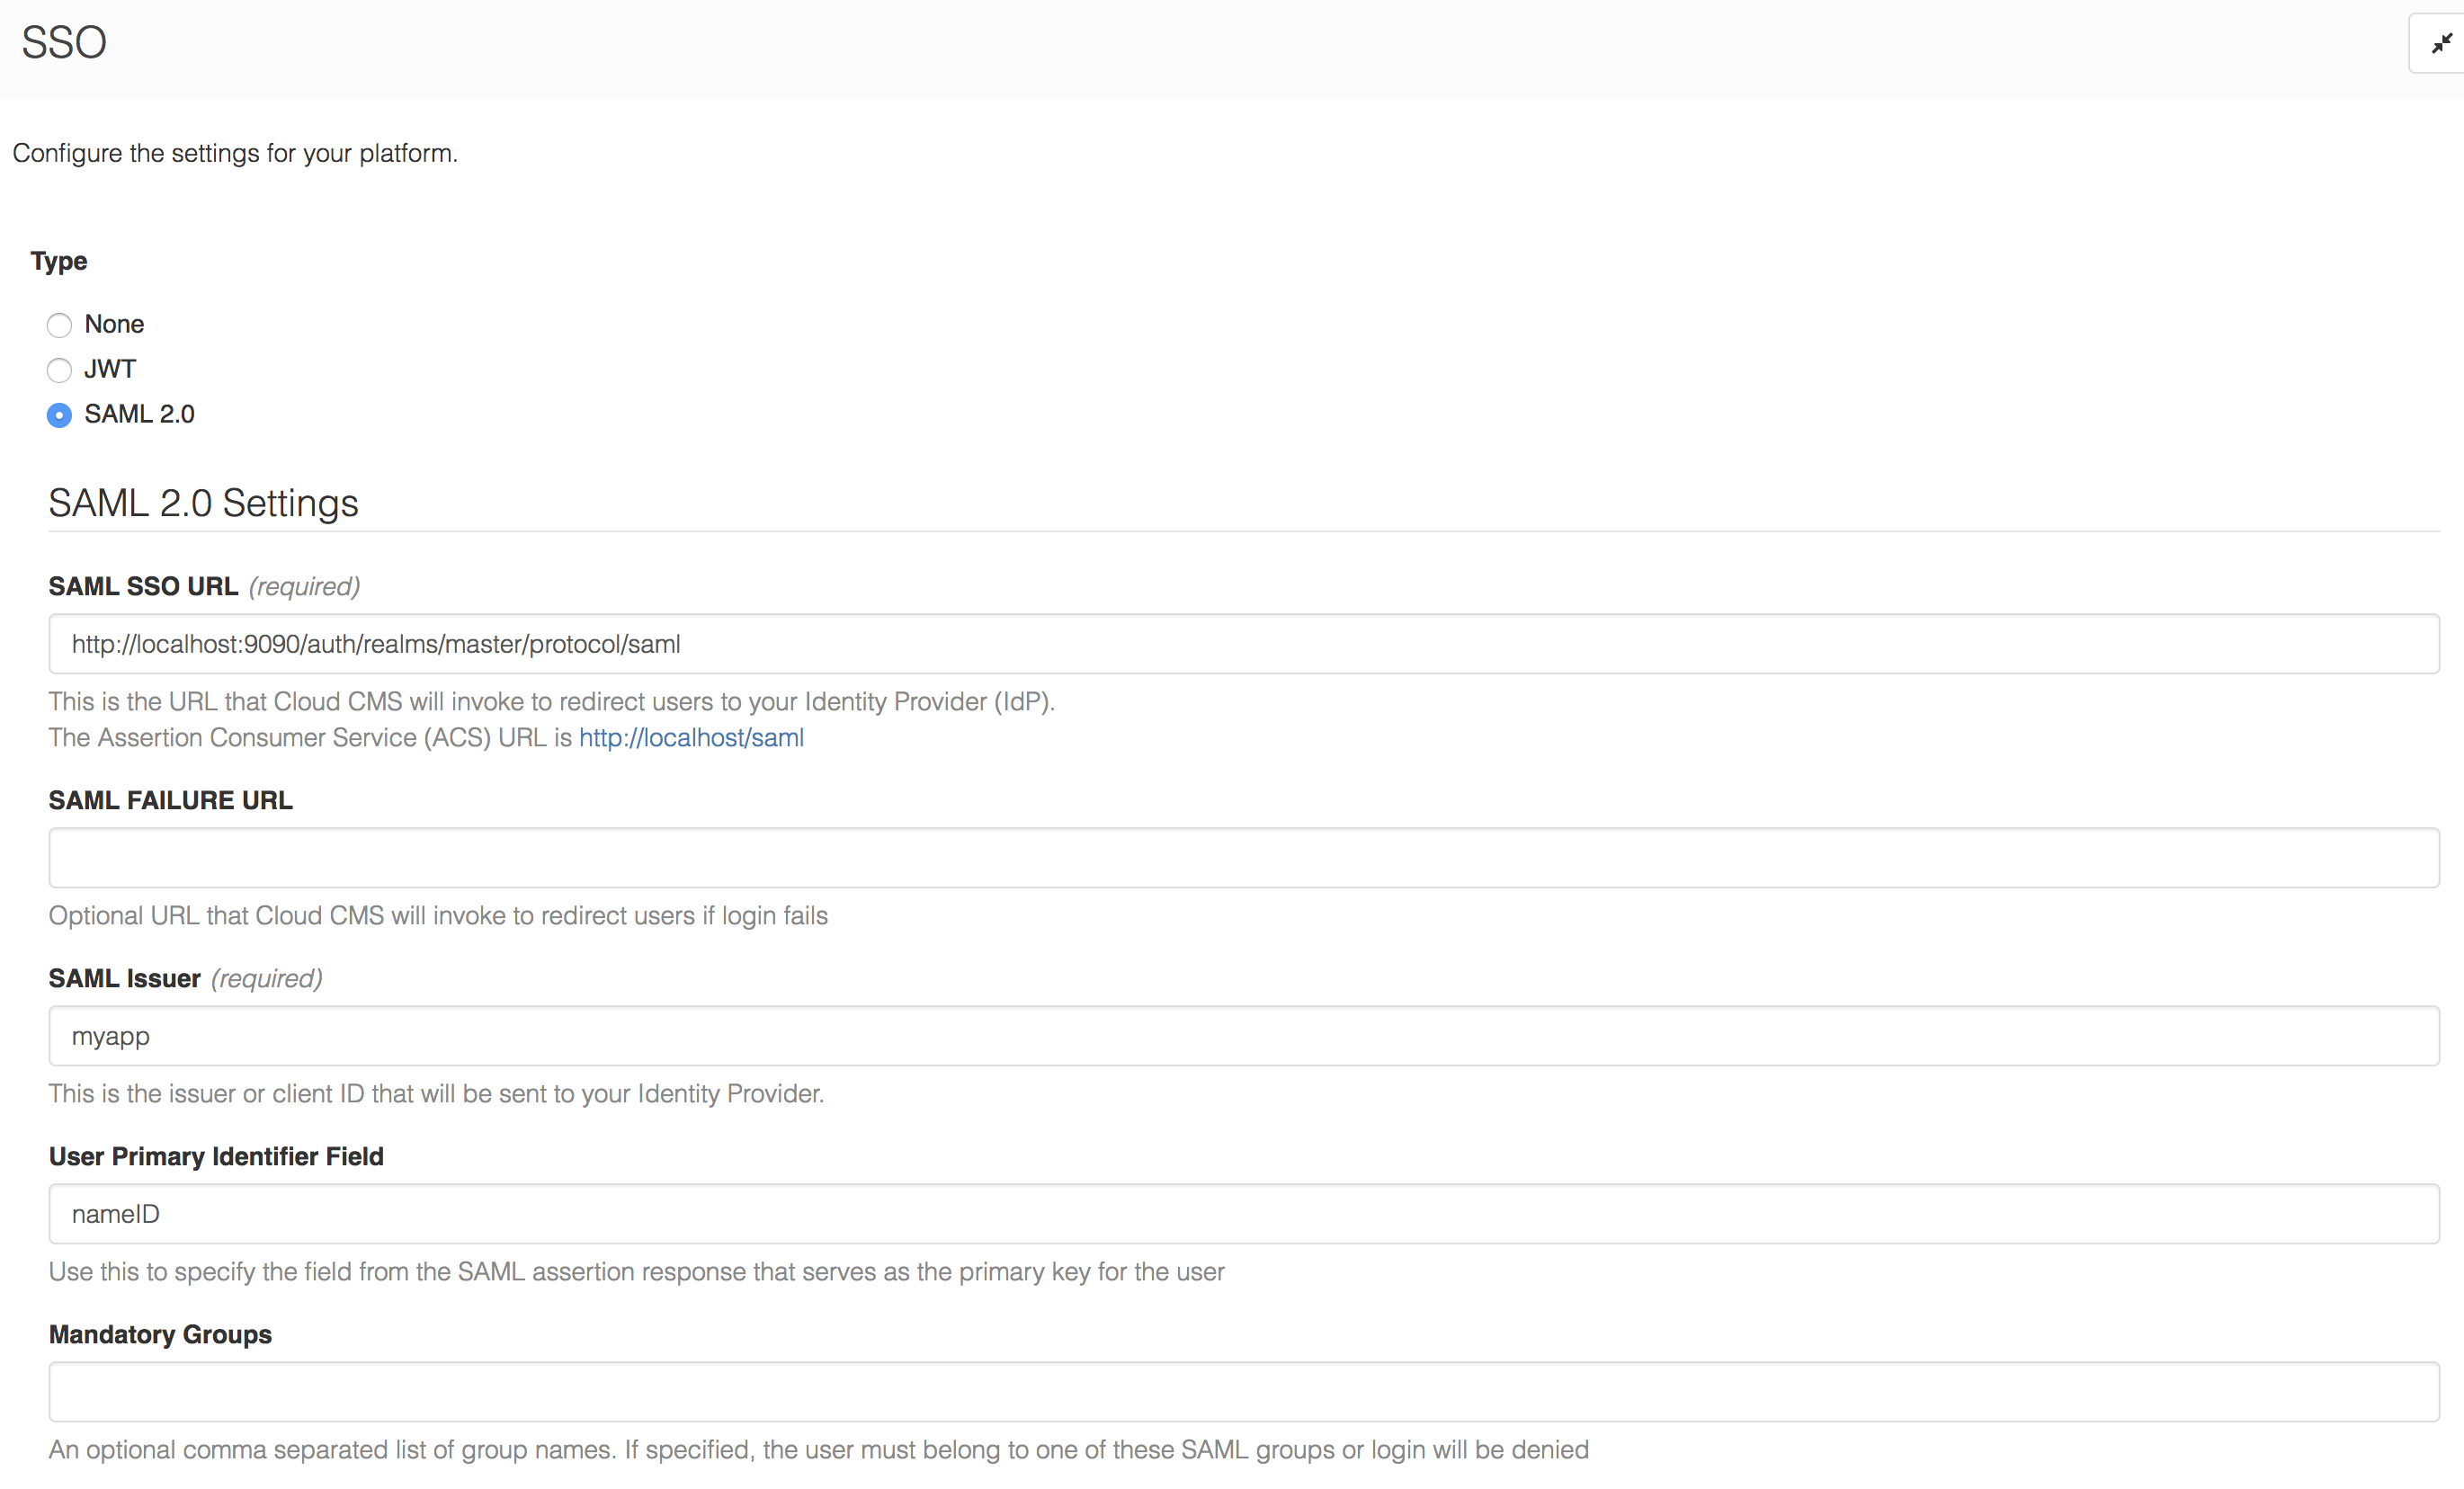
The following is required:
- The
SAML URLshould behttp://localhost:8080/auth/realms/master/protocol/saml
This may vary depending on your installation of Keycloak. By default, Keycloak is installed on port 8080. If you've modified this or if your Keycloak installation exists on a different port, you will need to modify this URL.
The
SAML Issuershould match the Keycloak Client ID ofmyapp.Under the
User Field Mappingssection, add the following:
- User Property
firstName= Field ValuefirstName - User Property
lastName= Field ValuelastName - User Property
name= Field Valuename
This sets things up so that the SAML Assertion Attributes (which you configured using User Attribute Mappers in Keycloak) will be picked up and sync'd to the Cloud CMS user's properties.
Save your changes and log out.
Verify it works
You can now verify that Cloud CMS is configured to use SAML 2.0:
- Log out of your current Cloud CMS account
- Try to access Cloud CMS again.
- You will be redirected to Keycloak's login screen.
- Fill in the username and password for the Joe Smith user you created above.
- After you successfully authenticate to Keycloak, you will be redirected back to Cloud CMS.
- Cloud CMS will automatically log you in and create your user if it doesn't yet exist.
- Proceed and be merry.
Tips and Tricks
While testing our your SSO configuration, you may find that you need to log back into Cloud CMS as an administrator or as another pre-established account. To do so, simply go to the Cloud CMS UI and point to the /login route.
This lets you log in manually using an existing account.
