Create A New Content Type
In the Content Model Builder, you can create a new Content Type.
Click button "Create Content Type" near the top left:
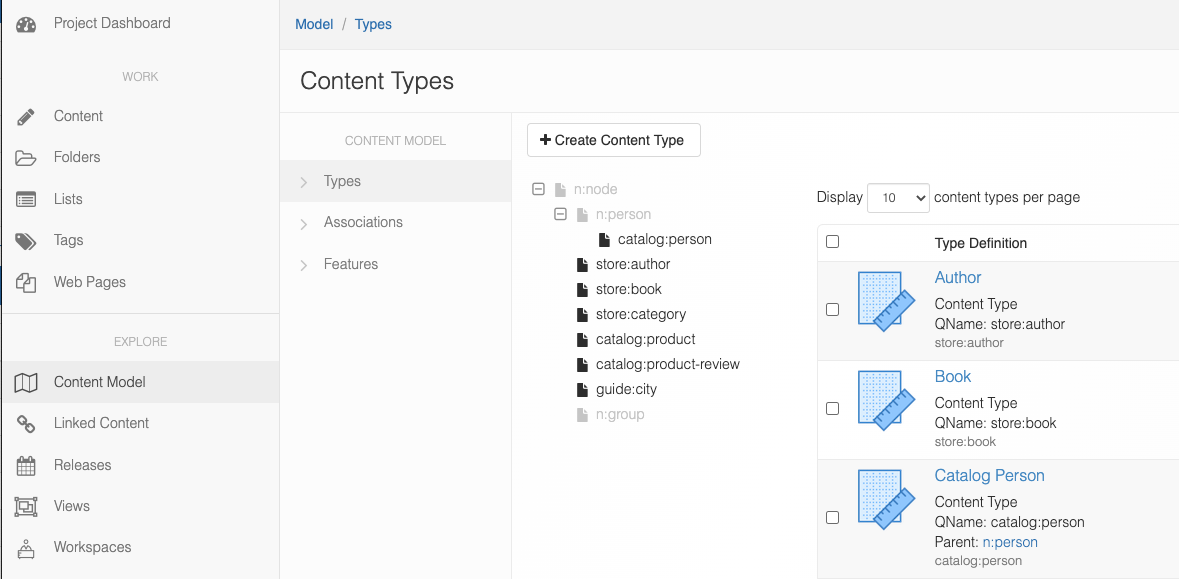
Then give your content type a name in the pop up modal:

Hit "Create" and the new content model will open in the Content Model Builder:
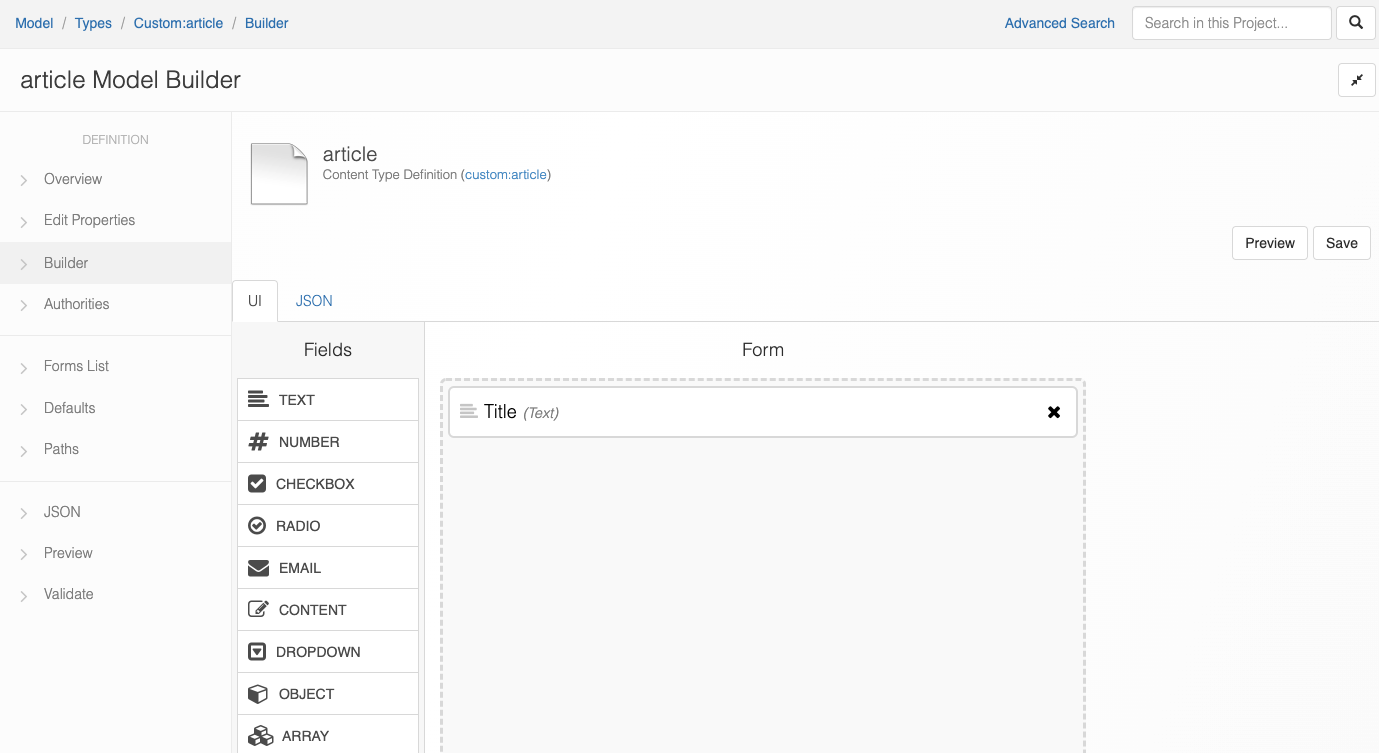
As you can see there are two tabs -- "UI" and "JSON". Cloud CMS provides you with two ways to build in the content type builder. If you are an editor and fancy building it with simple actions like drag and drop, UI builder is for you; if you are a developer and enjoy the flexibility to just code it out yourself, go ahead and switch to "JSON" tab.
On the top right, there are two buttons -- "Preview" and "Save". It's always good to see what the Content Entry Form is going to look like while you are building it, and "Preview" lets you do that. "Save", as it indicates, will save all the changes you've made for this content model. Note: you do NOT need to save to preview.
Build with UI
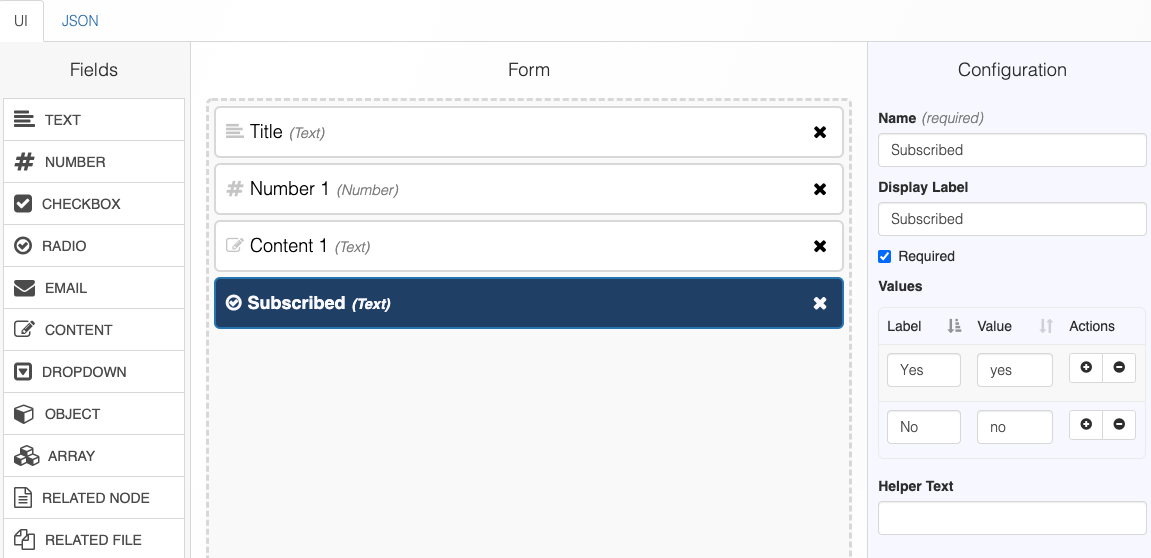
In the left side nav, you can see a list of pre-defined Field types. Each field type has a simple description of it so that you can determine which is the right one to meet your need. Then, simply drag and drop the the required field type.
For each property you will need to enter the parameters in the Configuration section. Note: a default name for each property will be generated but it is likely you will want to change the Name and label. Name must be unique. The Configuration also differs for each Field Type.
At anytime you can "Preview" to see the Content Entry Form:
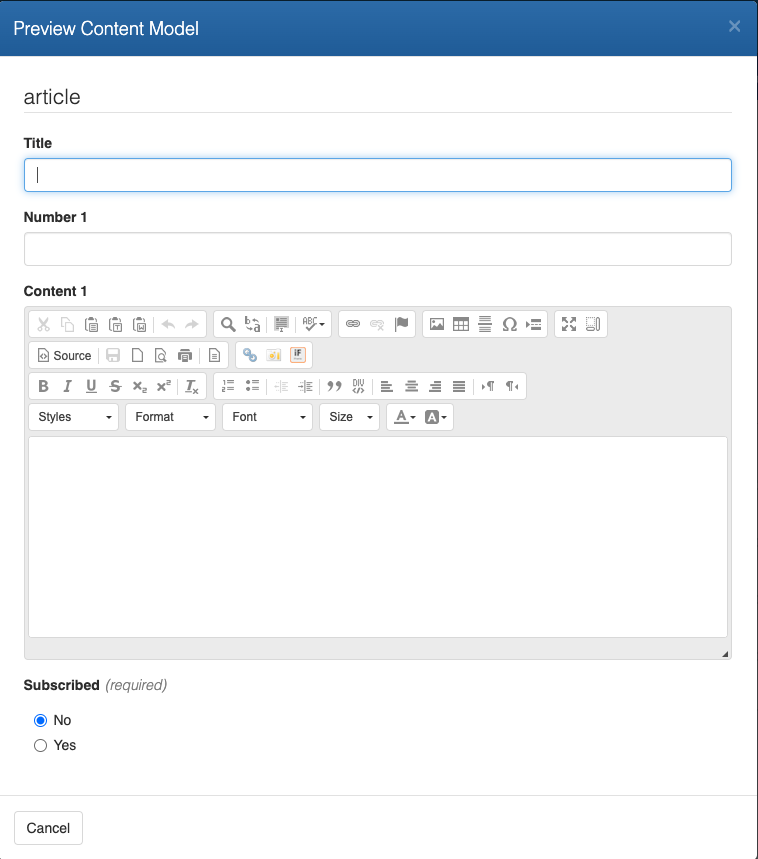
Once you are happy with the way it looks, hit "Save".
If you modifying the UI, and need to see the "JSON", feel free to switch to "JSON" tab and you will be able to see all the changes you made in the UI are reflected here:
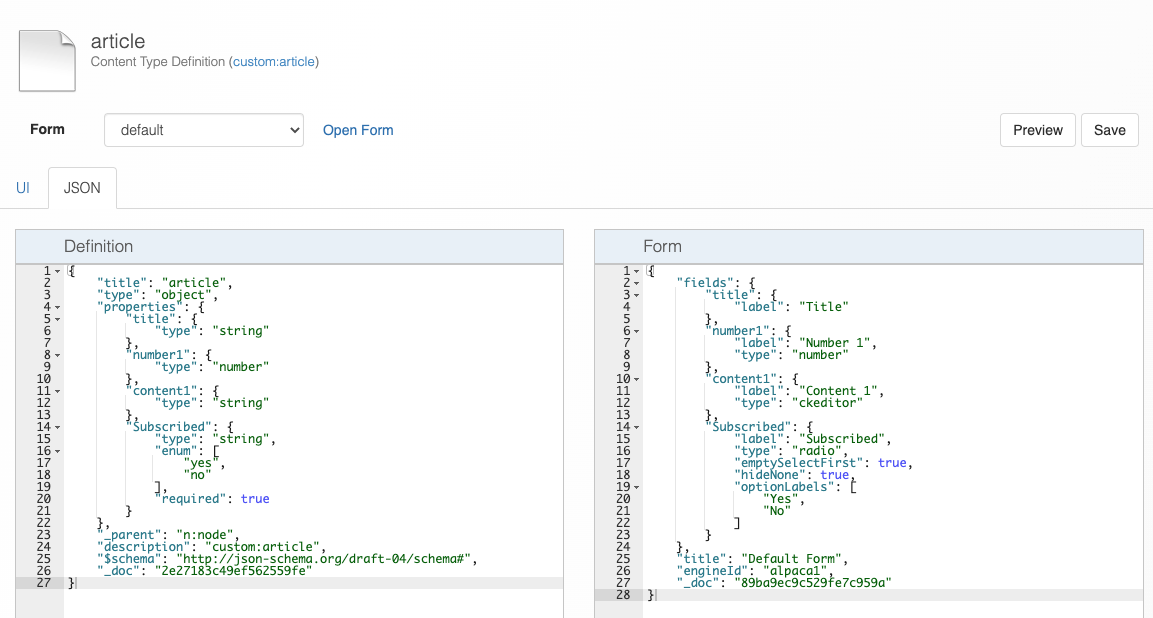
There are two JSON views -- "Definition" (Content Type Definition) and "Form" (Content Entry Form). The convention here follows Alpaca Forms documentation.
