Monitoring API Server with an APM
The Cloud CMS API Server is a Java application that launches inside of a Java Servlet Container. As such, Application Performance Montioring (APM) frameworks such as New Relic can be used to monitor performance metrics and other run-time data.
Production Performance
Although APM frameworks are designed such that they do not impact production performance more than is necessary, the impact is not zero. Cloud CMS Support may, therefore, ask you to disable monitoring if necessary to diagnose an issue.
General Setup
APM tools that monitor Java based applications (Such as the Cloud CMS API server) are typcially enabled by including a jar file in the classpath of the JVM running the API server code.
New Relic Setup
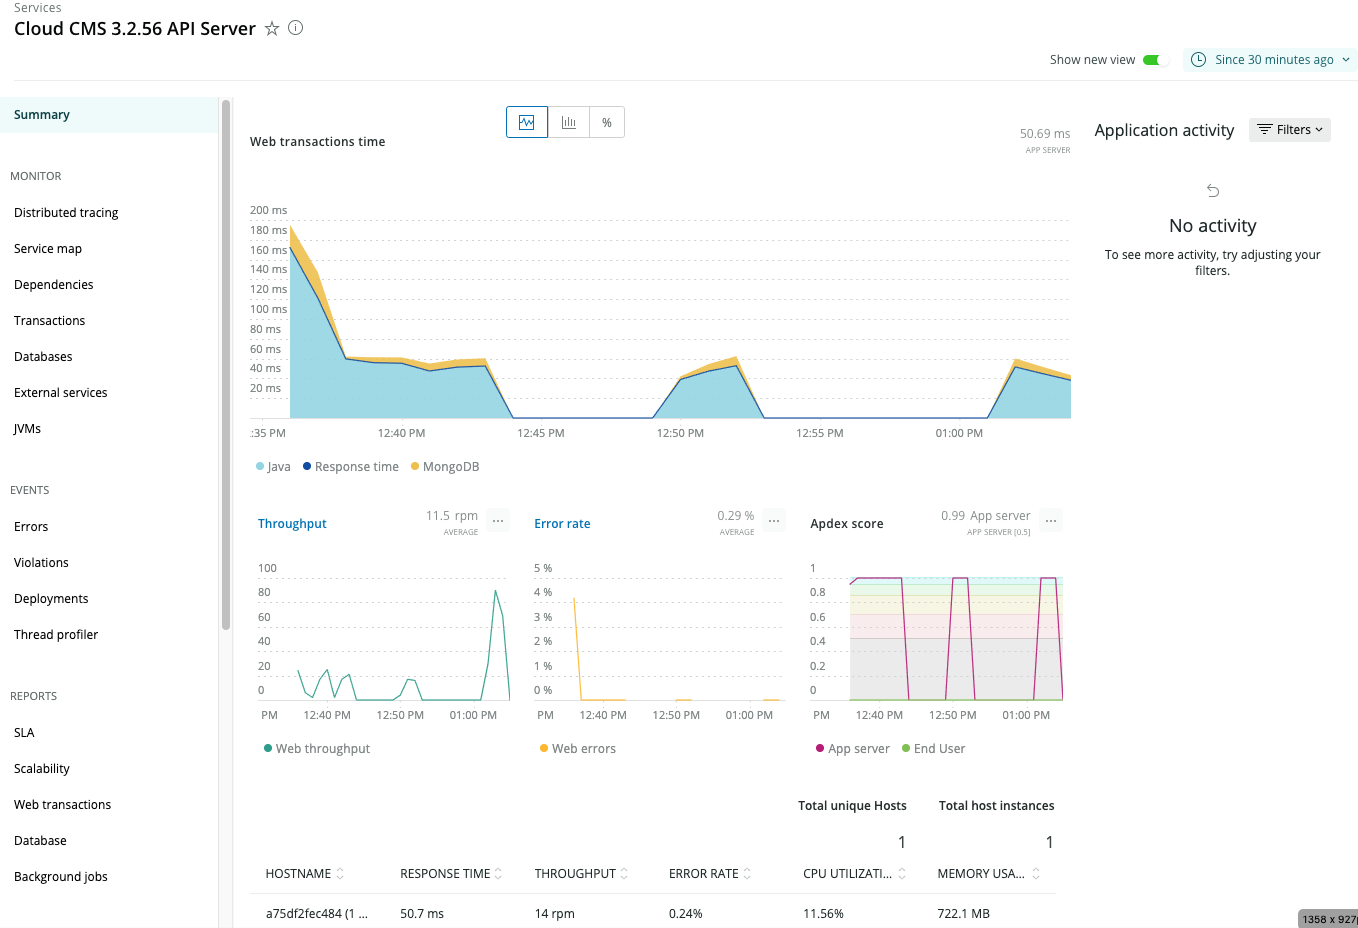
Following is an example of configuring New Relic's APM java agent.
Locate the Dockerfile for the API container in your build environment. Download and install the New Relic java agent to the same folder.
Follow New Relic Documentation for installation instruction of their Java agent.
Open the Dockerfile and add the following lines:
# add newrelic java agent
RUN mkdir -p /usr/local/tomcat/newrelic/logs
RUN chmod 777 /usr/local/tomcat/newrelic/logs
ADD ./newrelic/newrelic.jar /usr/local/tomcat/newrelic/newrelic.jar
ADD ./newrelic/newrelic.yml /usr/local/tomcat/newrelic/newrelic.yml
The Dockerfile file should now look something like this:
FROM cloudcms/api-server:3.2.56

MAINTAINER Cloud CMS <support@cloudcms.com>

# copy the custom properties and classes into place
# this includes the license file in the ./classes/gitana/license directory
COPY ./classes/ /opt/tomcat/shared/classes/

# add newrelic java agent
RUN mkdir -p /usr/local/tomcat/newrelic/logs
RUN chmod 777 /usr/local/tomcat/newrelic/logs
ADD ./newrelic/newrelic.jar /usr/local/tomcat/newrelic/newrelic.jar
ADD ./newrelic/newrelic.yml /usr/local/tomcat/newrelic/newrelic.yml
Now locate api.env and add this option to the JVM options:
-javaagent:/usr/local/tomcat/newrelic/newrelic.jar
The api.env file should essentially look like this (Note that you may have modified other JVM option values such as max heap memory setting so your file may not look exactly the same):
JAVA_OPTS=-Xmx2048m -javaagent:/usr/local/tomcat/newrelic/newrelic.jar -server -XX:+UseShenandoahGC -XX:ShenandoahGCHeuristics=compact -Dsun.net.inetaddr.ttl=60 -Djava.net.preferIPv4Stack=true
Finally, update license_key and app_name in your newrelic.yml file. Get license_key from your New Relic account page
Now start your API container and in a few minutes you should see information become available in your New Relic Dashboard