Modules
All you need to build your own add-on modules is GitHub and some JavaScript / HTML skills. You can get started quickly by forking the Cloud CMS UI Sample Add-on Module repository on GitHub. This sample add-on works with the data set provided by the Sample Project (which is included with every free trial).
Register your Module
Note: To register your module, you must have Manager rights to your tenant. If you do not have Manager rights, you will either need to delegate the responsibility to someone who does or ask to be granted Manager rights by the person who set up your tenant.
Log in to your Cloud CMS tenant. Go to on Platform Settings and then select Modules from the submenu. You shouldn't see any modules listed if you haven't done this before.

Click on Register New Module. A dialog will appear like this:
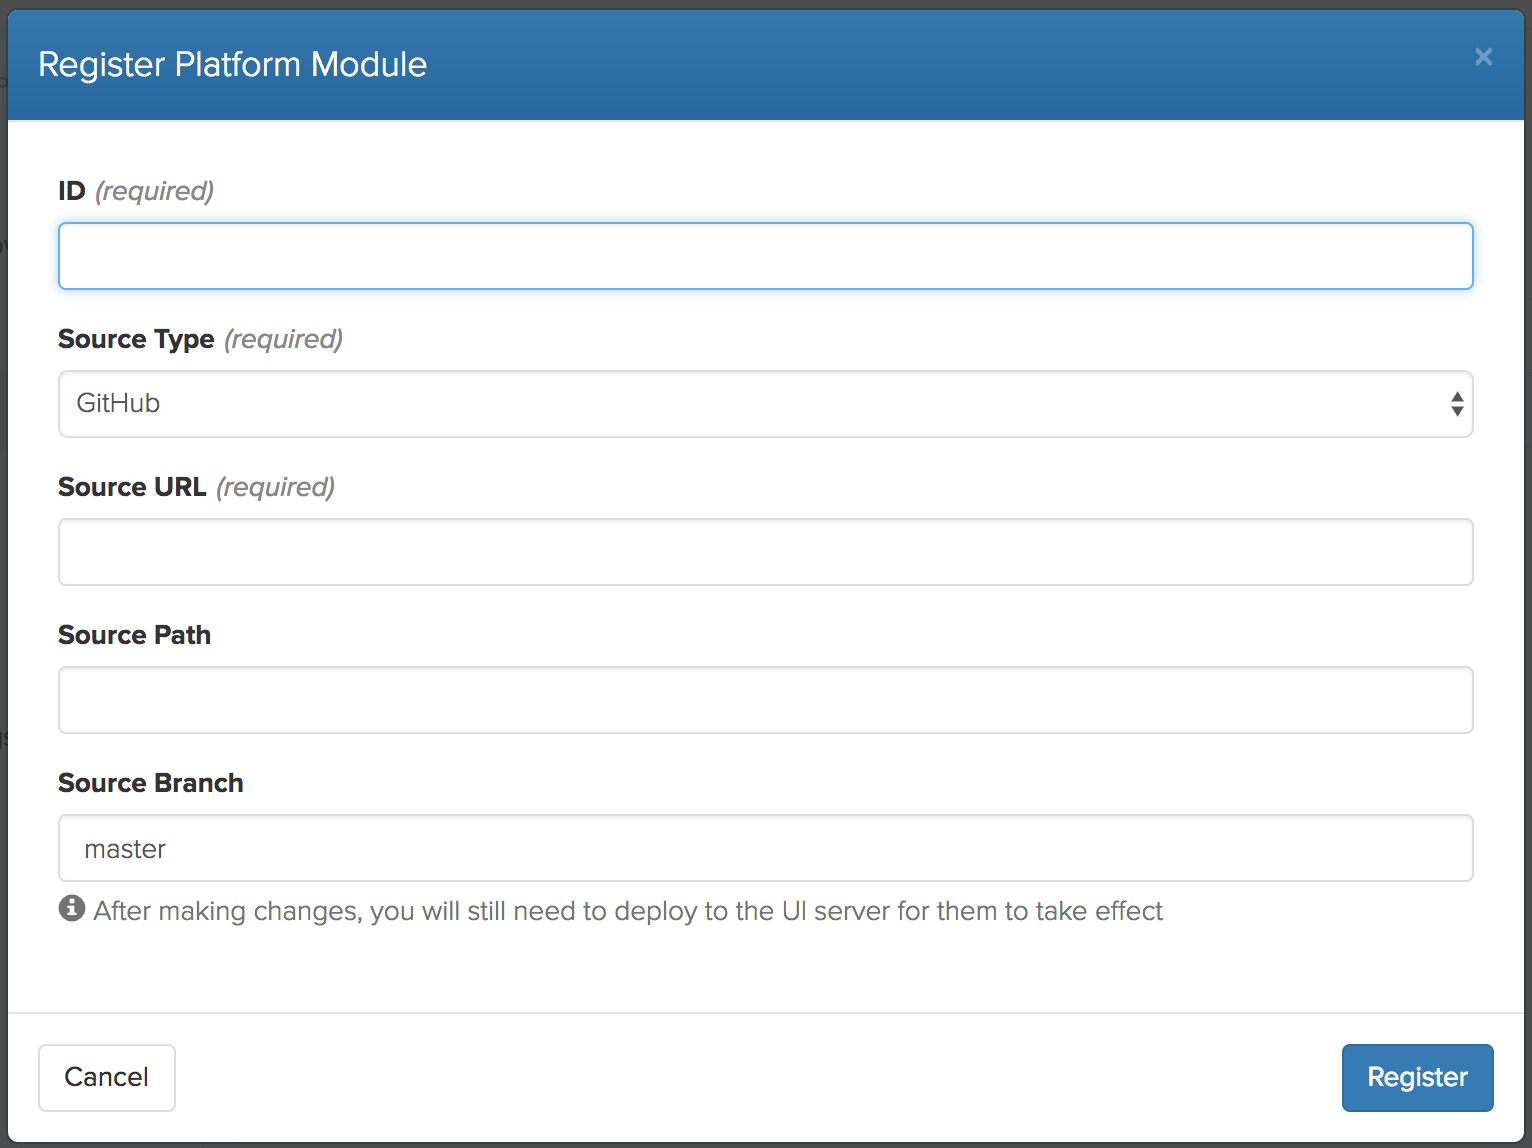
Where:
- ID is the ID of the module, same as "name" defined in
module.json - Source Type is either GitHub or BitBucket
- Source URL is the URL to your git repo
- Source Path is the path from the root of your git repo to the module
- Source Branch: provide a branch ID if you would like to have your code checked out from a branch other than master.
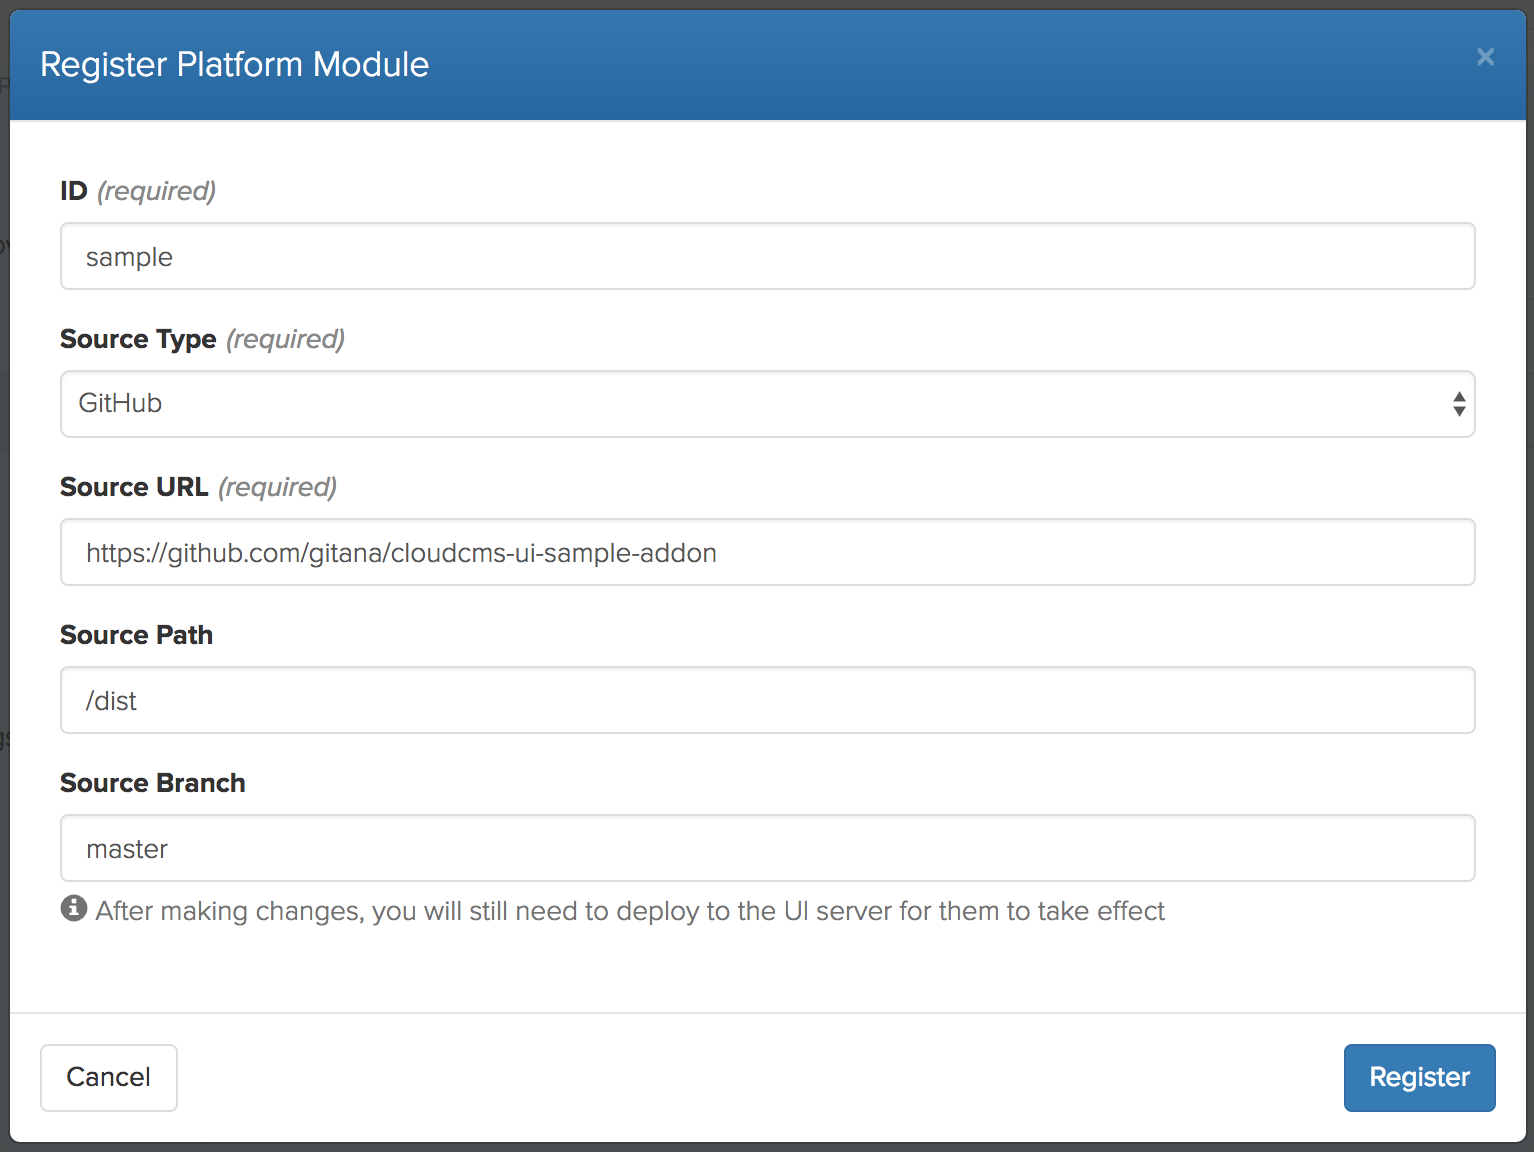
Enter the required fields. The ID should match the ID of your module within source control. Provide the GitHub (or BitBucket) URL for your module source code. If your module lives under a directory within the root of the checkout, you can provide that path as well. Finally, provide a branch ID if you would like to have your code checked out from a branch other than master.
For the Sample Add-On, we would do something like this:
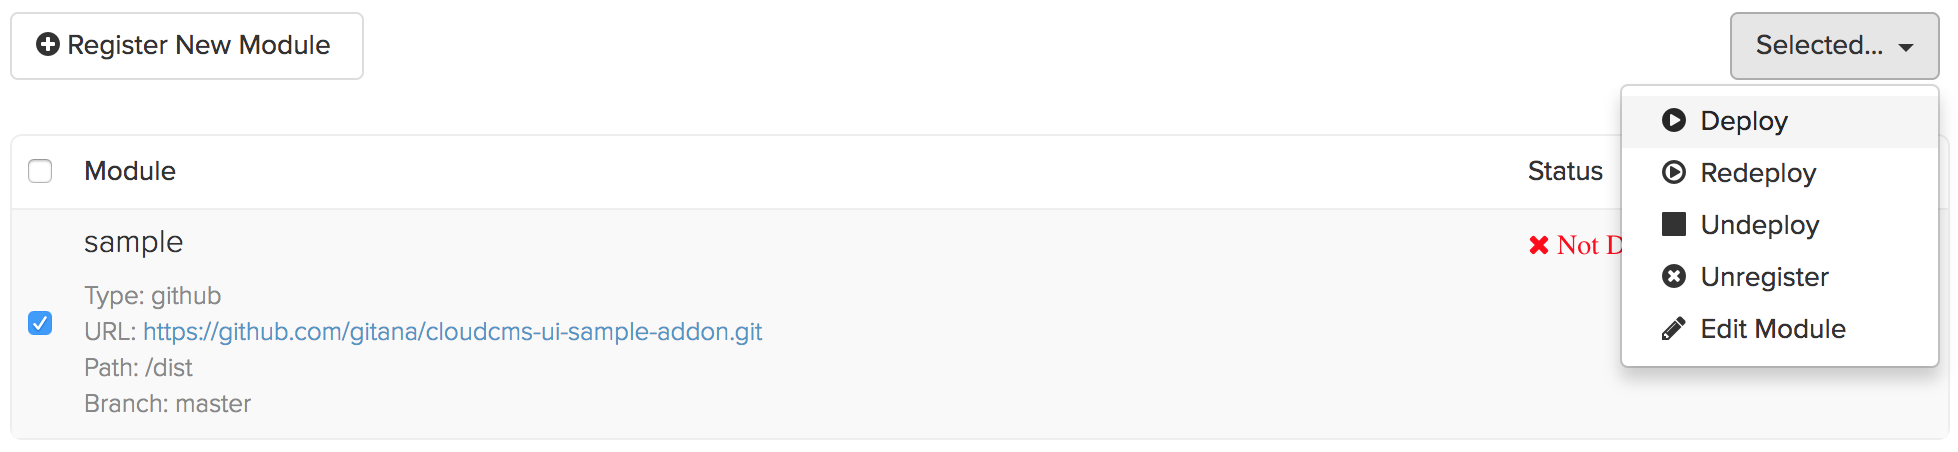
Then click on Register. You will then see your add-on module listed.

Select your Add-on from the list and click on Deploy.
Cloud CMS, in all of its courtesy, will ask if you're sure you want to deploy the module.
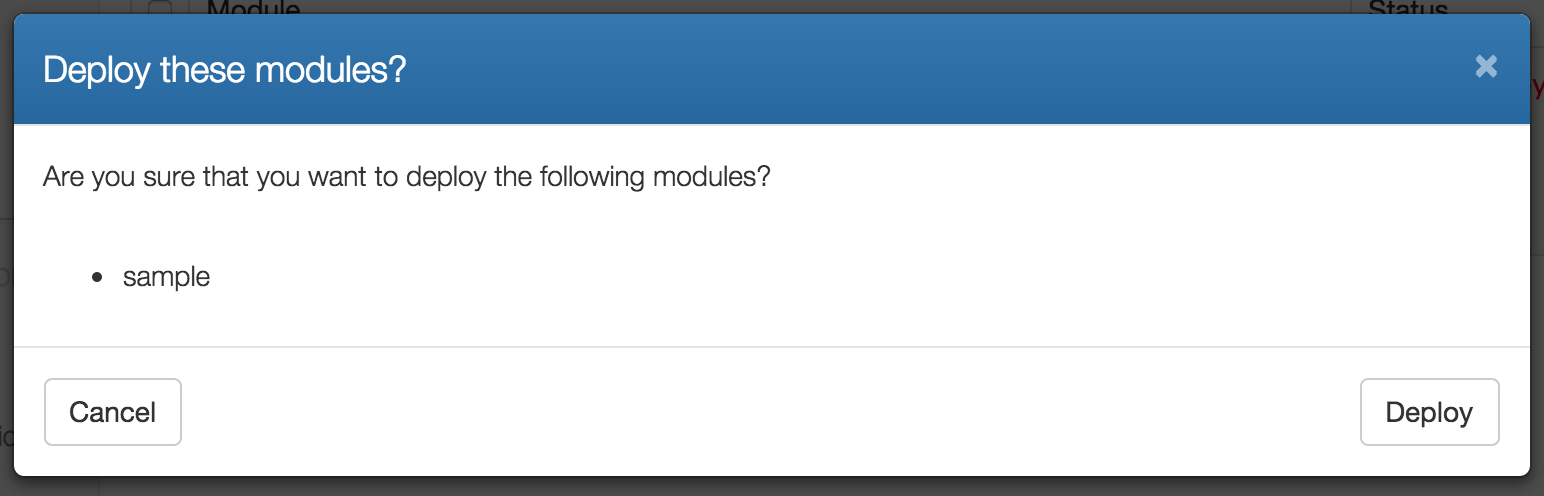
Click Deploy to confirm. Your source code will be checked out and deployed to the Cloud CMS user interface.
The Cloud CMS user interface will reload and your AMD module will be loaded after the main Cloud CMS modules are loaded. As such, your AMD module has the ability to extend and override any configuration or components on the page, ahead of them being rendered.
Checking network traffic, you should see your AMD module load. If there are any issues while loading your module, these will appear in the browser's console along with an explanation of what failed. If there are no problems, your module's config and JavaScript source will effectively merge with the main user interface, appending and overriding the existing configuration wherever necessary.
The modules list will now show that your module is deployed.

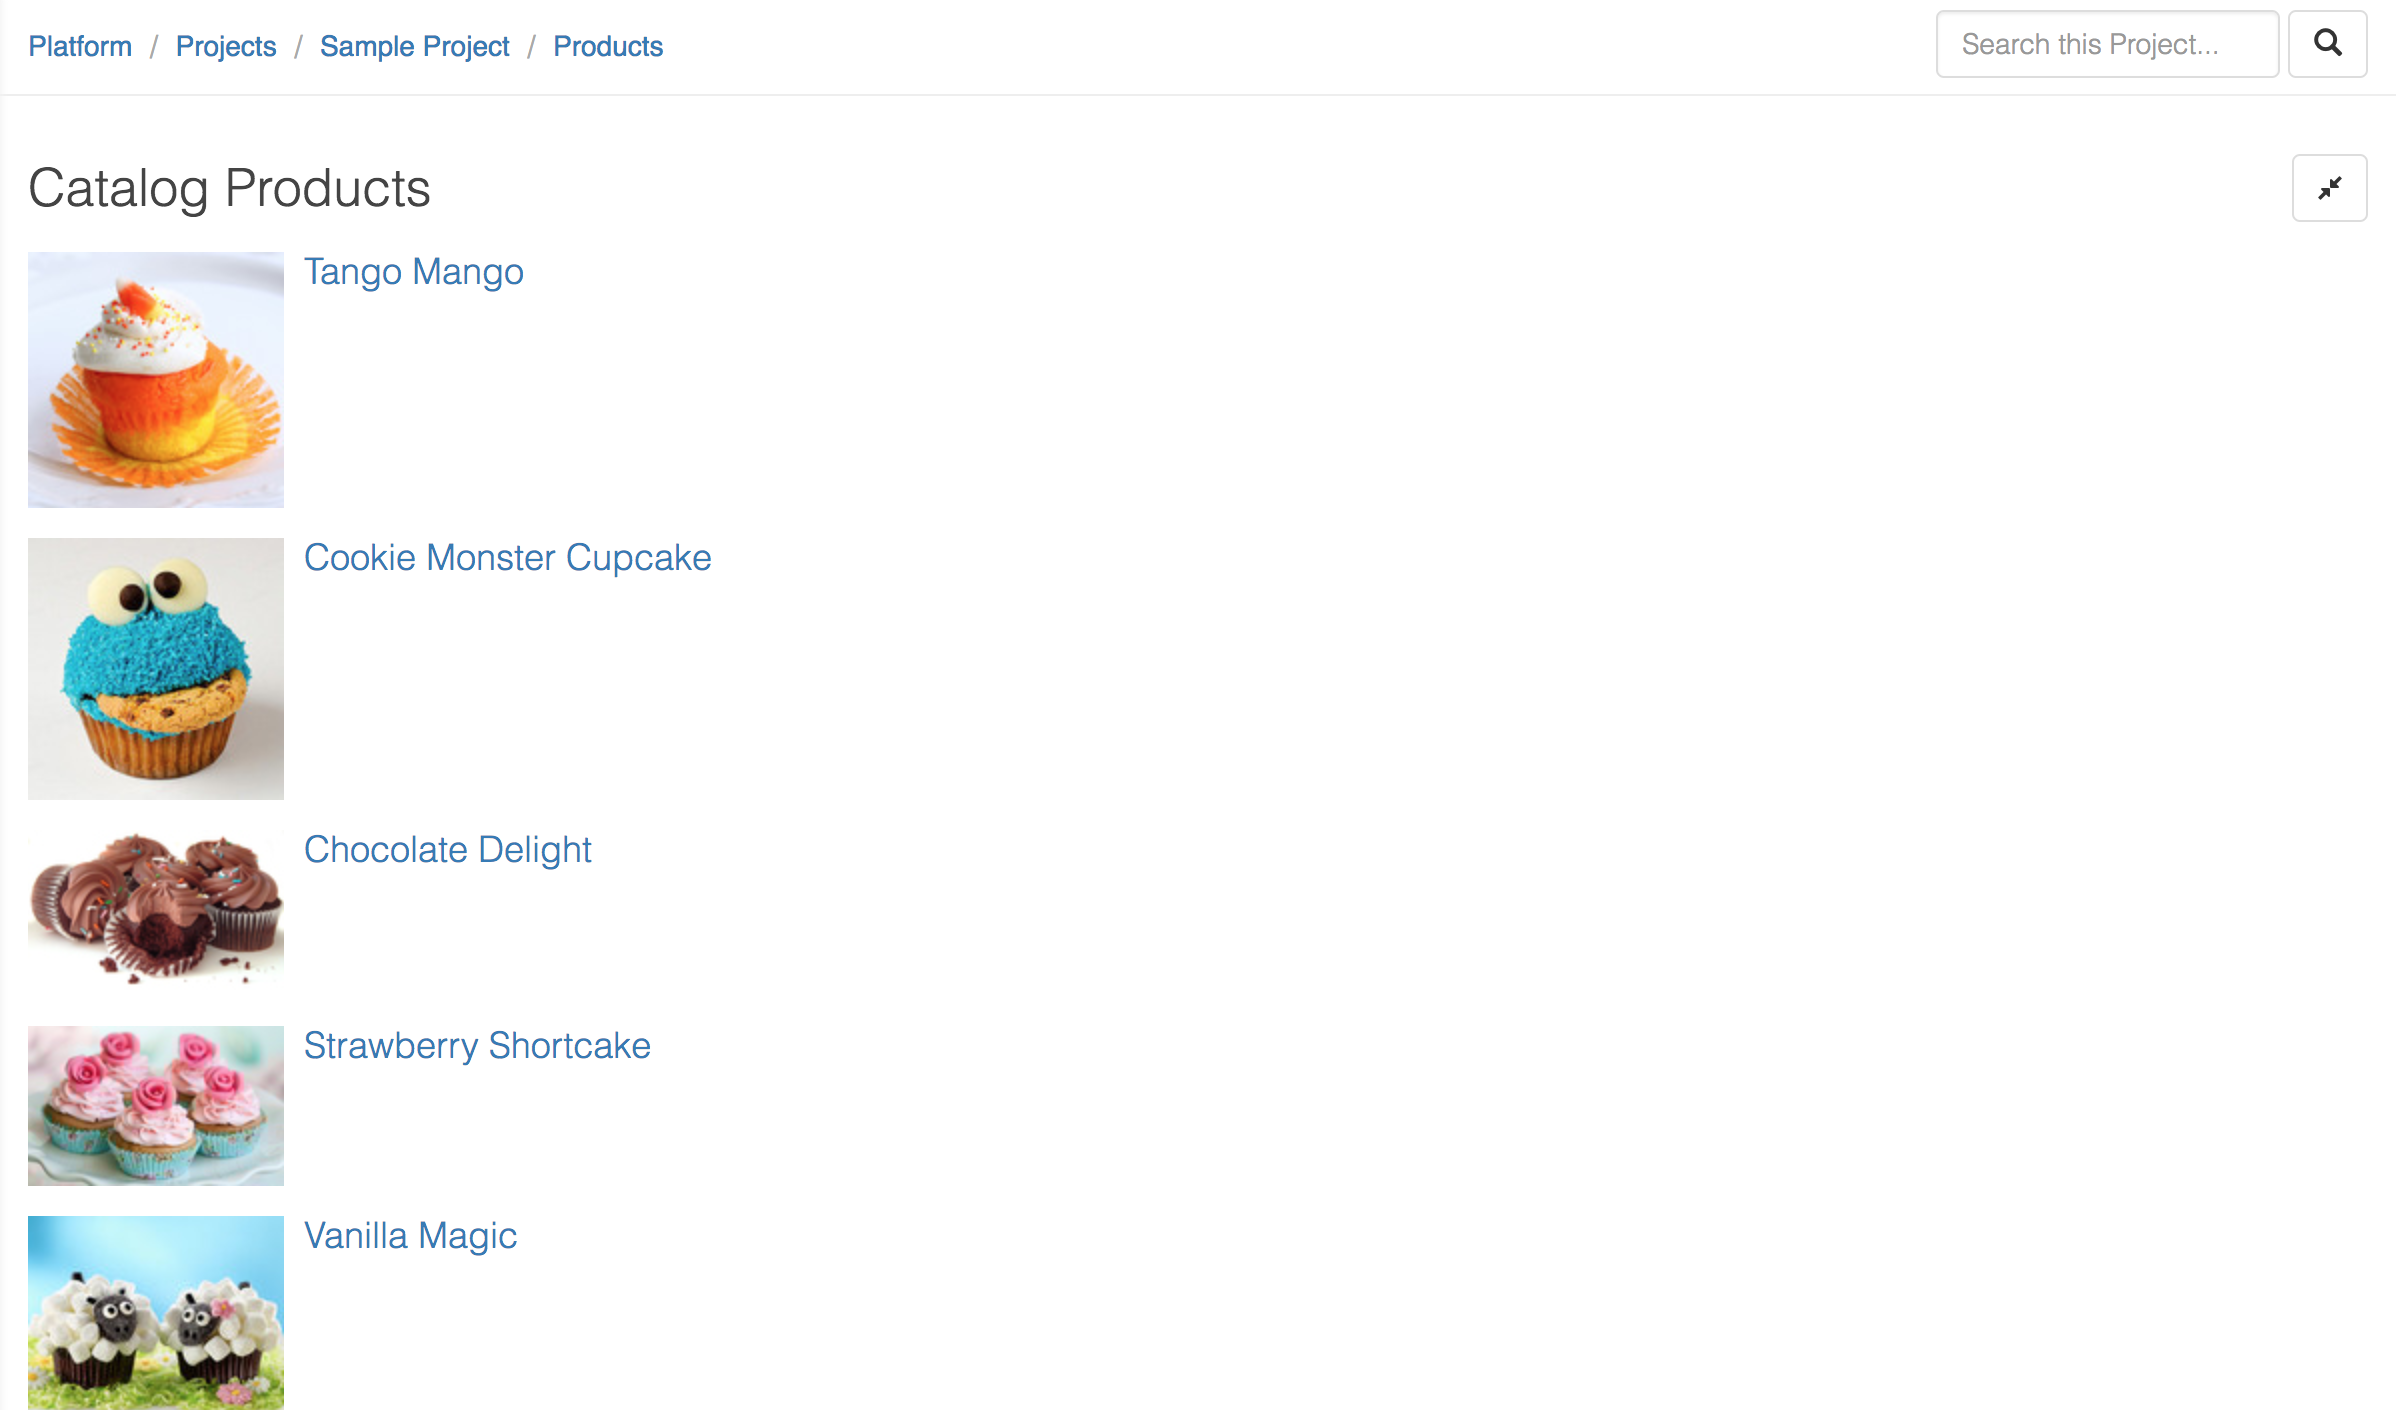
Now click in a Project. You will see a new menu option on the left-hand side called Products:
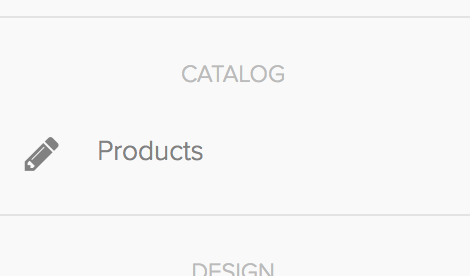
Clicking on Products page will bring up a list of the catalog:product instances in your Sample Project.