Auto Translate
QName: f:auto-translate
This feature makes it so that any content that is saved is automatically translated into any desired target locales and stored as translations within the Cloud CMS I18N (Internationalization) framework.
With this feature, your editorial users could, for example, make a change to a node and save it. The change could then be translated into Chinese, Spanish and German so that content can be retrieved from Cloud CMS in those locales. This all happens automatically when the Save button is clicked.
In some cases, you may opt to use these translated values as they are. In other cases, you may wish to then put the translations through a workflow for approval. Either way, the automatically translated values are useful and may serve to inform or guide your translation team, lowering the amount of work required or speeding the time to delivery.
There are a few inputs that will not be translated. If you have a field representing an enum value, it will not be sent for translation since this would cause validation issues. Html tags will also be parsed out, and only the values in between tags will be sent for translation.
Requirements
To use this feature, you must first set up a Translation Service. This is described below. At the moment, Cloud CMS supports Amazon Translate and integrates with it seamlessly in the background.
You may apply this feature any node that will serve as the master node within the Cloud CMS I18N Framework.
A master node must meet the following:
- It should have the
f:multilingualfeature on it. - It should additionally have the
f:localefeature on it to indicate the master node content locale.
Usage
Once applied to a master node, any updates to the master node will result in the translations for that node being synchronized. If the node sits in a project, the project locales will be consulted to determine what translations are needed. Alternatively, the f:auto-translate feature may specify the locales.
When the master node is updated -
- For each locale, a translation will be created if it doesn't already exist.
- If a translation is newly created via step 1, all properties from the master node will be copied to the translation node (after undergoing optional translation).
- If a translation already exists in step 1, the modified properties (not all properties, just the modified ones) will be copied to the translation node (after undergoing optional translation).
When the master node is touched -
- For each locale, a translation will be created if it doesn't already exist.
- All properties from the master node will be copied to the translation node (after undergoing optional translation).
Translation Service
To use this feature, you must create a Service Descriptor for a Translation Service. You can do this my going to Manage Platform > Services:
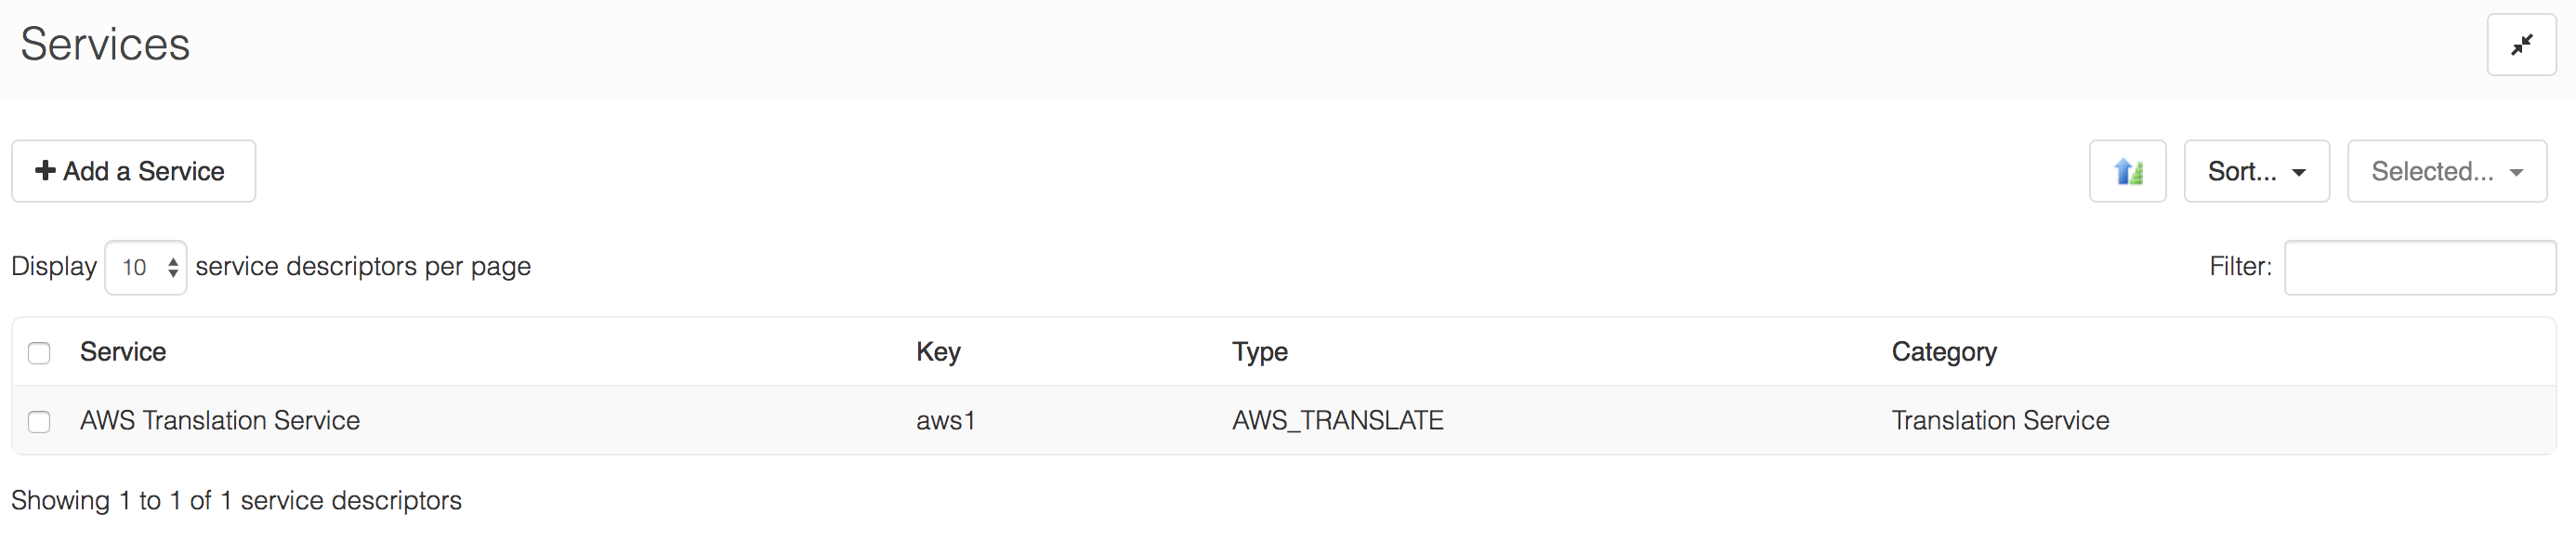
Click on the Add a Service button to bring up the Add A Service wizard.
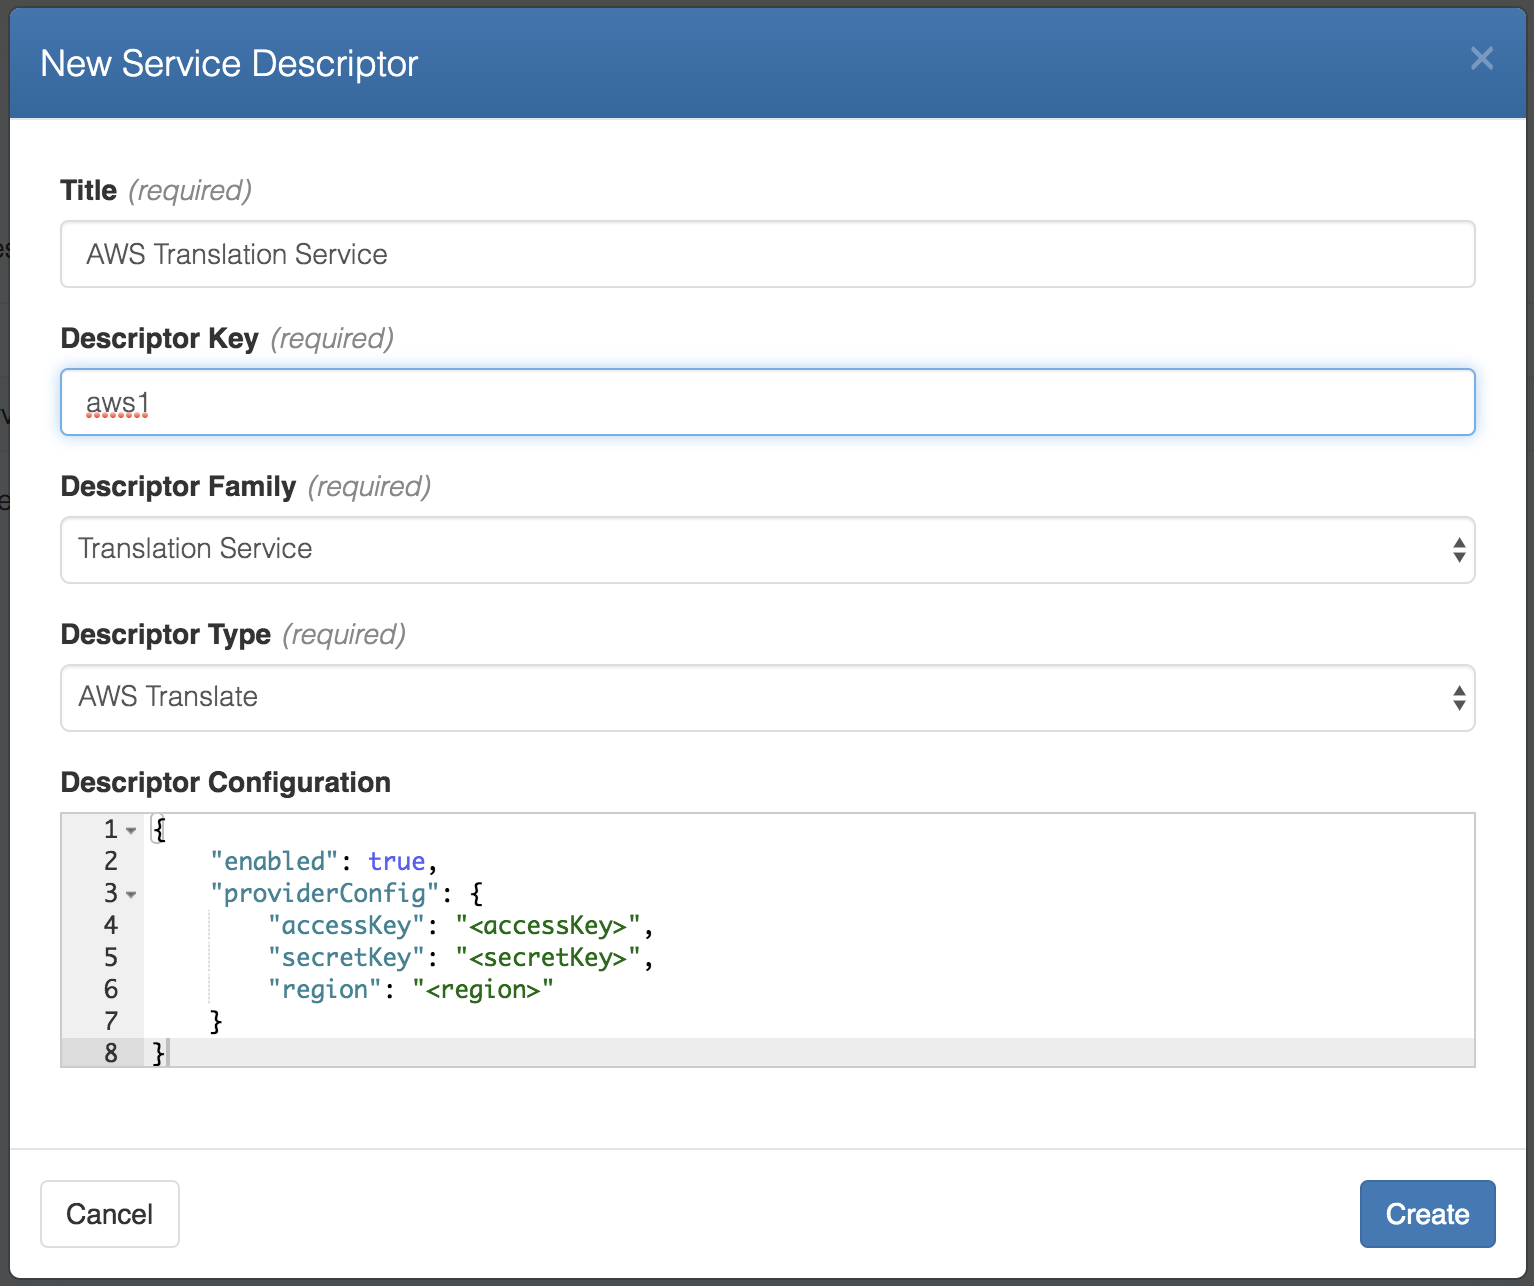
Give your Service Descriptor a Title and a Key. The Key is important as it is the primary means by which your Service Descriptor will be referenced by your feature. It can be any value you like so long as it is unique across your Service Descriptors.
You should pick Translation Service and provide a configuration for your chosen service.
AWS Translate
Cloud CMS supports AWS Translate. According to Amazon -
Amazon Translate is a neural machine translation service that delivers fast, high-quality, and affordable language translation. Neural machine translation is a form of language translation automation that uses deep learning models to deliver more accurate and more natural sounding translation than traditional statistical and rule-based translation algorithms. Amazon Translate allows you to localize content - such as websites and applications - for international users, and to easily translate large volumes of text efficiently.
Well said. To be sure, AWS Translate provides a fast and reliable means for converting text in one locale to another. You can learn more about AWS Translate here: https://aws.amazon.com/translate
You may also want to review the specific locale conversions that AWS Translate supports: https://docs.aws.amazon.com/translate/latest/dg/pairs.html
To configure Cloud CMS to connect to AWS Translation Services, you will need an AWS account and an IAM user with an Access Key and Secret Key.
To configure AWS Translate, pick it from the list of Translation Services and fill in your configuration, similar to what is shown here:
{
    "enabled": true,
    "providerConfig": {
        "accessKey": "2ZSKS4SAOQFBJ6VQIACX",
        "secretKey": "0HtMfAAzsDGWYafJeS8XJNTNMx4RxrqGPp88PlrN",
        "region": "us-east-1"
    }
}
Azure Text API Translate
Cloud CMS supports Microsoft Azure's Translation Services.
The Microsoft Translator API is a neural machine translation service that developers can easily integrate into their applications websites, tools, or any solution requiring multi-language support such as website localization, e-commerce, customer support, messaging applications, internal communication, and more.
You can learn more about Azure and its translation services here: https://azure.microsoft.com/en-us/services/cognitive-services/translator-text-api/
To configure Cloud CMS to connect to Azure Translation Services, you will need a Microsoft Azure subscription and a subscription key for the translation services you instantiate.
To configure Azure Translate, pick it from the list of Translation Services and fill in your configuration, similar to what is shown here:
{
    "enabled": true,
    "providerConfig": {
        "subscriptionKey": "46c863655e20fa91696c55174c5cbdc0"
    }
}
Google Translate
Cloud CMS supports Google Translation Services. According to Google -
Google Translation Services offer the ability to quickly translate between languages, using the best model for your content needs. You can build custom models using AutoML Translation or leverage Google’s pre-trained models using Translation API.
You can learn about Google Translation Services here: https://cloud.google.com/translate
To configure Cloud CMS to connect to Google Translation Services, you will need a Google account and an API Key that you can use to connect with Google.
To configure Azure Translate, pick it from the list of Translation Services and fill in your configuration, similar to what is shown here:
{
    "enabled": true,
    "providerConfig": {
        "apiKey": "DtwtUAIzjUaSy_kJ8pvNpdPMXzCUSwmpZc8I3pe"
    }
}
Feature Configuration
The basic configuration looks like this:
{
    "service": "my-translate-service",
    "locales": [],
    "excludePaths": []
}
Where:
serviceis either thekeyor the_docID of a Service Descriptor on your platformlocalesis an optional array of locales for which translations should be producedexcludePathsis an optional array of property paths which should NOT be translated. This is useful in instances where a property contains a slug, universal value, or something you generally wouldn't want to translate. The value can be an absolute path (ex. "author/firstName") or a java style regular expression to exclude all matching properties (ex. recommendations\\[.*\\]/title will exclude all recommendation titles in the recommendations array)
For example, if we set up AWS Translate as a Translation Service with Key aws1, then we could configure our feature like this:
{
    "service": "aws1"
}
You can also point to a very specific service by using its ID, like this:
{
    "service": "d869b106810918ab9fd5"
}
We recommend using the Service Descriptor Key (the first approach) since it lets you potentially delete and re-create the Service Descriptor in the future (should you need to). In this case, the new Service Descriptor would have a different ID but could still have the same Key and you won't be forced to go back and update all of your features.
Locales
This feature will automatically detect and make use of any custom locales you've set up in your Project. You can set up locales by going to Manage Project > Locales.
The screen shot below shows a situation where we have the following locales set up:
- Spanish (
es) - German (
de) - Chinese (
zh) - English (
en)
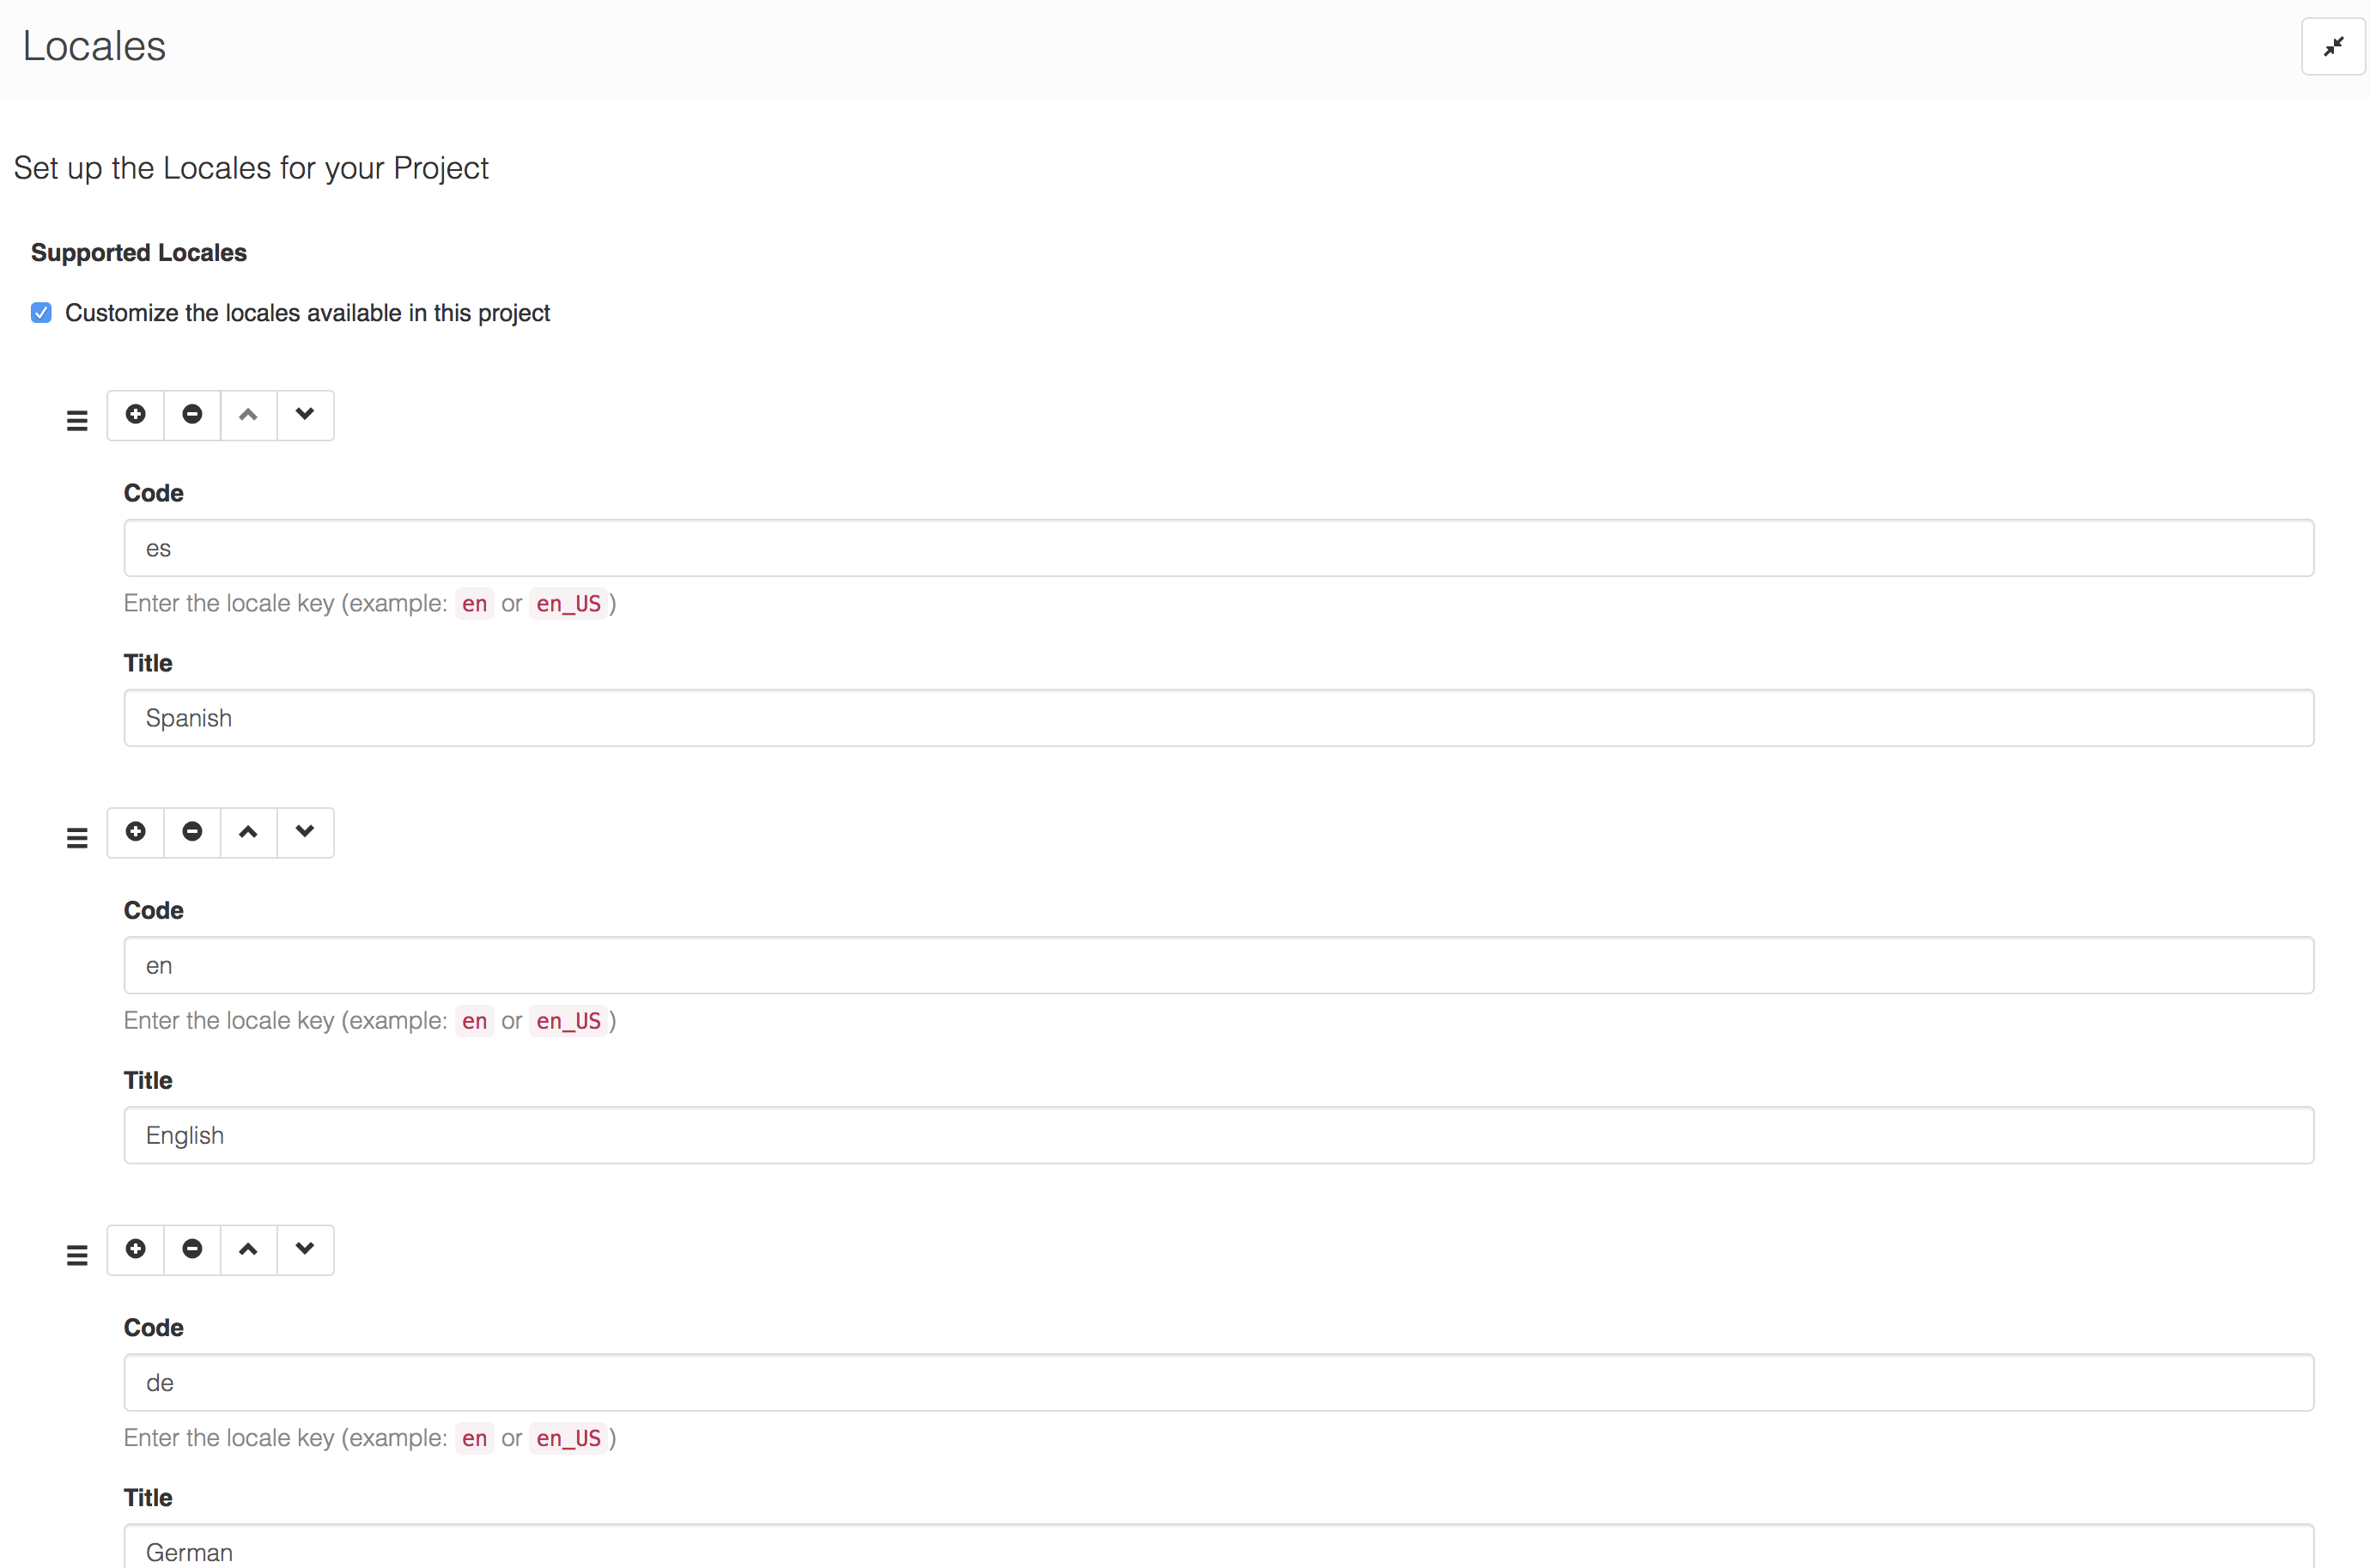
Note that we have English set up because we intend for the Master Node to store the original content in English.
The Auto Translate feature will automatically detect that your Master Node is in English and so will only generate translations for Spanish, German and Chinese.
As an alternative, you can also specify locales directly within your feature. Like this:
{
    "service": "aws1",
    "locales": ["es", "de", "zh"]
}
Example
Let's look at an example of Auto Translate in use:
Suppose that:
- We have a Project with custom locales set up for Spanish (
es), German (de) and Chinese (zh`) as described above. - We have the AWS Translation Service configured as per the steps above.
We can now do the following:
- Create a Node
- Click on the Make Multilingual action to give it the
f:multilingualfeature. Once we do that, we can refer to the Node as the "Master Node".
On the Master Node, we can then:
- Click on Set Locale to set the locale for the Master Node to English (
en). - Add the
f:auto-translatefeature with the following config:
{
    "service": "aws1"
}
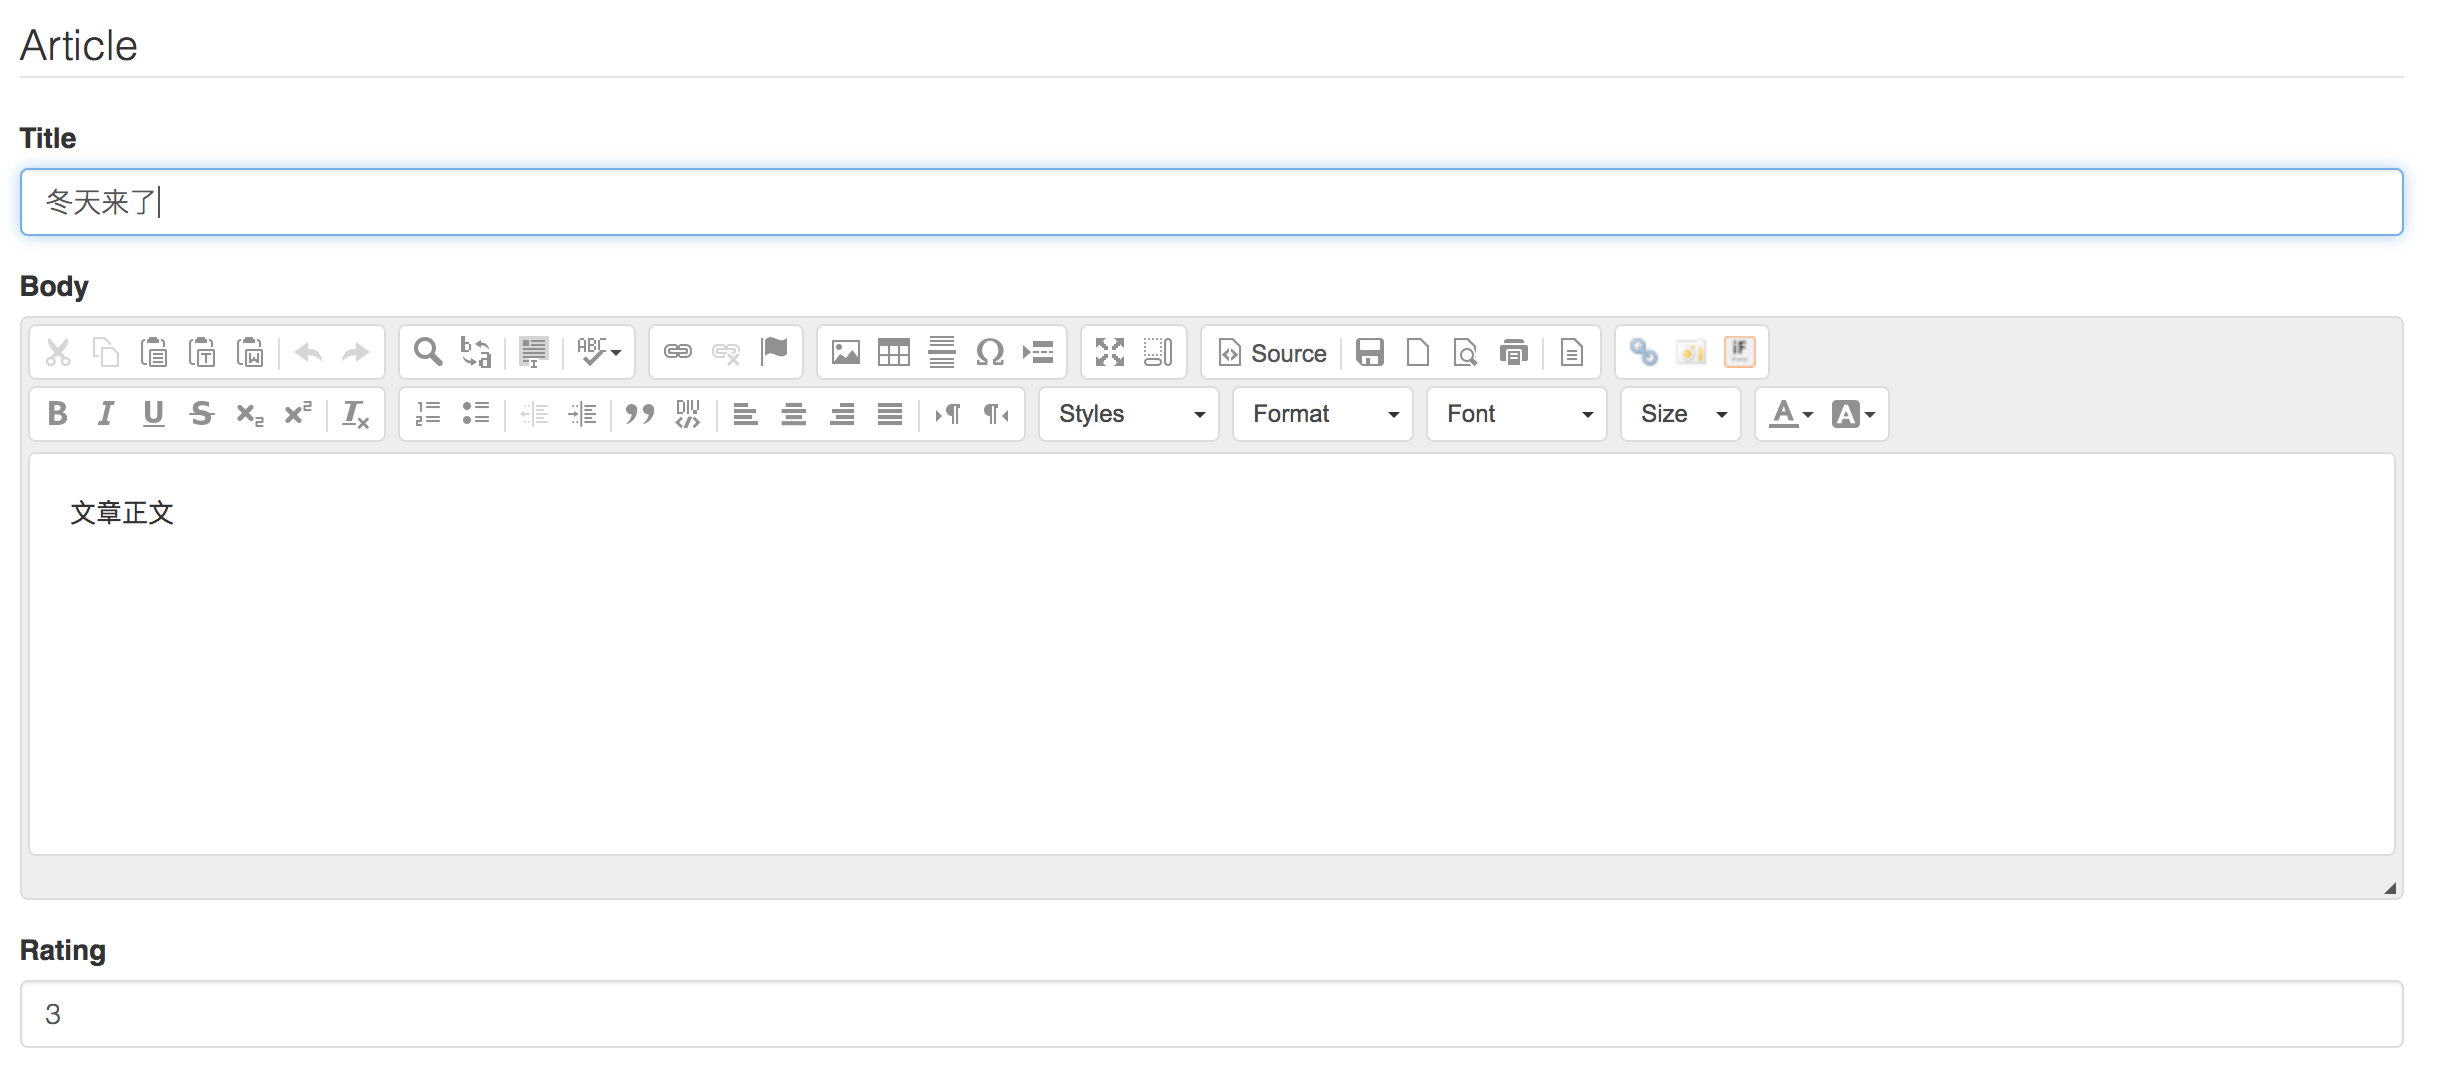
Now edit the Master Node. Set the title to Winter is Coming. Save it.
In the background, three new translations will be created - one for each locale in the project. These translations will be populated with translated content acquired via the AWS Translation Service.
Click on the Translations page to see the three translations. Inspect them and you will see the following:
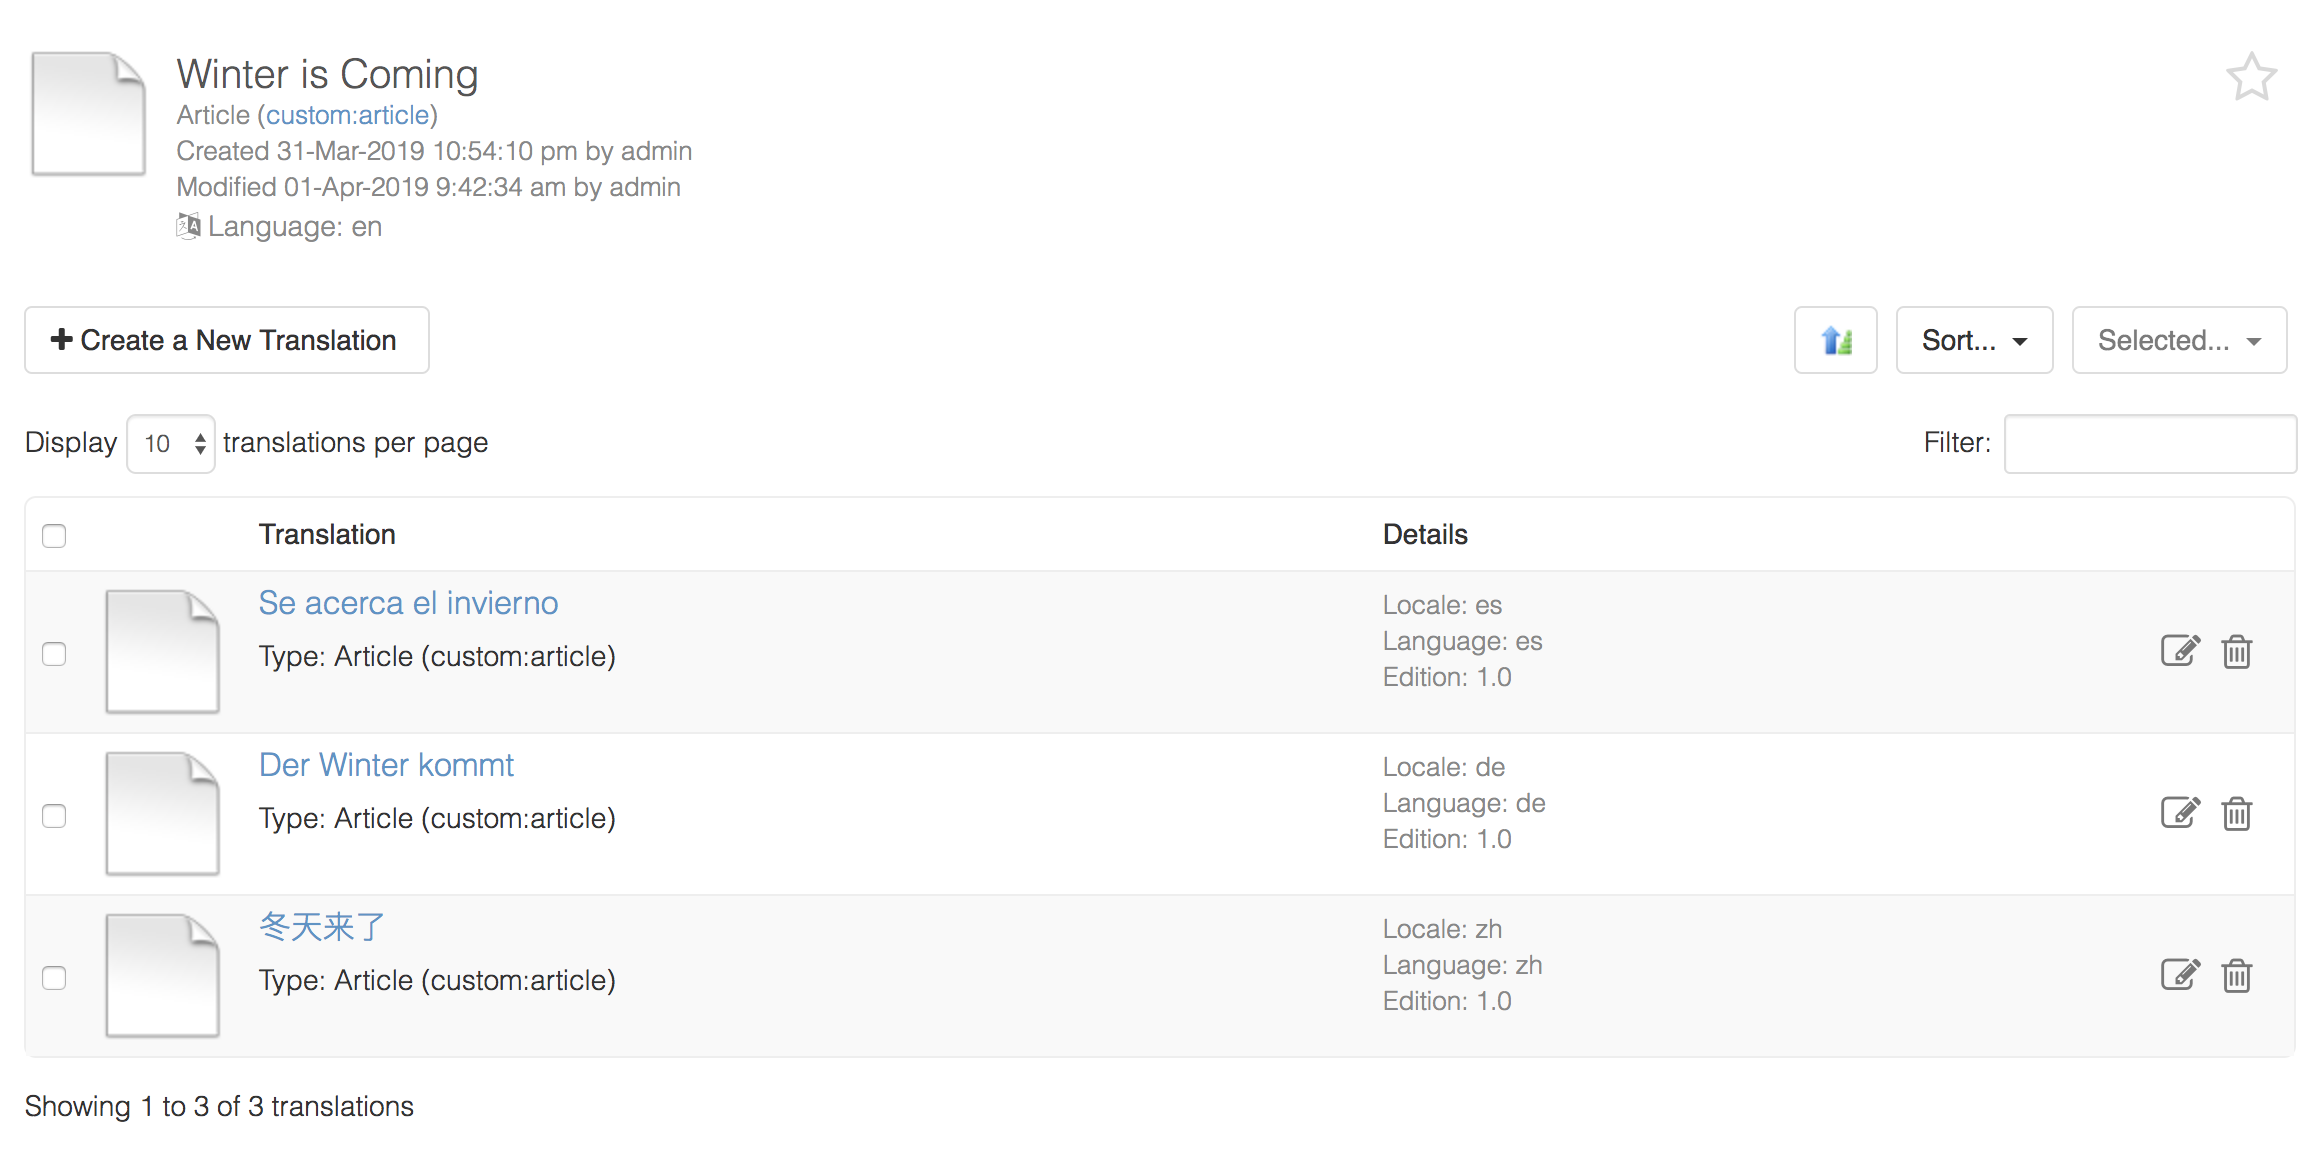
Congratulations, your content has been automatically localized.
If you click on the pencil icon for each node, you can dive in and edit the translations. This is useful if you want to make further touch-ups or changes.
In addition, your translated content is full-text search indexed. You can search for it within the project right away.