Branches
Cloud CMS offers Branches to provide editors with a way to create their own private and shared spaces where they can work on content without stepping on each other's toes.
Branches are implemented using branches to provide all of those capabilities to the editorial team, including fork, merge, differencing, compare and push/pull between branches.
Editorial users can create branches for any purpose they wish. Here are a few good uses of branches:
- A place to work on content that will be launched at the end of the week
- A place to make changes to definitions or forms needed for a new launch of your mobile app
- A place to test out some ideas that may or may not work out. If they don't work out, you just throw them away!
Branches let you build things and share them with others. You can instantly search and query for content or run GraphQL queries on top of them. And you can instantly preview the content on a branch using front-end apps that switch branch IDs.
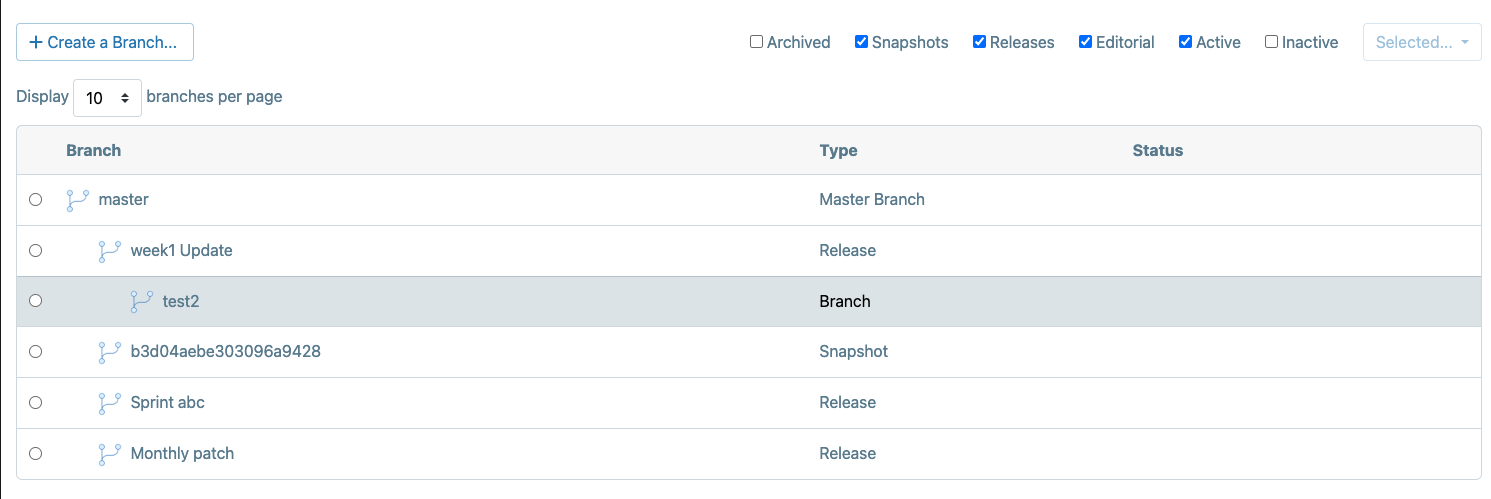
View your Branches
To see a list of the available branches, click on the Project Icon in the left Nav, then 'Branches'.
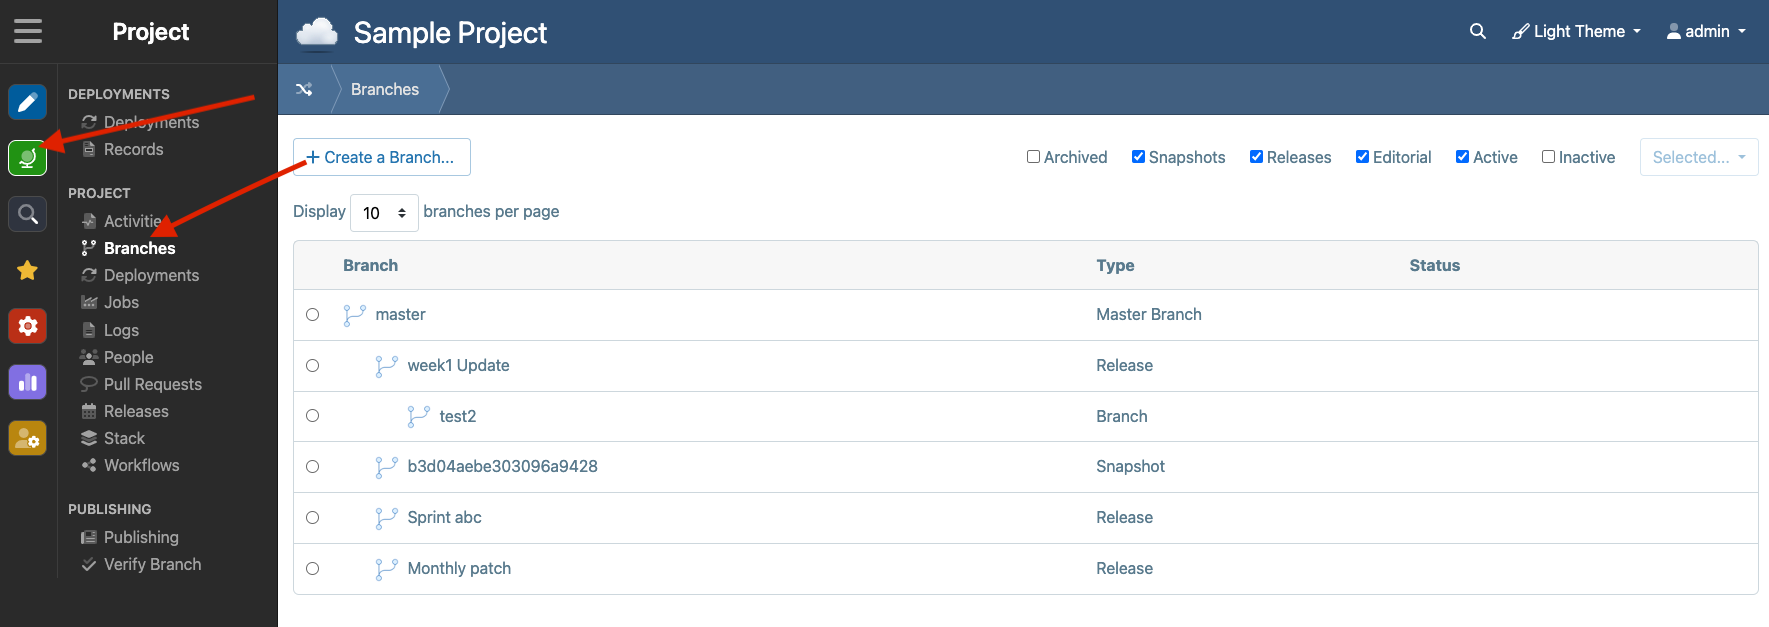
Your branches will be listed in a tree structure that reflects how branches inherit from their parents. When you create a branch, you do so by spawning off from an existing branch (in the branching mindset, this is known as "forking"). The new child branch inherits all the content from the parent branch.
Create a New Branch
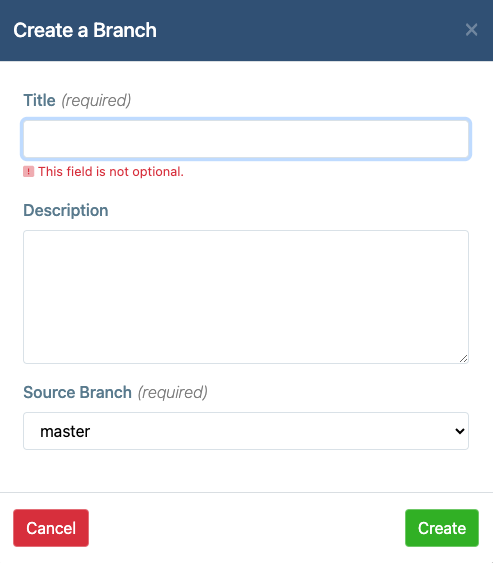
To create a new Branch, click on the 'Create a Branch' button. Provide your branch with a title and pick the parent Branch from which your new Branch will descend.
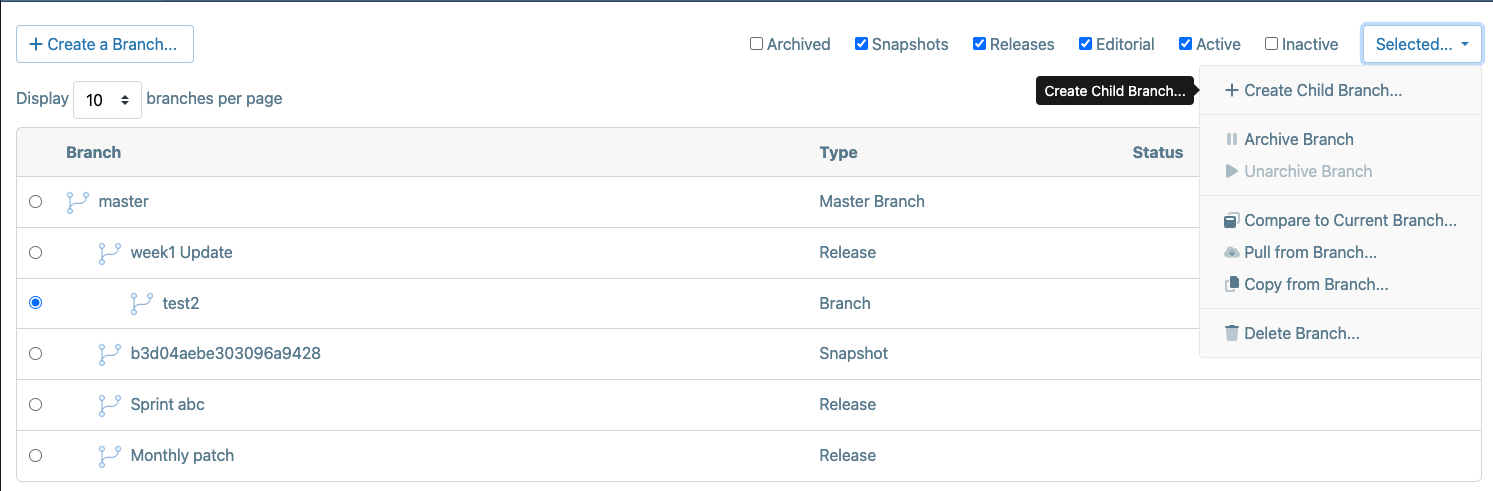
There is also a second way to create a branch. Select an existing branch and then use the Selected... dropdown and click Create a Child Branch.
Switch Between Branches
Once your Branch is created, you can switch between branches using the dropdown arrow that now appears next to the branch name in the header banner.
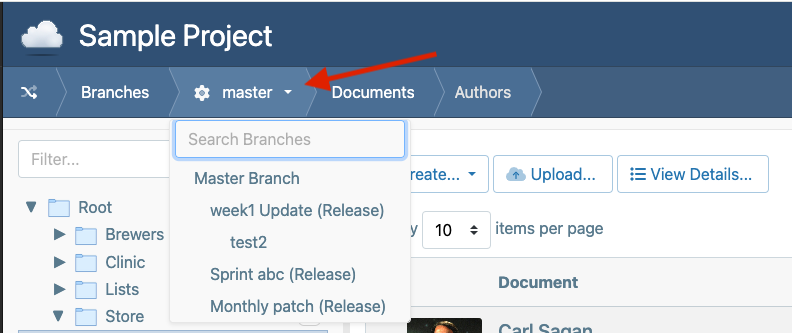
When you switch branches, the content that you see on the page will be the content for the branch. As such, you can manage multiple realities at once.
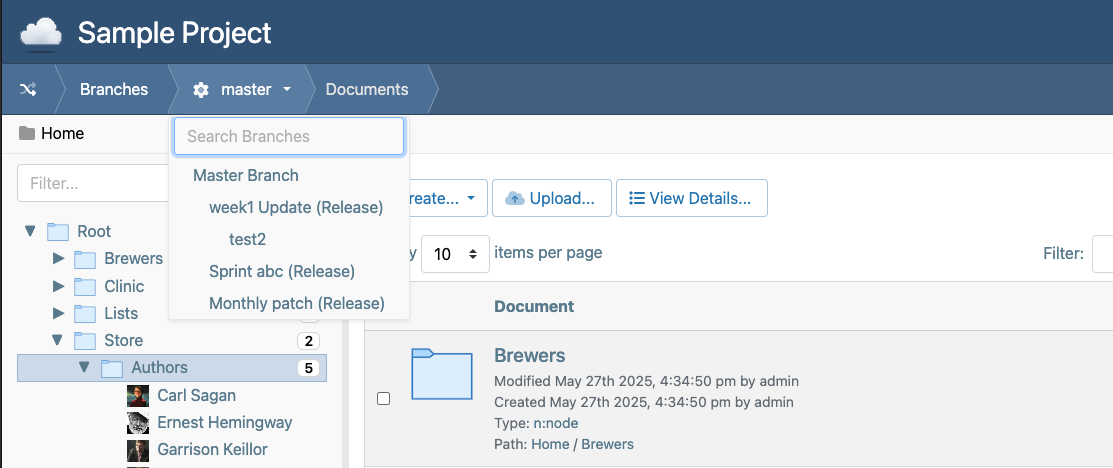
Branch Details
To view the details of your branch, click on its title on the Branches page:
You can also click on the branch name in the branch dropdown.
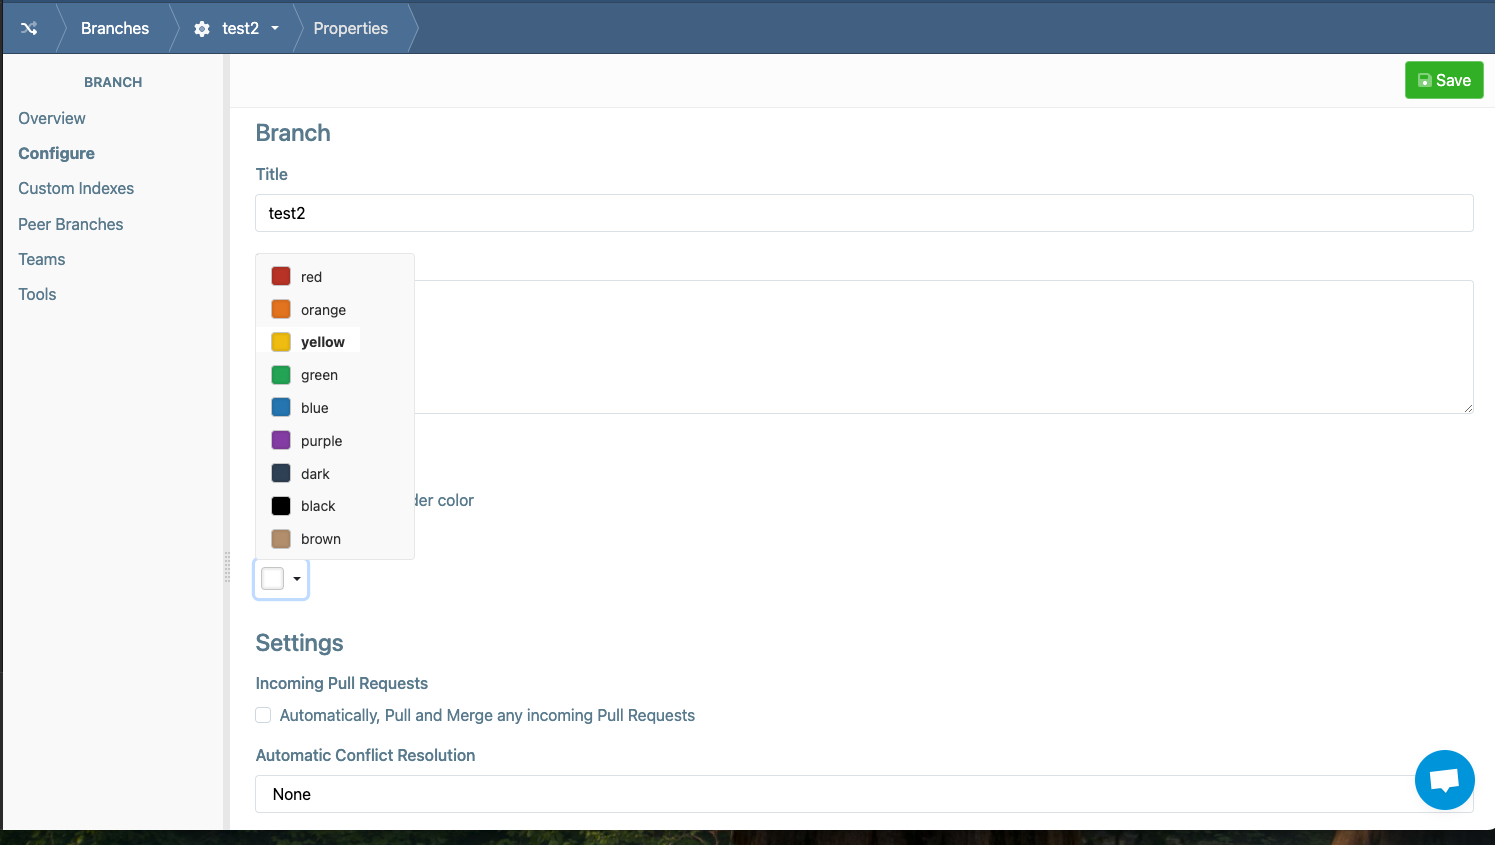
Branch Properties
Next to the branch name in the header banner, click the 'cog' icon which will open the Properties page for the branch. Various tools are available here to configure the branch. A useful configuration is to set a color for which can make it easier for users to distinguish between which branch they're working on.
Compare with Branch...
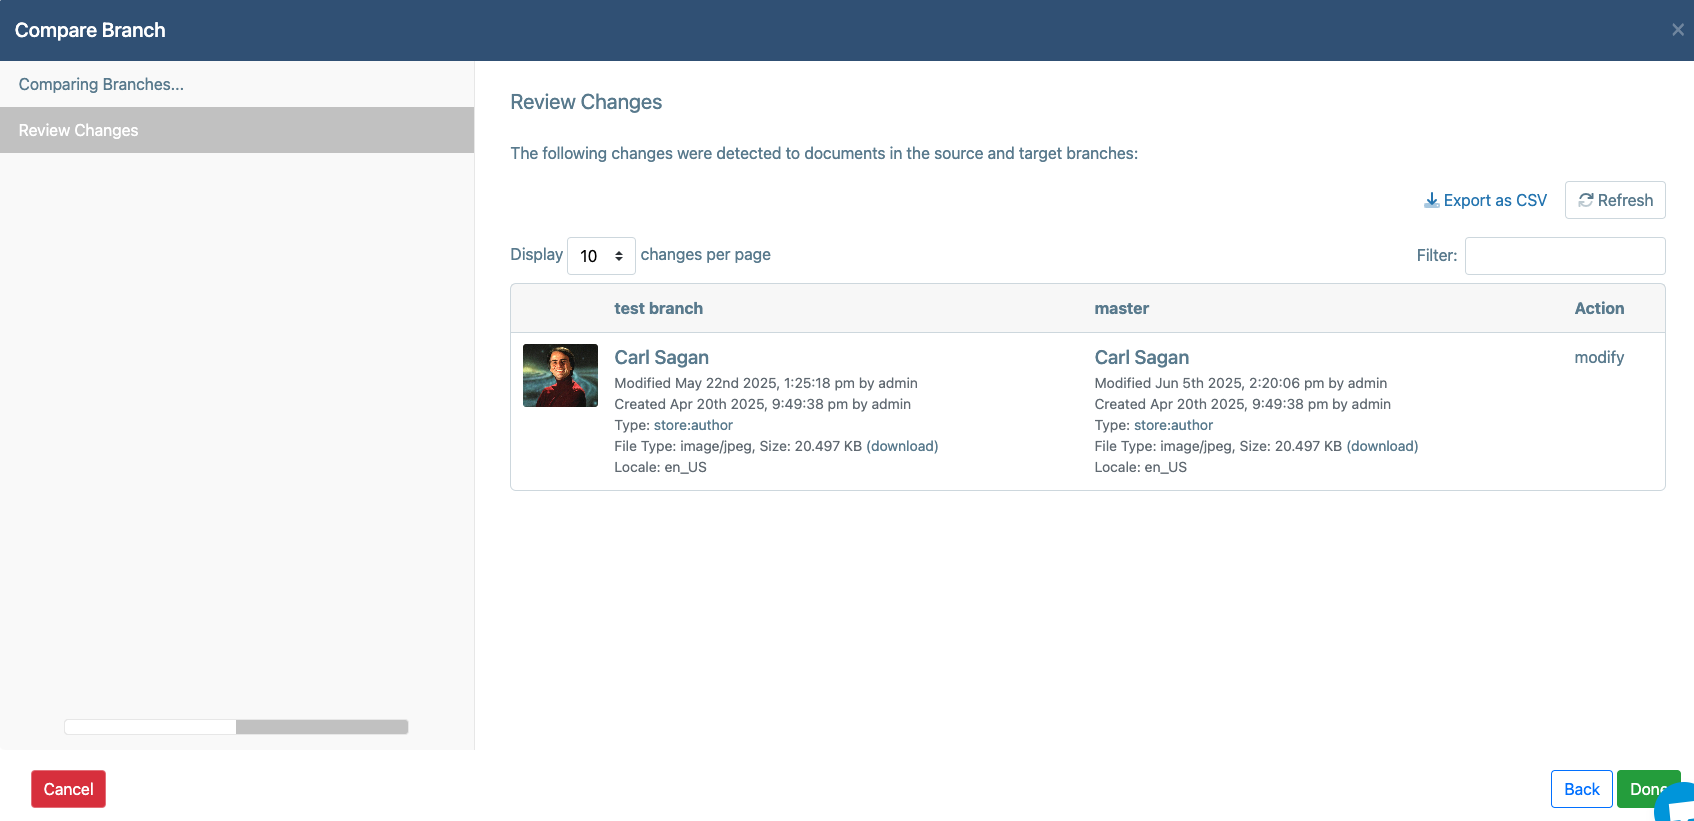
To compare the contents of another branch with your own, select the branch in the list and use the Selected... drop down and pick Compare Branch.
This launches a wizard that will show you what is different in that branch compared to your own. In effect, this gives you an idea of what content is available in that branch should you choose to cherry pick (copy things over) or pull from that branch.
Copy from Branch...
To copy content from another Branch into your own, select the Branch in the list and use the Selected... drop down and pick Copy from Branch.
This launches a wizard that will show you what is different in that branch compared to your own. You can then pick which content items you'd like to copy into your branch Click Copy to perform the copy operation.
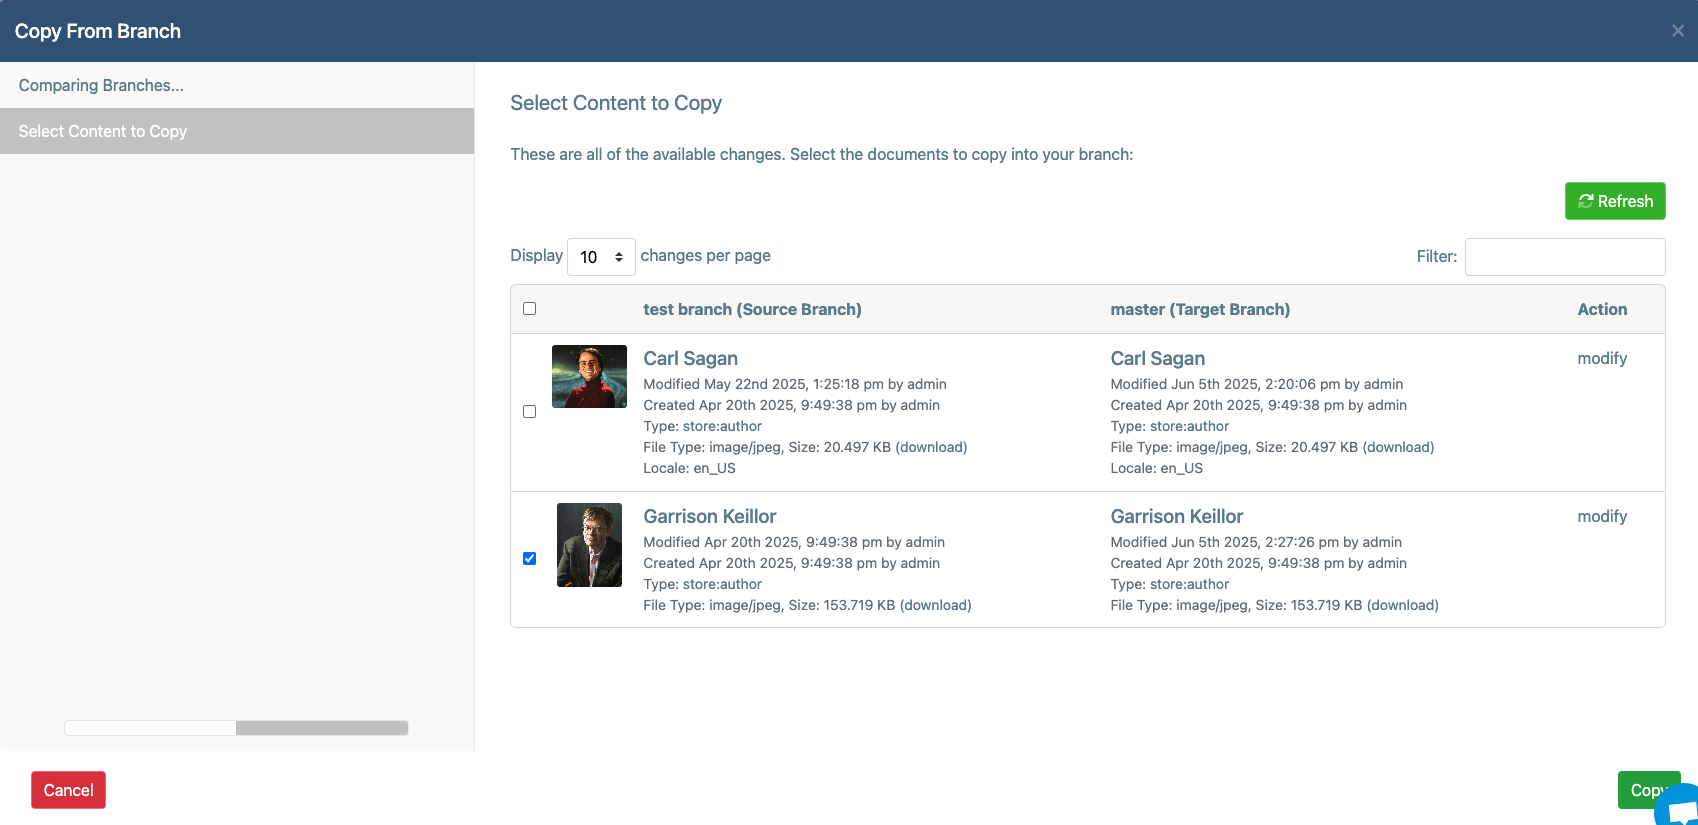
NOTE: This will copy those content items from the other branch into your own. The content items you select will overwrite the changes you've made locally on your branch.
Pull from Branch...
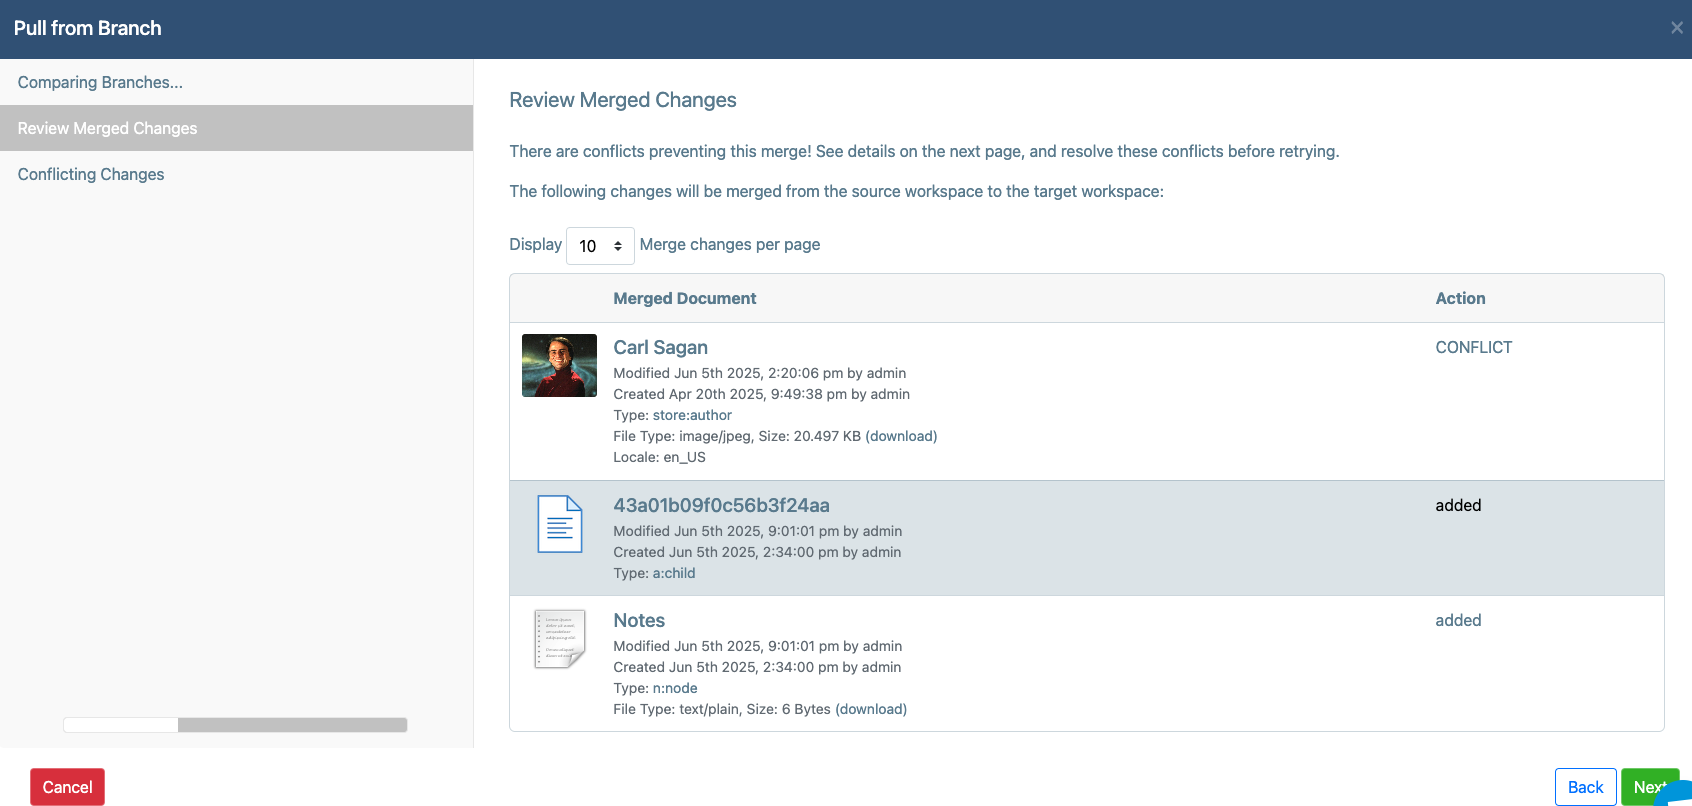
To pull content from another Branch into your own, select the Branch in the list and use the Selected... drop down and pick "Pull from Branch..."
This launches a wizard that will show you all the changes that the other Branch has relative to your own. It will then show you any Merge Conflicts that may be produced as a result of these changes being pulled.
This screen shows you the changes that are available on the incoming Branch and also any Merge Conflicts that may occur as a result of the pull:
Pulling is a powerful option that is useful when collaborating across Branches where changes are being made quickly and often across the same sets of content. In these cases, it is tough to avoid stepping on each other's toes. You may make a change to something that someone else also changed and you didn't know and they didn't know and it is nobody's fault and we're all human. Kumbaya.
In those cases, you can pull and Cloud CMS will create Merge Conflicts. These identify where you're stepping on each other toes and then give you the option to work with the other person to figure out which changes should be kept. It's neat and organized and, essentially, lets you defer the problems until the point that you actually push or pull.
Merge Conflicts
If you pull from another Branch, it's possible for Merge Conflicts to be created. A Merge Conflict is created when there was a change on the other Branch that conflicts with a similar change on your own Branch. In this case, Cloud CMS doesn't know which change to keep. It lets you make that decision.
Merge Conflicts are normal. They don't mean that something did not work. In fact, quite the opposite. They mean that Cloud CMS understands that you're trying to bring someone else's changes into your own. However, to do so, Cloud CMS needs to resolve a conflict.
Let's consider an example. Suppose that there is an Article out there with a title on it, like this:
{
    "title": "My Article"
}
Two branches are created. On Branch A, the title is changed to My Article A. And on Branch B, the title is changed to My Article B.
Now suppose Branch A tries to pull in the changes from Branch B. Cloud CMS will attempt to do so by seamlessly stitching the content from Branch B into Branch A. In this case, however, the article on Branch B cannot be seamlessly stitched into Branch A because both branches have a conflicting change to the article. Specifically, both Branches have changed the title property.
Thus, Cloud CMS doesn't know which one you want keep. It can't keep both. One must win out over the other.
As such, a Merge Conflict will be created. The managers of both Branches will see this Merge Conflict and will have the option to resolve it. They may resolve it by keeping one value or the other. Or they may resolve it by changing it to a third value.
Pulling a Branch
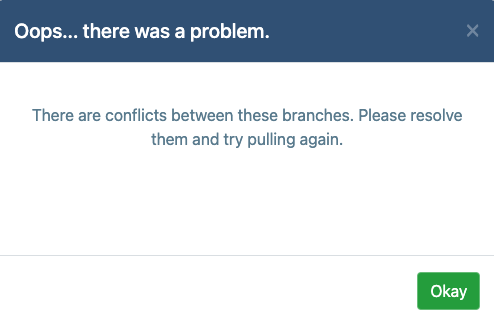
When you pull the contents of another Branch into your own, the Pull wizard will inform you whether any Merge Conflicts will be created:
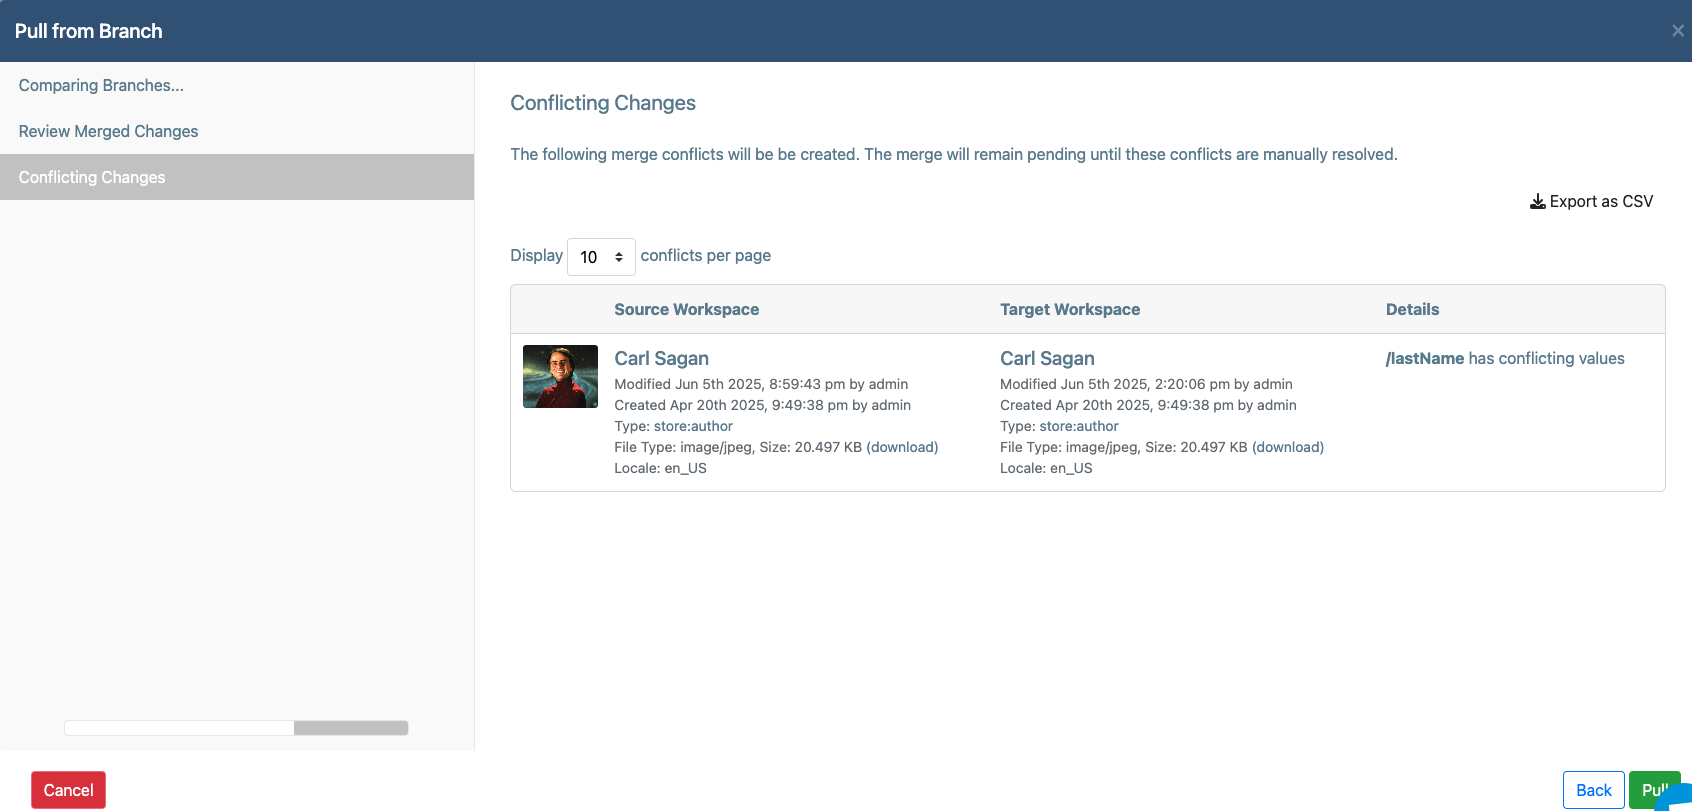
When you click "Pull", the Pull Wizard will let you know that Merge Conflicts were created:
Pending Merges
If your Branch has merge conflicts, you'll see a new menu option on the left-hand menu:
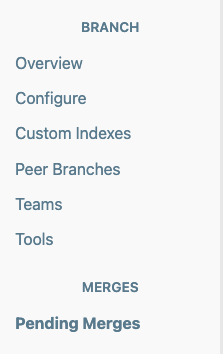
Click on "Pending Merges" to view the other branches that have pending Merge Conflicts. These indicate an incomplete merge and show you places where work remains to be done:
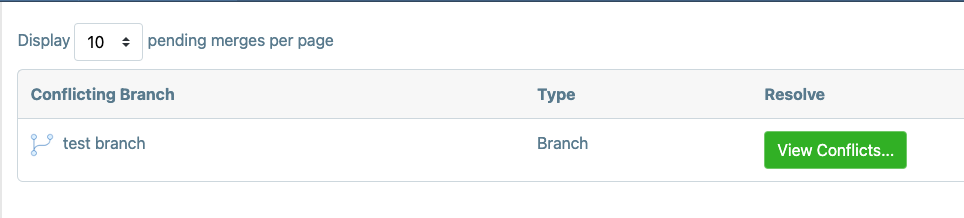
Click on "Resolve Conflicts" to work on the conflicts on a per-document basis.
Pending Merge Conflicts
This screen shows you all the content items that are in conflict. You must resolve these conflicts on a per-document basis in order to complete the merge.

- The left-hand column ("Local") shows you information about the content item as it exists in your branch.
- The center column ("Conflicting") shows you information about the content item as it exists in the other branch.
You will also see details that inform you about exactly which properties are in conflict.
- Any details in red identify properties that are unresolved.
- Any details in green identify properties that are resolved.
Click on the "Resolve..." button to work on a conflict.
To resolve a conflict, you must manually compare the differences between the content in your Branch (Local) and the other Branch (Conflicting). There are two ways to do this:
- Visual Conflict Resolution
- Manual Conflict Resolution
Visual Conflict Resolution
The first option is Visual Conflict Resolution. Click on the "Visual" tab to see this:

The issue is described on the left-hand side. You are then presented with the option to keep the Local value or the Conflicting value.
To keep your own value, click on "Keep My Version":

To keep the value from the other Branch, click on "Keep Their Version":

Once you've picked your resolutions, click on "Save Resolutions".
Manual Conflict Resolution
The second option is Manual Conflict Resolution. Click on the "JSON" tab to see this:
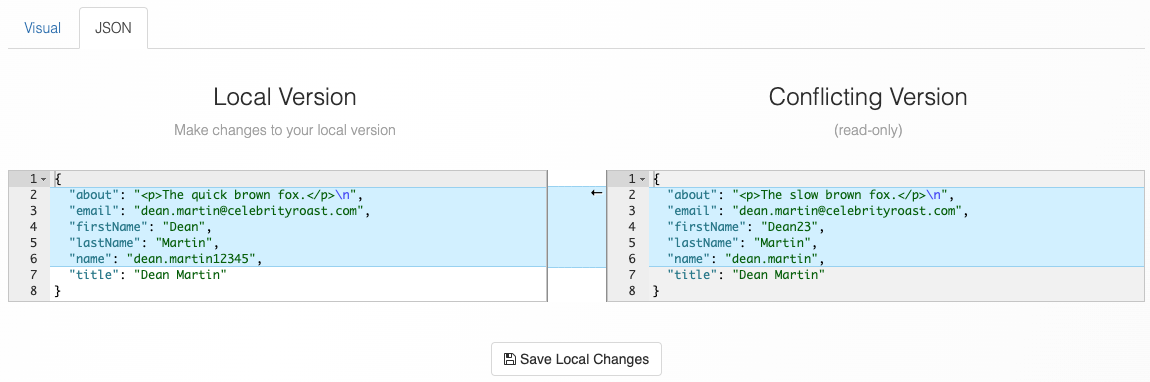
The right-hand side shows the content (in JSON format) for the conflicting version. This is read-only. The left-hand side shows your local content. You can change this.
Make adjustments to your content and then click "Save Local Changes" to apply them.
Re-Attempting the Merge
After you've picked your resolutions (using the Visual approach) or adjusted your local content (either via the JSON tab or via other means), you can re-attempt the merge.
Click on the "Retry Merge" button to re-attempt the merge.
In the majority of cases, you may need to retry the merge a few times before you get all your Merge Conflicts resolved. This is perfectly fine. You're free to make adjustments, retry the merge and iterate like that as you whittle down your Merge Conflicts.
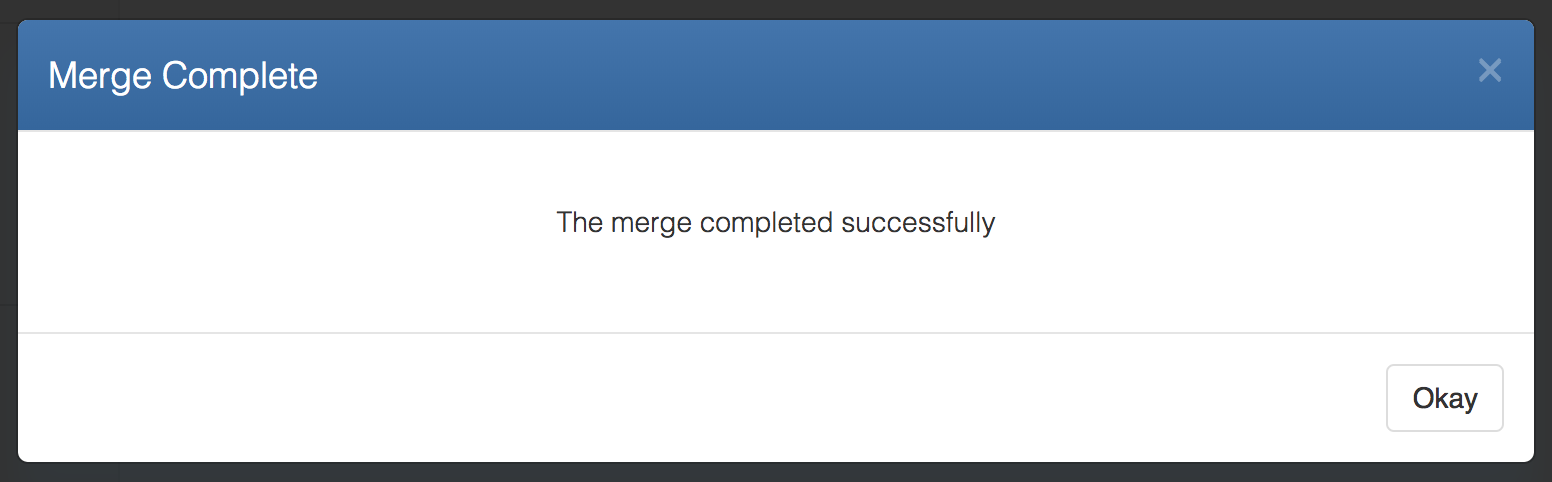
Eventually, the Merge will succeed and you'll get a message like this: