Module Installation
The Cloud CMS Application Server can also be run as a custom Node.js application. It is available as a Node.js module that you can require() in from npmjs.org. The server features a number of extension points that you can utilize to wire in new functionality or extend the framework.
Getting Started
Here is a simple example where we start up the Application Server from within a Node.js application:
var server = require("cloudcms-server/server");
server.start();
The start() method takes an optional configuration object as an argument that can be used to configure and set up the features and services available within the framework.
// start up the server with wcm (web content management) enabled
var server = require("cloudcms-server/server");
server.start({
    "wcm": {
        "enabled": true
    }
});
Configuration
You need to tell the Cloud CMS Application Server about your Cloud CMS account. Specifically, you will need to go into your Cloud CMS tenant's user interface and create a Project. A Project is where you store all of your content.
Within your Project, create an Application. The Application will come with a default deployment and a default set of API Keys. You can access these API Keys from the "API Keys" navigation item on the left-hand side of the page.
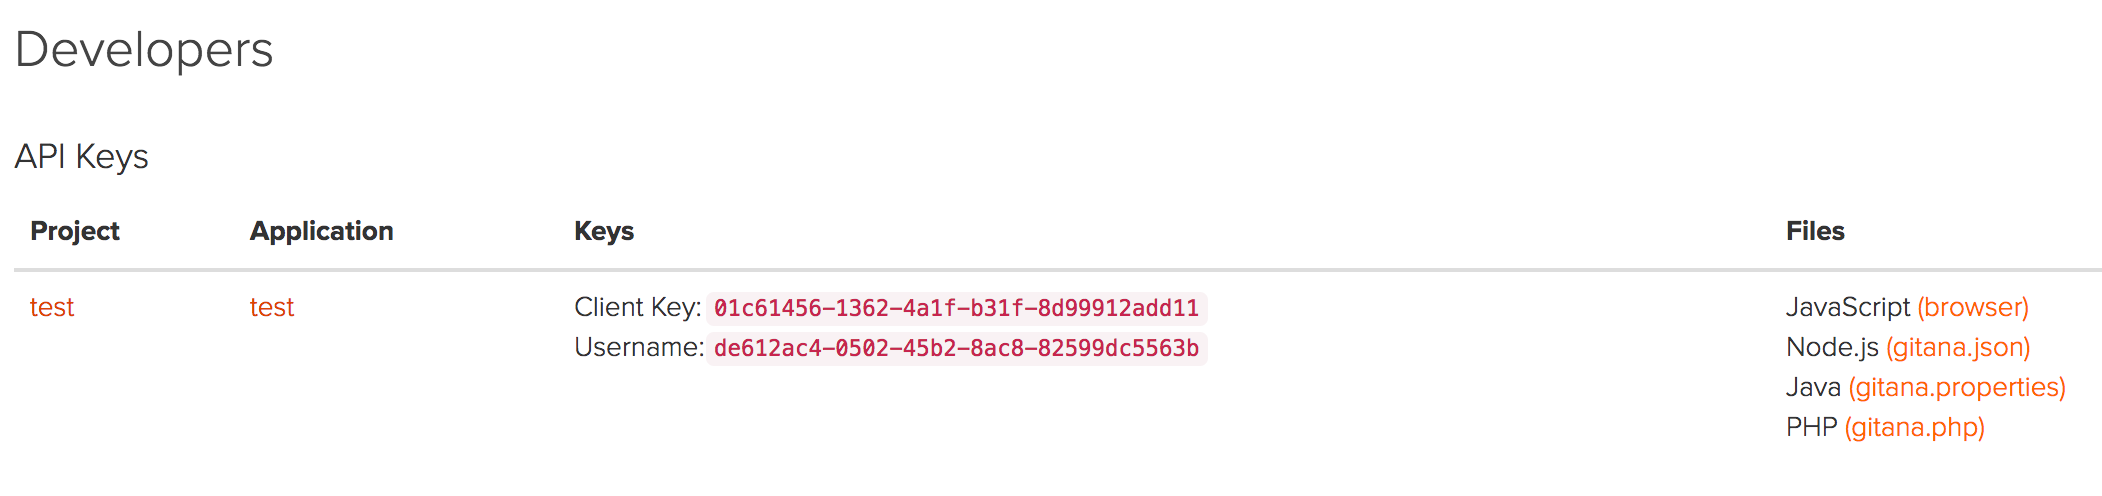
Click on gitana.json to view the keys.
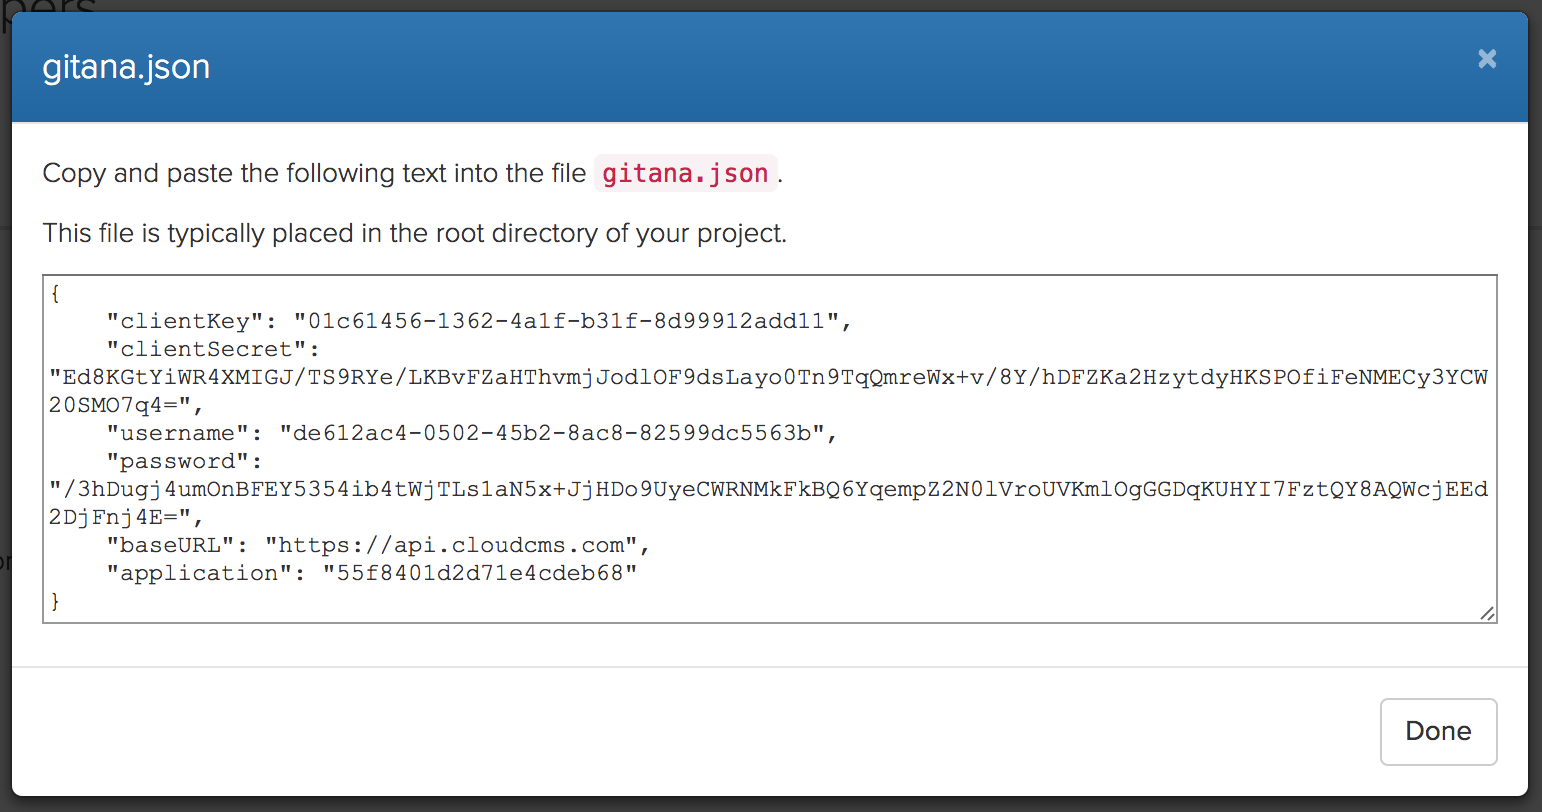
Copy and paste the contents to a file called gitana.json in the current directory. The gitana.json file should sit alongside the app.js file.
Customize the Express App
When the server instance starts up, it calls through a chain of configuration functions that are able to configure the underlying Express app instance.
You can register a configuration function using the configure(function(app, callback) { }) method. The callback must be fired once your code completes.
server.configure(function(app, callback) {

    // set up the app instance
    app.abc = 123;

    // fire the callback
    callback();
});
Customize Web Sockets
If you've enabled web sockets, then the underlying socket.io connect event will fire for every browser or mobile app connection that is started up. You can use the sockets(function(socket, callback) { }) function to configure sockets before they are used.
The callback must be fired once your code completes.
server.sockets(function(socket, callback) {

    // send a hello message to the client
    socket.emit("hello", {
        "message": "Hello World"
    });

    // fire the callback
    callback();
});
Customize Routes
The routes(function(app, callback) { }) function provides a place where you can register conventional Express routes. These includes handlers for GET and POST method calls and so forth.
The callback must be fired once your code completes.
server.routes(function(app, callback) {
    app.get("/hello", function(req, res) {
        res.send("Hello World").end();
    });
    callback();
});
Customize Driver
The driver(function(app, callback) { }) function provides a place where you can register functions that can dynamically set the req.gitanaConfig driver configuration that will be used by the framework. By setting this variable to your desired driver configuration, the driver will automatically be connected and methods such as req.branch() will be available to middleware functions downstream.
The callback must be fired once your code completes.
Here is an example where we might have two driver configuration files on disk (gitana1.json and gitana2.json) and we pick one based on a request parameter:
server.driver(function(app, callback) {

    app.use(function(req, res, next) {

        var preview = req.query["preview"] === "true";
        var filename = (preview ? "gitana2.json" : "gitana1.json");

        req.gitanaConfig = JSON.parse("" + fs.readFileSync("./" + filename));

        next();
    });

    callback();
});
Customize Dust
The Application Server uses the LinkedIn Dust.js engine to provide layouts, templating and component rendering. You may wish to register custom Dust handlers or customize the Dust engine. Use the dust(function(app, dust, callback) { }) function to customize Dust before it is used.
The callback must be fired once your code completes.
Here is an example where we register a new @sample helper Dust tag.
server.dust(function(app, dust, callback) {

    // utilities
    var support = require('cloudcms-server/duster/support')(dust);
    var end = support.end;

    // sample dust helper
    dust.helpers.sample = function(chunk, context, bodies, params)
    {
        return support.map(chunk, function (chunk) {

            // message
            var message = context.resolve(params.message);

            // write and end this chunk
            chunk.write(message);
            end(chunk);
        });
    };

    callback();

});
This helper function can then be used within your HTML pages like this:
{@sample message="Hello World" /}
Before Server Startup
Use the before(function(app, callback) { }) method to provide handlers that should run before the server binds to the port (i.e. before the server comes online).
The callback must be fired once your code completes.
server.before(function(app, callback) {
    console.log("The server is about to start!");
    callback();
});
After Server Startup
Use the after(function(app, callback) { }) method to provide handlers that should run after the server has started. This code runs once the port has been bound and the server is handling requests.
The callback must be fired once your code completes.
server.after(function(app, callback) {
    console.log("The server has started!");
    callback();
});
Post Startup Report
Depending on how you have things set up, the server will start up either on a single CPU or on multiple CPUs using the Node.js cluster module. If started on multiple CPUs, the before and after methods will run once per CPU. This means that the "The server has started!" message from above may print multiple times - once per CPU.
In some cases, you may wish to provide a callback that only runs once all of the servers have started on all of the available CPUs. Use the report(function(callback) { }) method to register a callback that will be fired exactly once when all servers are online.
This is frequently useful for reporting and/or logging the startup of your server. Hence the name!
The callback must be fired once your code completes.
server.report(function(callback) {

    var cpuCount = require('os').cpus().length;

    console.log("Hello World - running on: " + cpuCount + " cpus");

    callback();

});
Store Values
The server object provides get and set methods for storing key/value pairs on the server instance. You can use this as you wish and as a means for retrieval later within custom services.
// set a value onto the server
server.set("host", "http://www.cnn.com");

// get a value from the server
var host = server.get("host");
Error Pages
If something goes wrong within any of the interceptors or handlers in the request processing chain, an error will be thrown. You can register error pages to handle these errors and produce meaningful messaging to your front end users about what went wrong.
server.error(function(app, callback) {

    // send a 503 back to the user
    app.use(function(err, req, res, next) {
        res.status(503);
        res.send("Phooey. An error occurred: " + err.message);
    });

    callback();
});
If you don't provide any custom error pages, the server will default to using the default error page for Node Express. This shows a stack trace and a print out of what went wrong.