CK Editor
ID: ckeditor
The ckeditor field renders the popular CKEditor HTML control. This offers a fully-featured HTML editor on top of a string schema type. It is ideal for situations where you wish to provide your editorial team with the ability to edit HTML visually and offers a large range of plugins and behaviors that you can customize.
For basic information of what is possible in terms of configuring this field type, please view the Alpaca Forms documentation for the CKEditor field.
Configuring CKEditor
To configure CKEditor in your forms, you just need to set the field type to ckeditor. Suppose we have a form with a property named body of type string. The definition might look sort of like this:
{
    "title": "my:article",
    "type": "object",
    "properties": {
        "body": {
            "title": "Body",
            "type": "string"
        }
    }
}
We can use CKEditor for the body field by declaring our form like this:
{
    "fields": {
        "body": {
            "type": "ckeditor"
        }
    }
}
Here is an example of the CKEditor field at work:
We can then customize CKEditor by passing in configuration information to the underlying CKEditor control using the ckeditor attribute. Here is an example where we customize the toolbar:
{
    "fields": {
        "body": {
            "type": "ckeditor",
            "ckeditor": {
                "toolbar": [
                    ["Format", "Font", "FontSize"],
                    ["Bold", "Italic", "Underline"],
                    ["Image", "Table", "Source", "cloudcms-image"]
                ]
            }
        }
    }
}
For information on what kind of configuration you can pass to CKEditor, we advise you to look through and become familiar with the CKEditor Developer Guide". The configuration options are provided in full here.
Cloud CMS Plugins
In addition to the core plugins offered by the CKEditor field, Cloud CMS offers out-of-the-box extension plugins that give your editorial team the ability to do things like pick from images, files and nodes within Cloud CMS to present and link within the HTML.
In most cases, these plugins are enabled out-of-the-box meaning that the default toolbars that Cloud CMS configures will have these controls enabled when appropriate. However, you can also enable them manually or add them to your custom toolbar sets by identifying them by their plugin name.
To configure these plugins, you will generally follow a pattern like this:
{
    "fields": {
        "body": {
            "type": "ckeditor",
            "ckeditor": {
                "<pluginName>": {
                    ...plugin config
                }
            }
        }
    }

}
The following plugins are available:
Cloud CMS Image Plugin
Plugin Name: cloudcms-image
This plugin lets you insert an image from your current Cloud CMS branch into the editor. It provides a configurable modal screen with a picker for selecting the image node. It also lets you specify an optional link to wrap around the image so that you can surface a Cloud CMS document upon click.
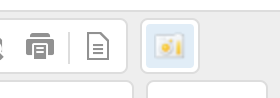
The Cloud CMS Image Plugin docs in your toolbar like this:
A configuration is optional. By default, the following configuration is used:
{
    "cloudcms-image": {
        "imagePickerType": "file-picker",
        "imagePickerConfig": {
            "initialContainerPath": "/",
            "mimetypeRegex": "image\/([^;\s]+)"
        },
        "imageClass": "",
        "enableAltText": false,
        "enableLink": false,
        "linkPickerType": "file-picker",
        "linkPickerConfig": {
            "initialContainerPath": "/"
        },
        "linkClass": ""
    }
}
This is the full configuration block to pass into the CKEditor control. The cloudcms-image outer element lets you define specific configuration just for the Cloud CMS Image plugin (versus more global CKEditor settings).
The properties are these:
imagePickerType- the kind of picker (usually node-picker, file-picker) or one of the other picker types available within Cloud CMS.imagePickerConfig- the optional configuration for the picker (see each picker's respective documentation)imageUploadPath- an optional path where images should be placed when uploaded (defaults to the root directory "/").imageClass- a space-separated list of CSS classes to apply to the generated IMG tag.enableAltText- whether to provide a text field for editors to fill in the IMG alt attribute.enableLink- whether to let editors make the image clickable and, if so, specify the target linklinkPickerType- the kind of picker (usually node-picker, file-picker) or one of the other picker types available within Cloud CMS.linkPickerConfig- the optional configuration for the picker (see each picker's respective documentation)linkClass- a space-separated list of CSS classes to apply to the generated A tag.hideUploadButton- determines either to hide the 'Upload...' button or not.
The default configuration appears like this:

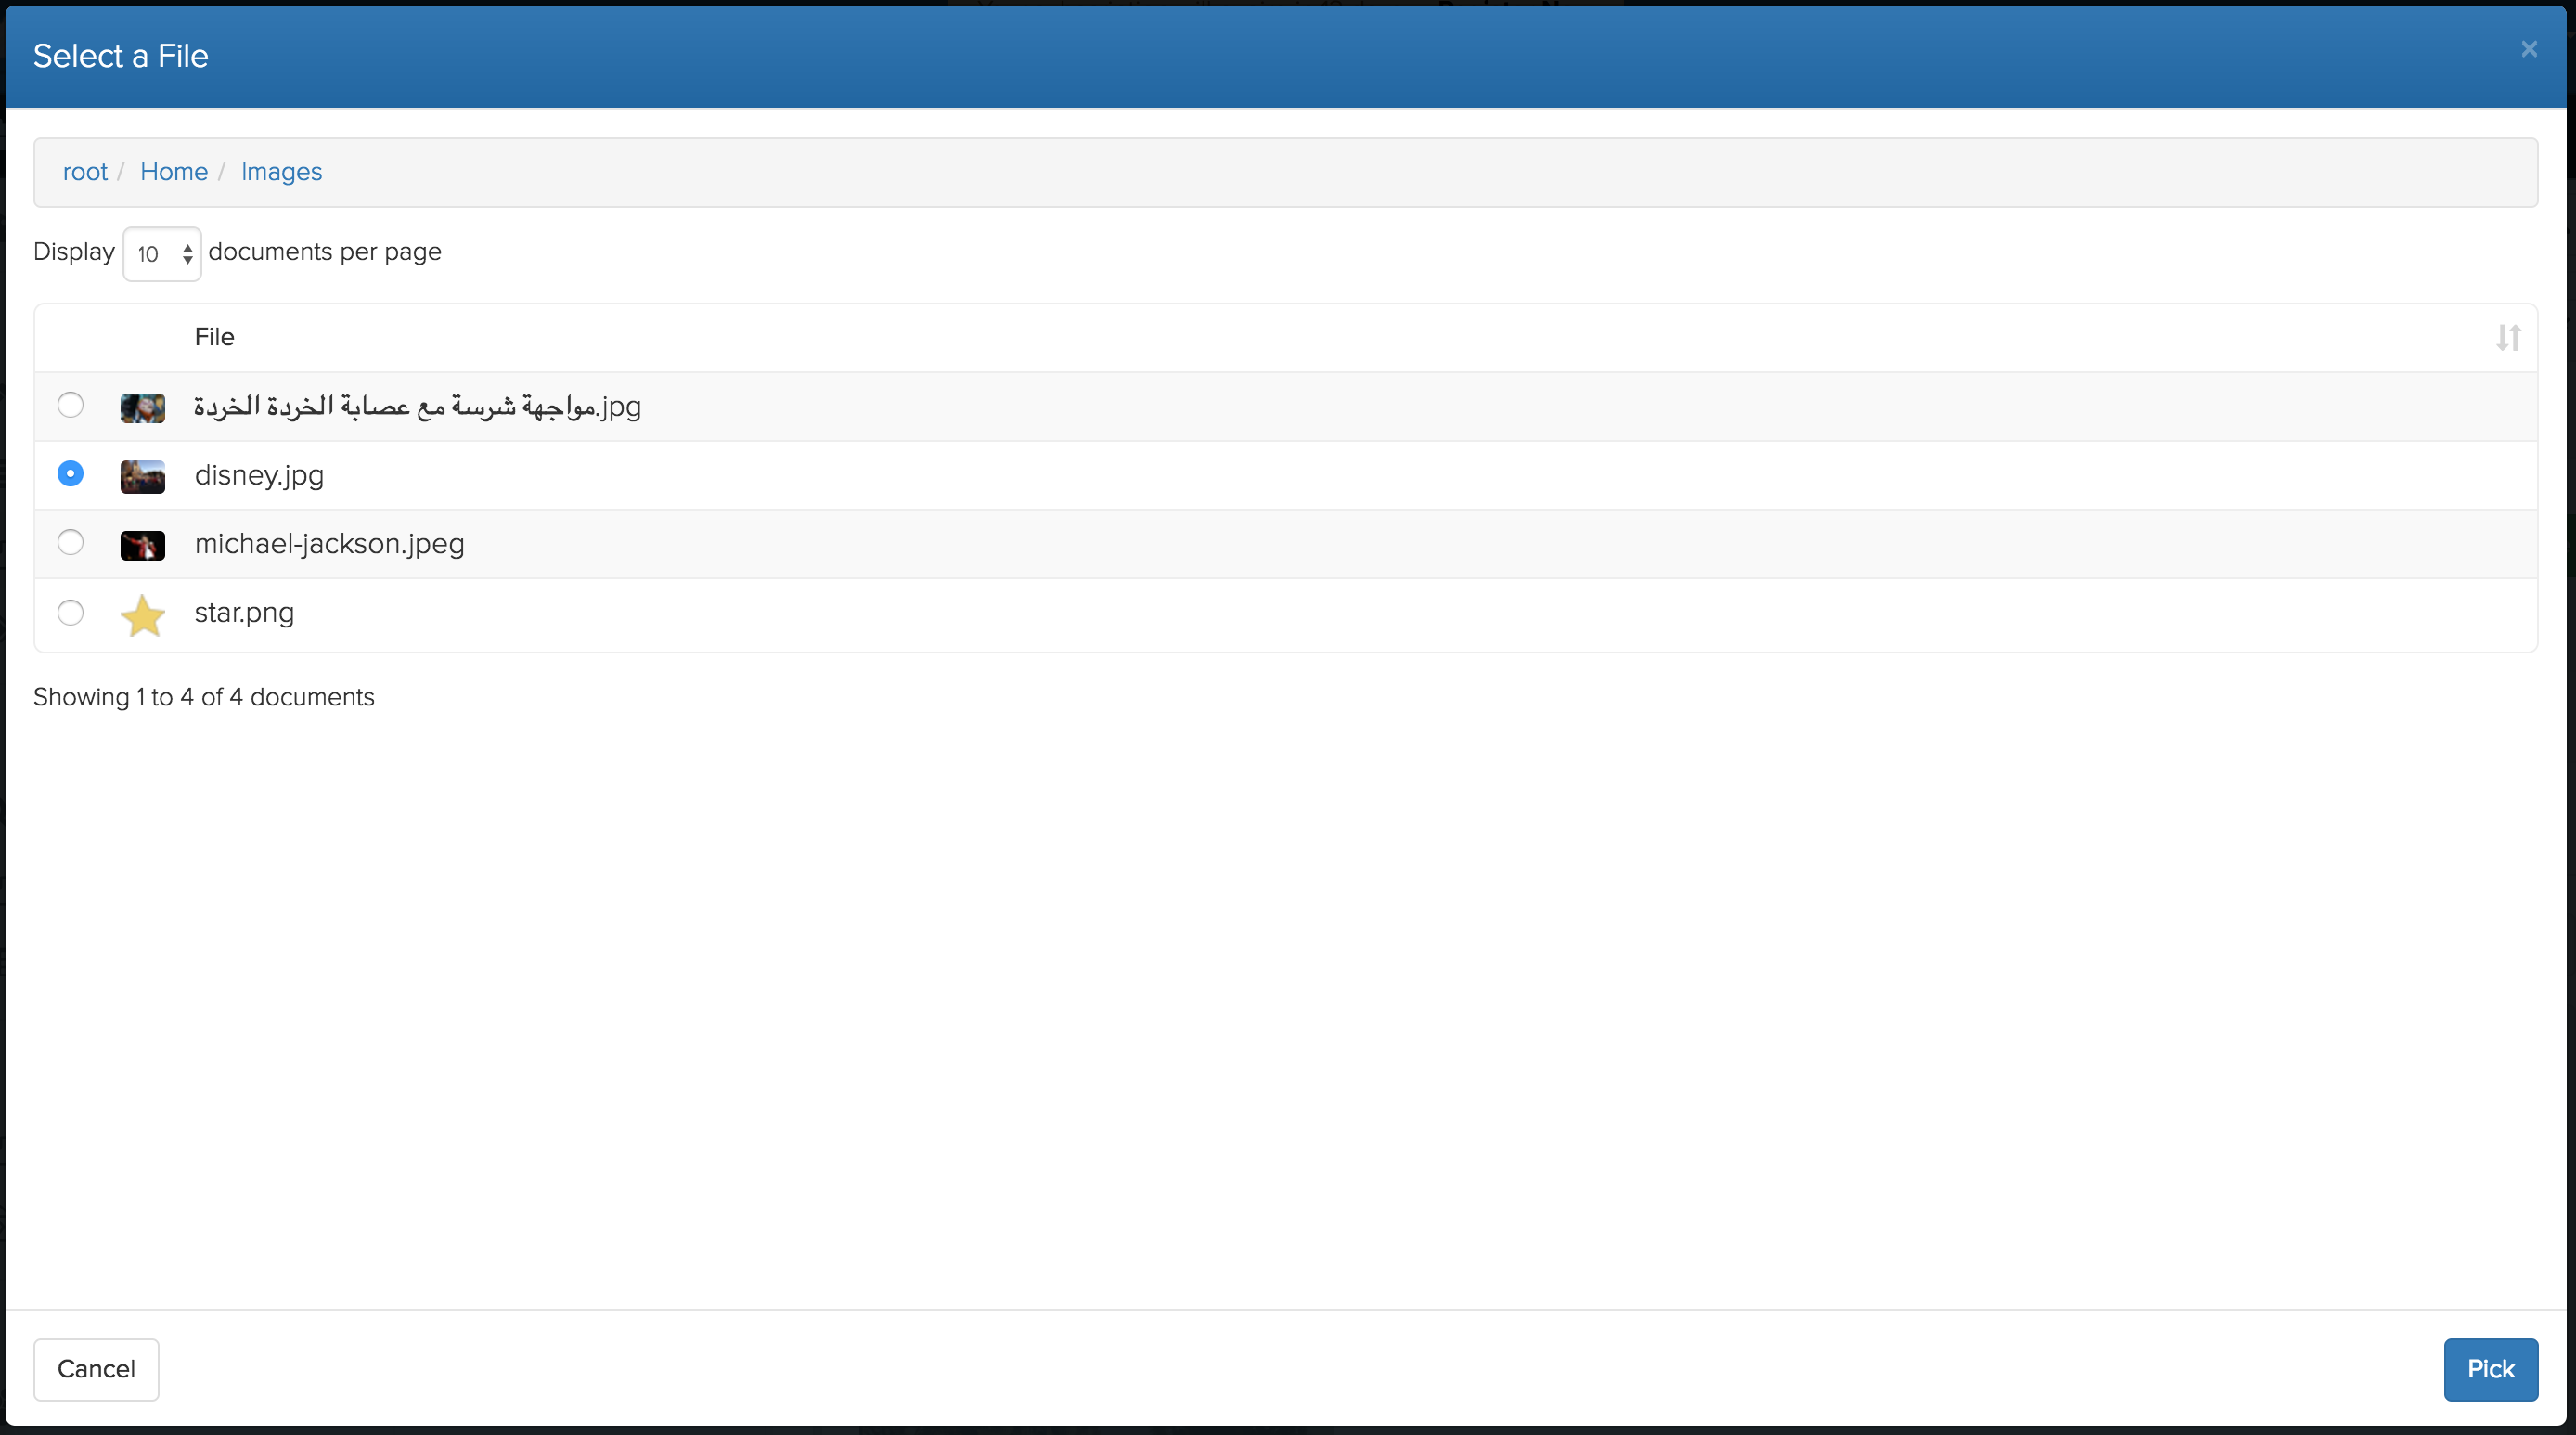
A File Picker is configured by default. The file picker provides folder-based traversal and discovery of nodes. It opens as a modal and provides a navigation experience that looks something like this:
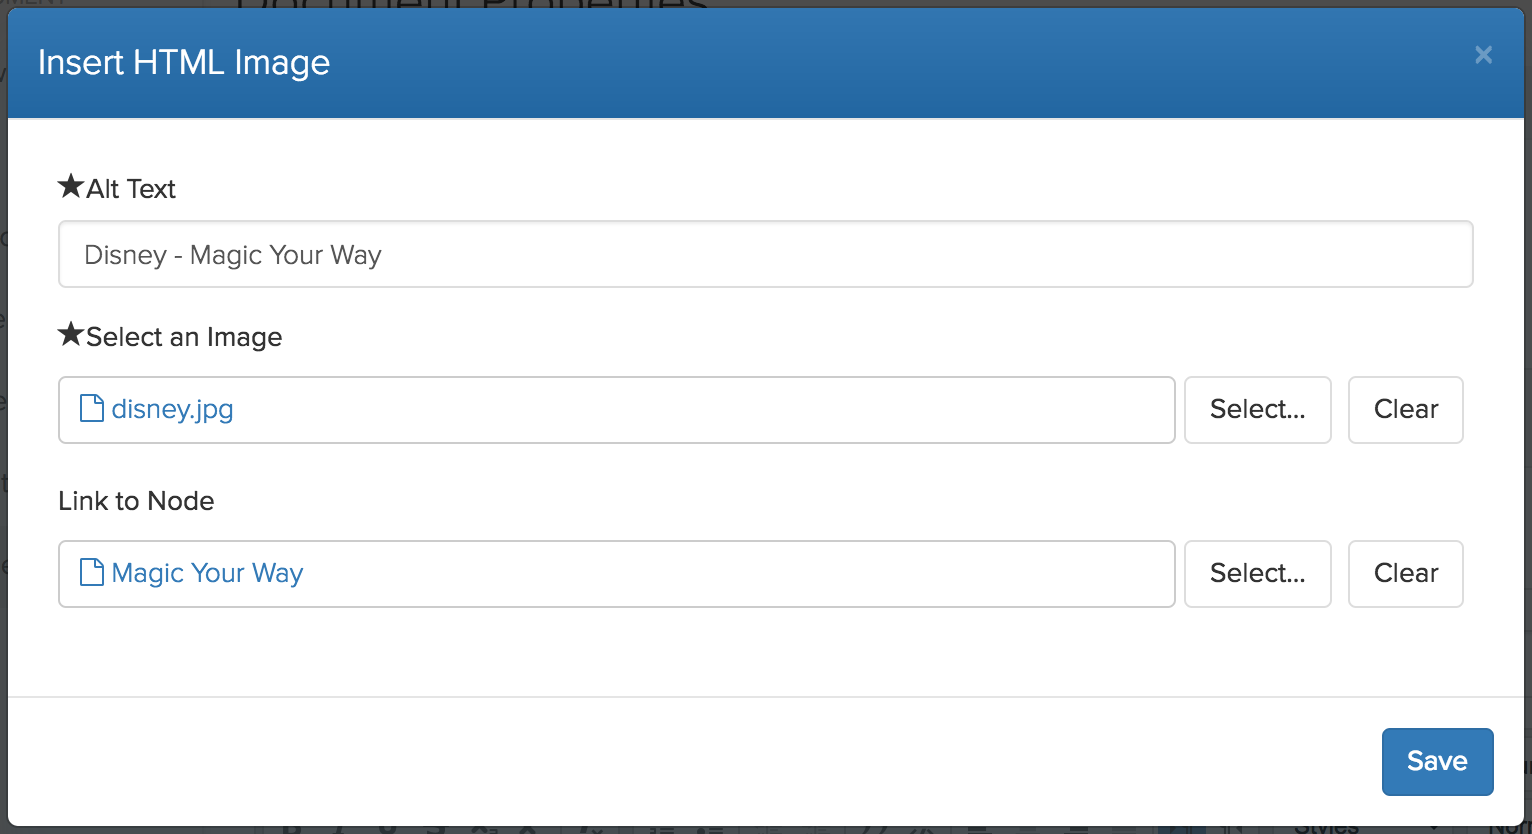
Using the configuration attributes above, you can turn on additional link target selection and the alt-text property. Here is an example of an alternate configuration for the plugin at work:
Here is an example of how your form might look with a CKEditor field configured:
{
    "fields": {
        "body": {
            "type": "ckeditor",
            "ckeditor": {
                "toolbar": [
                    ["Format", "Font", "FontSize"],
                    ["Bold", "Italic", "Underline"],
                    ["Image", "Table", "Source"],
                    ["cloudcms-image", "cloudcms-link"]
                ],
                "cloudcms-image": {
                    "imagePickerType": "file-picker",
                    "imageUploadPath": "/Images",
                    "imagePickerConfig": {
                        "initialContainerPath": "/Images"
                    },
                    "hideUploadButton": true
                },
                "cloudcms-link": {
                    "linkPickerType": "file-picker",
                    "linkPickerConfig": {
                        "initialContainerPath": "/"
                    }
                }
            }
        }
    }
}
The plugin will inject an img tag with the following attributes:
data-image-id: id of the embedded imagedata-image-title: title of the embedded imagedata-link-id: unique identifier of image linkdata-link-ref: reference to image nodesrc: relative path image is downloaded at
Cloud CMS Link Plugin
Plugin Name: cloudcms-link
This plugin will insert a link to a node from your current Cloud CMS branch into the editor. It provides a configurable modal screen with a picker for selecting the linked target node.
A configuration is optional. By default, the following configuration is used:
{
    "cloudcms-link": {
        "linkPickerType": "file-picker",
        "linkPickerConfig": {
            "initialContainerPath": "/"
        },
        "linkClass": "",
        "hideUploadButton": true
    }
}
The properties are these:
linkPickerType- the kind of picker (usually node-picker, file-picker) or one of the other picker types available within Cloud CMS.linkPickerConfig- the optional configuration for the picker (see each picker's respective documentation)linkClass- a space-separated list of CSS classes to apply to the generated A tag.hideUploadButton- determines either to hide the 'Upload...' button or not.
Custom CKEditor Plugins
Cloud CMS allows you to build your own plugins to extend CKEditor for your editorial teams.
To do this, you will need to build a custom UI module (see Extending the User Interface to get started). UI modules let you define custom CKEditor buttons and settings as well as custom pages, navigation items, actions, buttons and more.
The layout for your module will generally look like this:
/icons
    icon.png
/css
    style.css
index.js
plugin.js
Where index.js is an AMD module that simply registers the plugin. To achieve this, it can use the ckeditor-tools library that Cloud CMS provides out-of-the-box. You could do something like this:
define(function(require, exports, module) {

    var CKEditorTools = require("ckeditor-tools");

    CKEditorTools.registerPlugin("my-custom-ckeditor-plugin", {
        "filepath": "plugin.js",
        "module": module
    });

});
You can also optionally provide a globalConfig callback that you can use to configure the global CKEditor configuration. It could look something like this:
    CKEditorTools.registerPlugin("my-custom-ckeditor-plugin", {
        "filepath": "plugin.js",
        "module": module,
        "globalConfig": function(CKEDITOR) {
            CKEDITOR.config.customProperty = "custom value";
            CKEDITOR.config.basicEntities = false;
        }
    });
Finally, you have your plugin.js file. This file is written using CKEditor's API and so you'll need to dig into the CKEditor documentation to learn what to do. However, as a general idea, it might look a bit like this:
(function() {

    var CKEDITOR = window.CKEDITOR;

    var pluginName = "my-custom-ckeditor-plugin";

    CKEDITOR.plugins.add(pluginName, {
        icons: pluginName,
        init: function (editor) {

            // button
            editor.ui.addButton(pluginName, {
                label: 'My Awesome Plugin',
                command: pluginName,
                toolbar: 'cloudcms'
            });

            editor.addCommand(pluginName, {
                exec: function (editor) {

                    var pluginConfig = CKEDITOR.tools.get_plugin_config(pluginName, editor);

                    var htmlElement = CKEDITOR.dom.element.createFromHtml("<p>Hello World</p>");
                    editor.insertElement(iframeEl);
                }
            });
        }
    });

    CKEDITOR.on('instanceReady', function (ev) {
        var editor = ev.editor;
        var dataProcessor = editor.dataProcessor;
        var htmlFilter = dataProcessor && dataProcessor.htmlFilter;

        htmlFilter.addRules( {
            "elements": {
                "$": function( element ) {

                }
            }
        });
    });
})();
We recommend diving into and getting very familiar with the CKEditor Developer Guide to learn about all the really great ways you can trip out CKEditor.